In this second part of article, we will see how we can restore the complete VM from scratch using the full backup which we have took earlier.In my case, i don’t even having VM on vcenter server inventory.
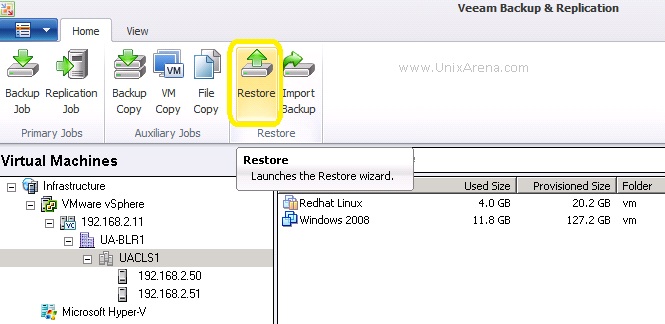
1.open the Veeam Backup and Replication.
2.Click on the restore to launch the wizard.
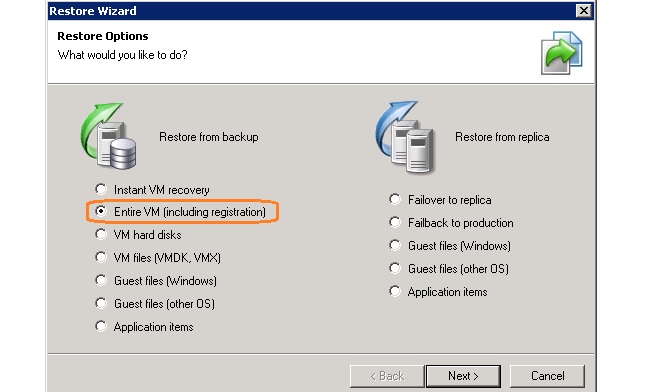
3.Select the Entire VM (including registration) option.
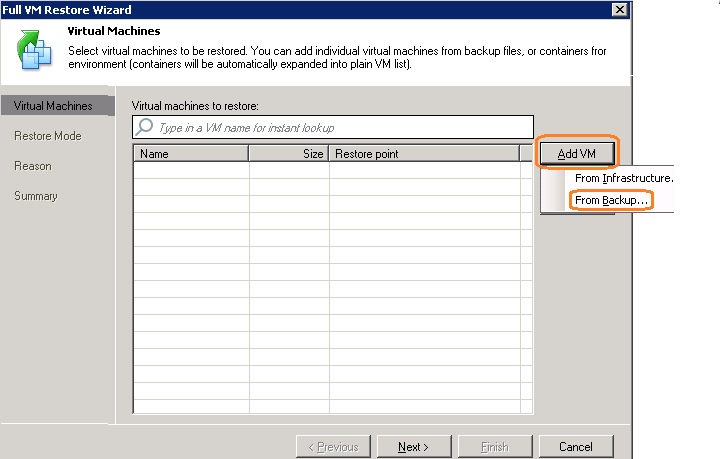
4.Select the VM from backup which needs to be restore.
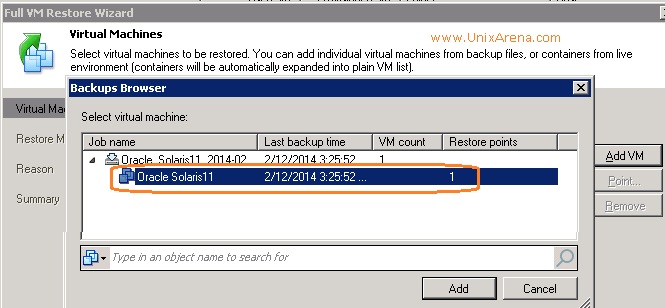
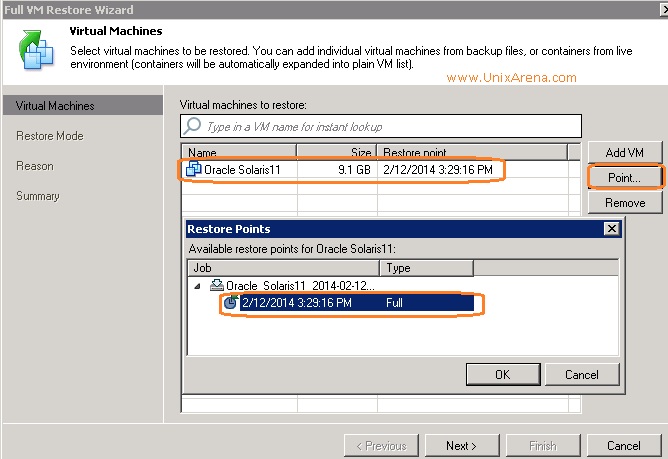
5.I had browse the backup repository and selected the VM backup file.
6.click on “point” to see what are the restore point you have for that VM.
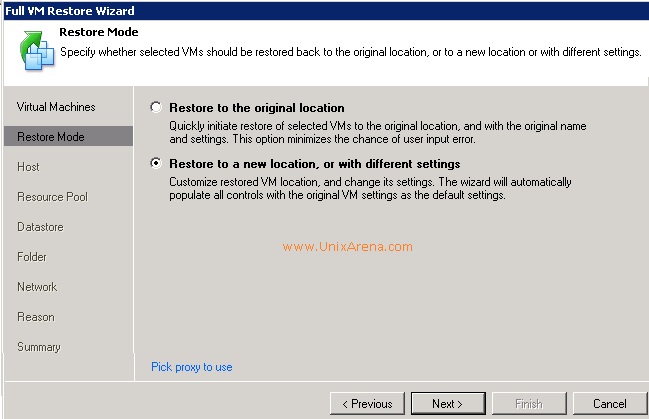
7.Select the new location to restore the VM. Sometimes original location may not be available.
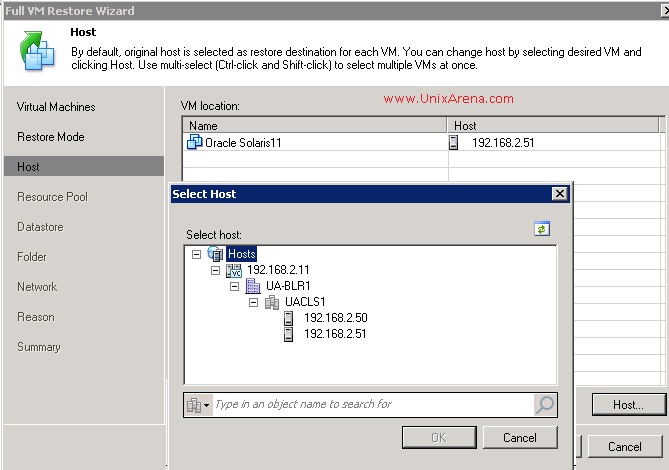
8.Select the VMware ESxi host where the VM guest needs to restore.
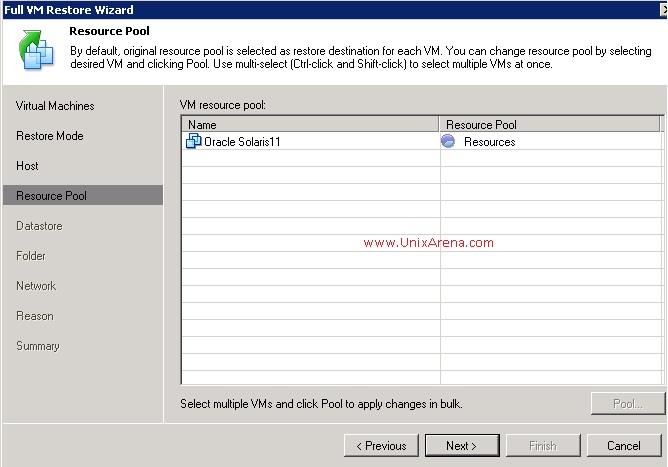
9.Select the resource pool for restore.
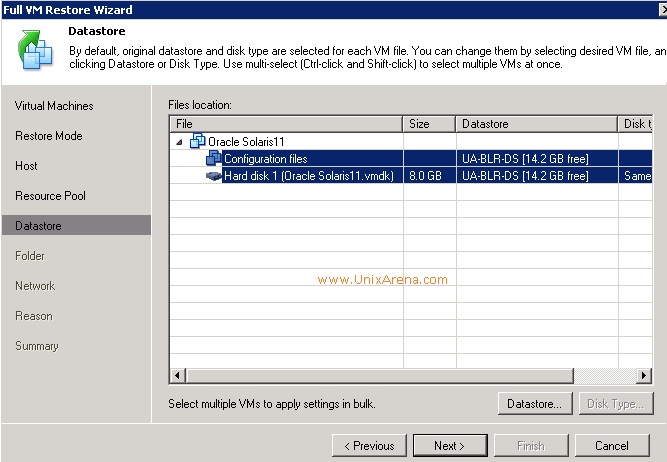
10.Select the datastore to restore.
11.You can also choose the folder where the VM needs to be created.

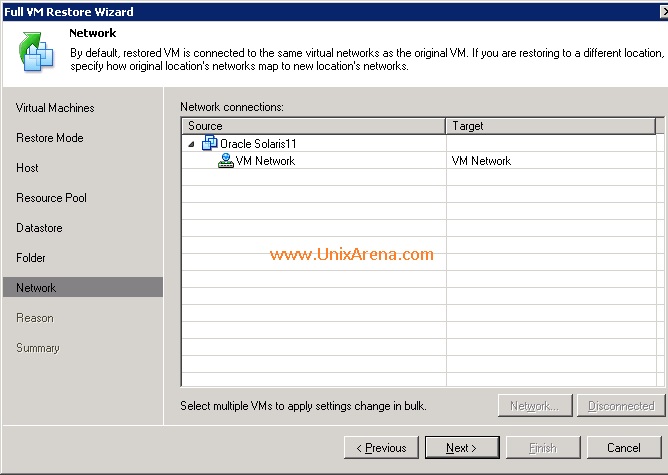
12.Select the Vm network for restore.
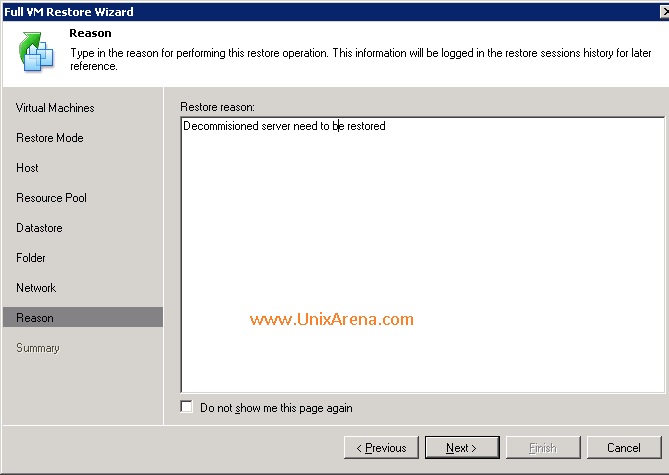
Enter the reason for restore of the VM.
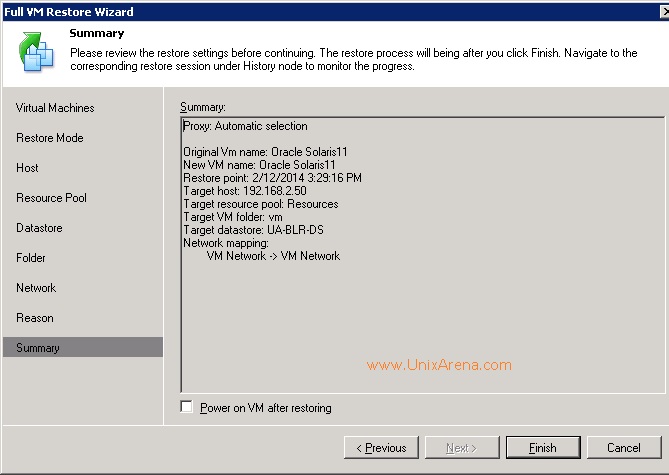
13.Here is the summary of the VM.
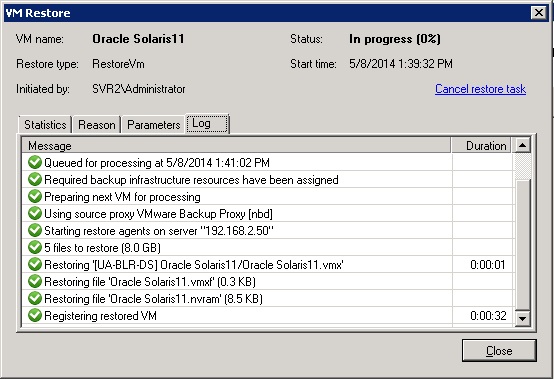
Here is the logs of the VM restore.
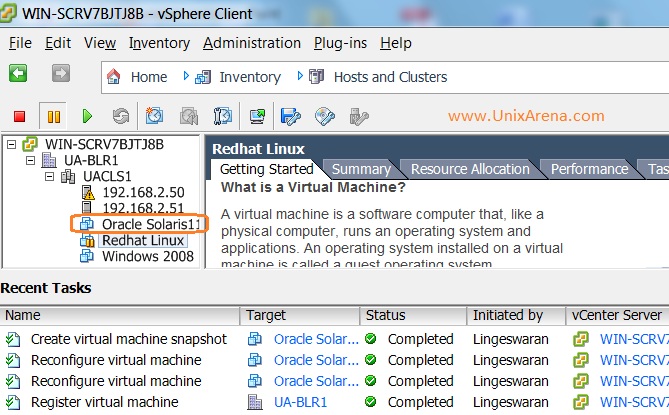
After the restore, You can see Oracle Solaris guest OS has been created.
Veeam is amazing backup software for virtualization environment. It has really helped us to restore the destroyed VM in quick time.
Hope this article will help of Veeam beginners to backup and restore the guest using veeam zip.
You can download a free trial Veeam Backup and replication7 from Veeam website.
Share it ! Comment it !! Be sociable !!!
Leave a Reply