We should not lose the superuser account on any operating system especially on VMware ESXi.There may be a chance of loosing root password due to system administrator careless or defective keyboard. If you forgot root password of ESXi host ,then there is no way to recover it .VMware does not provide utility or methods to recover the original root password of an ESX/ESXi host. If you try with some other method may lead to the host failure or unsupported configuration due to complex architecture of ESXi as per VMware KB. However i have reset the VMware ESXi root password using by booting from linux DVD. Before reinstalling ESXi , you can just try this method as a last option since you are nothing to lose.
VMware ESXi Version : 5.5
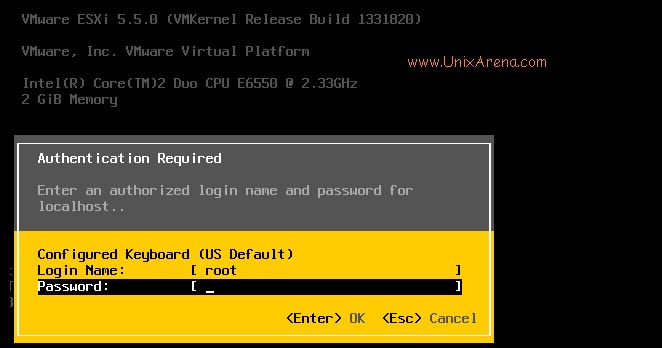
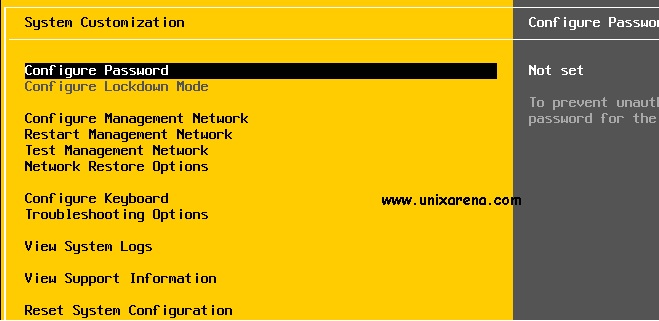
Here you can see , i am not able to login to ESXI host .

In a order to recover the root password, you need ubuntu Desktop operating system DVD.
1.Halt the VMware ESXi server from console (Hardware console whatever you have) since we can’t login to ESXi host to shutdown the server by pressing F12.
2.Boot the server from ubuntu Desktop DVD. Here i am using ubuntu Desktop 14.04 (Latest Version) since it will work as Live CD.
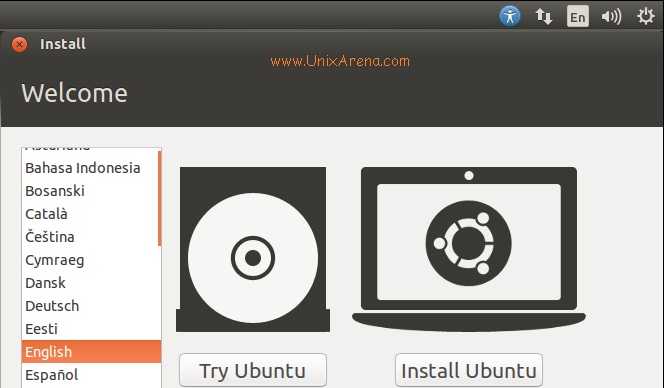
3. Once the Ubuntu is boot up , it will ask two option. You just select “Try Ubuntu”. We don’t want to install it .
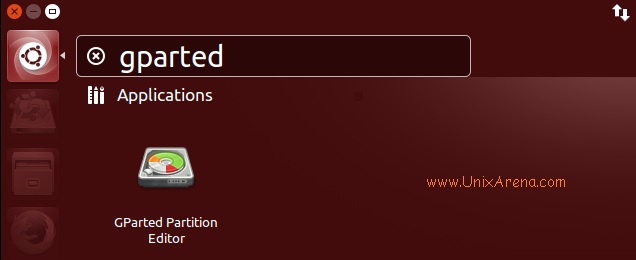
4.From the Ubuntu desktop, Click on the search icon and search for terminal .
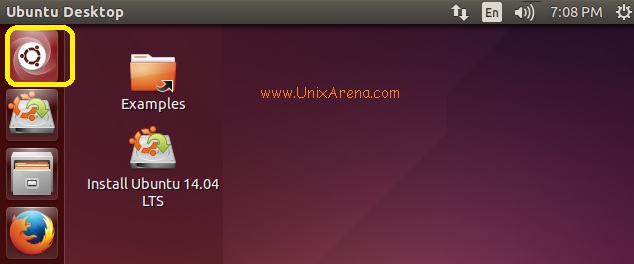
Here you go.Double click the terminal icon.
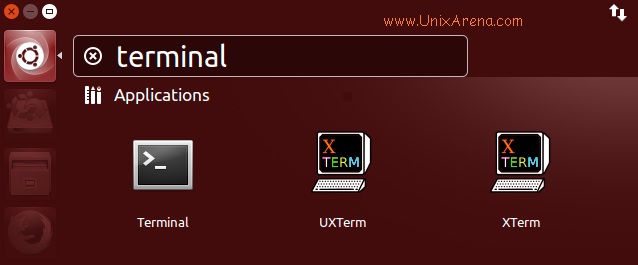
- Search for Terminal
5.In terminal , just gain root access by using sudo command.Use fdisk command to list the available disks.
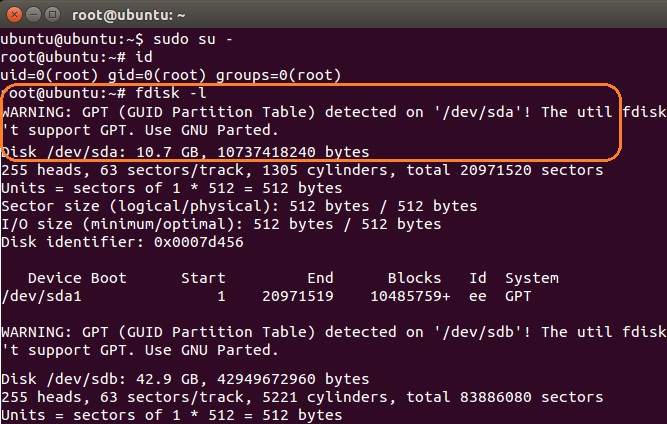
6.Normally /dev/sda will be the root disk of VMware ESxi . As per the above screenshot , sda is having GPT partition and its not supported in fdisk .Let me try from Gparted utility.
Gparted screen will something like below one.
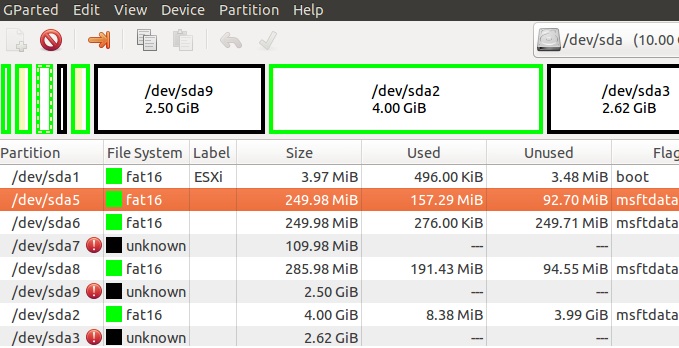
- Gparted – /dev/sda
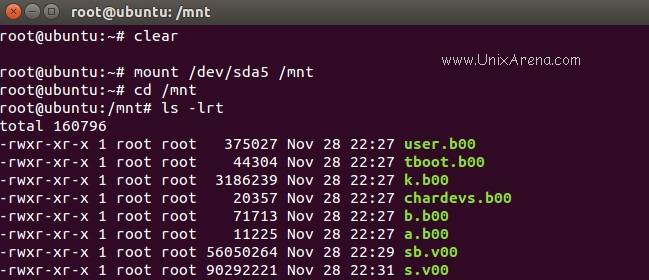
7.You need to mount /dev/sda5 to recover the VMware ESXi password. You need to identify in terms of size and flag.Once you have mounted , you can see files like the below screen shot.
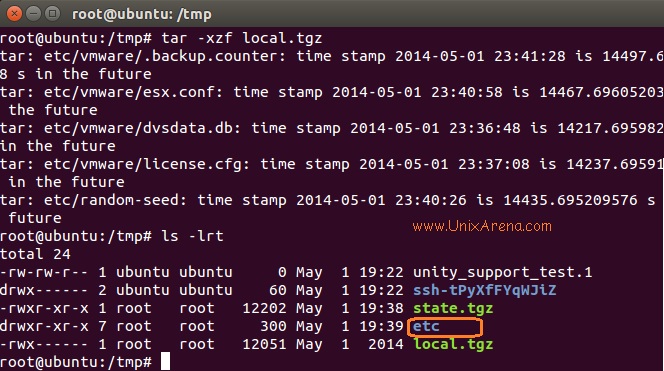
8.Copy the file “state.tgz” to /tmp . Then untar the state.tgz which will create file called local.tgz.
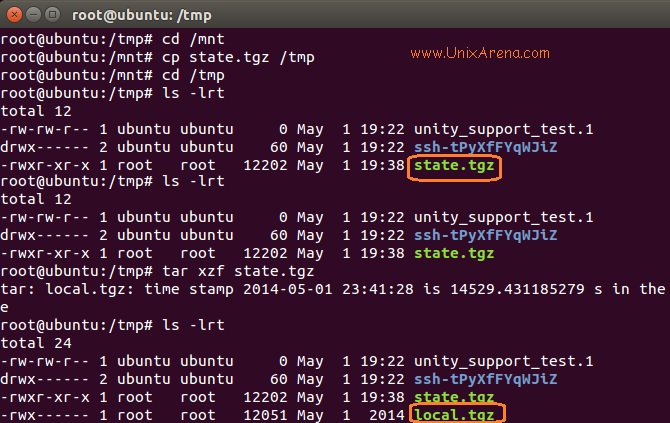
9.untar the local.tgz file and it will create a directory called “etc”.
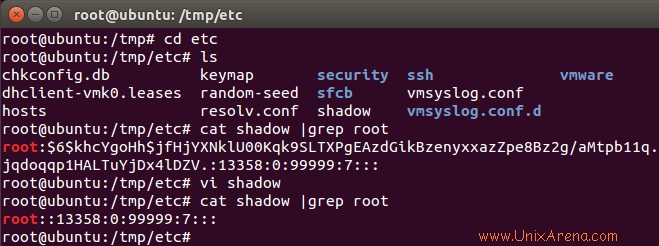
10.Go to the “etc” directory and edit the file called “shadow” using vi editor. You need to remove the strings between first colon to second colon.(which will be encrypted password).
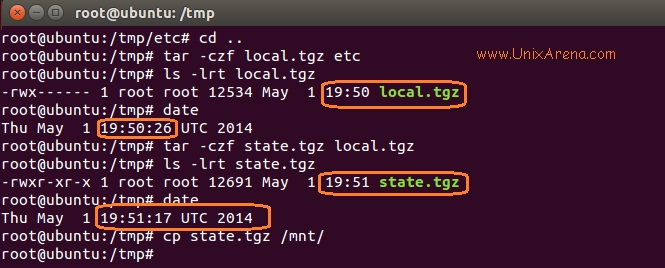
11.Here i am updating the “etc” to local.tgz and local.tgz to state.tgz. After updating the tar files , i am copying the updated state.tgz file to /mnt where we have mounted the VMware ESXi root.
12.Un mount the /mnt and reboot it . Please make sure that you need to remove the “ubuntu Desktop” DVD from the server.So that it can boot from local hard disk.

13.Once the VMware ESXi 5.5 is boot up , just login as root without password.
14.Please make sure that you are setting new root password and store it confidentially. Do not lose it again.
We have successfully reset/recover the root password of VMware ESXi 5.5 host.
Note: VMware is not responsible if you lose something after the root password reset by following above method. I didn’t face any issue after following this method .It may differs to other environment. 🙂
Check out below article’s as well
How to create ISCSI Datastore using ISCSI LUNS
VMware ESXi & vCenter License Keys
Configure VNC for VMware virtual Machine Console. (vCenter doesn’t require to access VM’s console)
Share it ! Comment it !! Be Sociable !!!
Roger P. says
Still works like a charm on an old 5.5 ESXi Dell server using the now old ubuntu 14.04 live iso!
Thanks!
Adam says
Does anyone know if it’s possible to also turn off lockdown mode and enable DCUI if they are both in place? Had an issue recently where a number of ESXi hosts lost their ‘trust’ with vcenter over a certificate issue. The ESXi hosts had ssh disabled,dcui disabled and lockdown mode enabled so there was no way to ‘reconnect’ them to the vcenter. If I could enable dcui i could console in and turn of lockdown etc. and add them back to the vcenter. Can you modify lockdown and dcui setting by modify some system files within the ESXi host ?
thanks
Ad
zati says
Works like a charm!
Thanks a lot.
Md. Moktar Hossain says
it’s a good for my helping.
Joko Fani Andrianto says
Hi all,
I have problem with my esxi 6.0 runiing on hpe proliant dl380 g9,
after I finish installation I cannot login with my password.
I try to reinstall but still same.
Who can help me?
CP says
I am having the same issue… I cannot figure out what it can be. Were you able to resolve the issue?
Adrian - Zambia says
Great work on this guide. Managed to access my inherited esxi 4. Thanks a lot.
Yanis Sauve says
Hello everyone.
I have two ESXi 5.1 hosts that I don’t have the root password anymore. I found this procedure, but am wary of using it before asking a few questions:
1 – I understand that the author used a test system without any VMs on it. I’d like to know if commenters used this procedure on production machines successfully?
2 – The fact that this is not supported by VMWare tells me that the root password is used somewhere else to secure some elements, like NFS shares, datastores, whatnot… Anybody has any information about this?
My machine is pretty much monolithic, that is, datastores are on local disks, hypervisor is also on local disks. But before I go and clear the root password, I’d like to make sure I’m not breaking anything important.
Thanks for your input.
amtech says
Hi Yanis,
I can only answer question 1, but I certainly used this on a production system and have yet to see any adverse affects to it.
Regards,
amtech says
As a rank amateur I was able to complete this on a Cisco UCS C240.
I used bootable USB stick with Ubuntu on it. I did note that persistent USB didn’t show all the partitions.
Thanks! The disgruntled vendor didn’t win this time.
fwedaster says
And I did it with rescueCD 🙂
fwedaster says
It works great 🙂 You saved my life man.
=> to Johnm : it is sdd5
mahan says
is it same in 5.1?
Lingeswaran R says
It should work.
johnm says
Would someone be able to help explain how i determine which disk has the VMware on it?
there are two devices visible in gparted, dev/sda (3.76gB) and dev/sdd (930gB)
if i select sdd i see:
sdd4 (fat16)(label hypervisor0) – 3.98mb
sdd1(extended) – 896mb
>sdd5(fat16)(hypervisor1) – 249.98mb
>sdd6(fat16)(hypervisor2) – 249.98mb
>sdd7(unknown) – 109.98mb
>sdd8(fat16)(hypervisor3) – 285.98mb
sdd2(fat16) – 4gb
sdd3(unknown) – 925gb
i wasn’t sure in the article above why sda5 was the disk to mount? Any help would be much appreciated.
rtfmp says
I guess install disk would different from environment but the the partition layout would remain the same. In my case, the host I had to reset the password was installed on SD card, I can immediately tell which one it is by the size. That same disk has a similar partition layout similar to sda in this post. So it was a no-brainer.
johnm says
Would someone be able to help explain how i determine which disk has the VMware on it?
there are two devices visible in gparted, dev/sda (3.76gB) and dev/sdd (930gB)
if i select sdd i see:
sdd4 (fat16)(label hypervisor0) – 3.98mb
sdd1(extended) – 896mb
>sdd5(fat16)(hypervisor1) – 249.98mb
>sdd6(fat16)(hypervisor2) – 249.98mb
>sdd7(unknown) – 109.98mb
>sdd8(fat16)(hypervisor3) – 285.98mb
sdd2(fat16) – 4gb
sdd3(unknown) – 925gb
i wasn’t sure in the article above why sda5 was the disk to mount? Any hel pwoul dbe much appreciated.
Dennis says
Thanks a million!
This was easy to follow and allowed me to brush up on my long-lost Linux commands. 😉
We had a power blip in our server room that somehow corrupted the passwords for our VMware ESXi servers and Sophos firewall.
I needed to get in to VMware to get the servers going again because the flipping stupid default “Leave Virtual Machines Shut Down when Power Is Interrupted” was still set.
pipe says
Execellent, it works.
Dinesh says
Thanks a lot….it is working for Esxi 6.0 also
Des says
How do you do this under 6?
VT says
You saved my life!!! Thanks!!!
ESXi 5.5.0, 1623387 on IBM BladeCenter HS22
VT
Triston says
Thanks a lot! I was able to get into an ESXi 4.0 host
Tiago Oliveira says
Thanks a lot! Worked like a charm.
D says
Thanks alot! Esxi 5.5
-x
lastwraith says
Great walk-through. This helped me get into an inherited ESXi 5.0.0 host that no one knew anything about!
Thank you for all of your work. The screenshots are fantastic.
-K
ali khan says
thanks..it works.
Chris Wittor says
Thank you very much. This was very helpful! 🙂
Jiri Jares says
Thank You very much ! It works :-))))
Guilherme says
Ty!
To work on ESXi5.5 i have to create a new password using passwd inside Ubunto and then replace it on copied shadow file from both SDA5 and SDA6.