In VMware ESXi 5.5 ,you can use VNC client to connect virtual hardware console for Solaris,Linux and windows guest operating systems by enabling VNC server. So that you can take the virtual machine consoles using any VNC viewer and no need to login to VSphere Client for any guest OS consoles .This is really good for VMware administrators that no need to provide the VCenter console access to windows and Unix/Linux administrators.Here we will see how we can enable VNC console for each virtual guests and how to access it using VNC-Viewer.
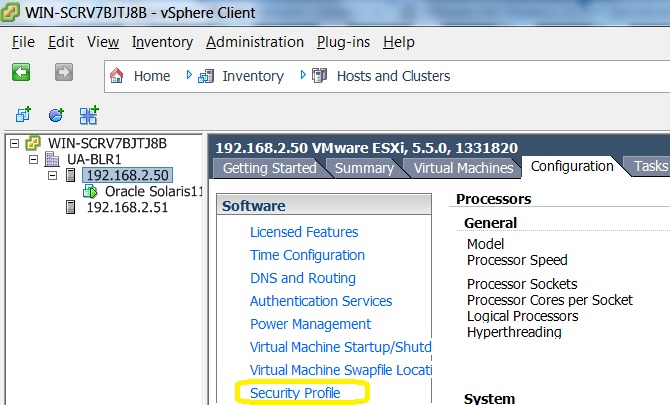
1. Login to Vpshere Client and Click on the ESXi server in which you want to enable the VNC Server.Click on the Configuration tab and navigate it to security profile.
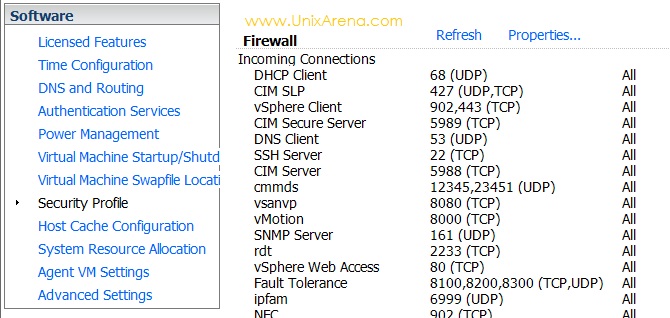
2.Navigate it to firewall and click on the properties link on the right top.
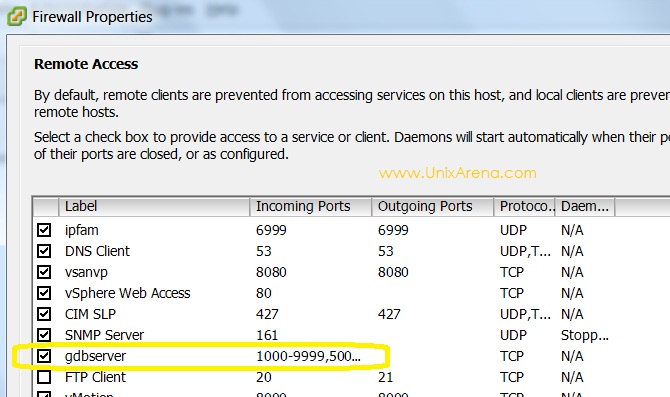
3.Select the gdbserver check box and click OK .
4.Halt the virtual machine for which you want configure the VNC virtual hardware console.
5. Login to ESXi server using ssh and navigate to the virtual machine location.
6.Here my guest Operating system is oracle Solaris 11 and its running on datastore UnixArenaDS1.
~ # df -h
Filesystem   Size   Used Available Use% Mounted on
VMFS-5      19.5G  10.6G      8.9G  55% /vmfs/volumes/UnixArenaDS1
vfat         4.0G  12.6M      4.0G   0% /vmfs/volumes/52ed901d-f74d0823-ab2c-000c29ccd561
vfat       249.7M 157.0M     92.7M  63% /vmfs/volumes/9f070673-e22fd28c-9db6-160d51616026
vfat       249.7M   8.0K    249.7M   0% /vmfs/volumes/03a2fa7c-fb1f691c-3c2b-0d6f295e5ef5
vfat       285.8M 191.3M     94.6M  67% /vmfs/volumes/52ed9016-2314ed74-b487-000c29ccd561
~ # cd /vmfs/volumes/UnixArenaDS1
/vmfs/volumes/52ef11f6-2f9eb043-4675-000c29ccd561 # ls -lrt
total 16
drwxr-xr-x    1 root     root           420 Feb  3 06:23 ISO
drwxr-xr-x    1 root     root          3780 Feb  3 09:00 Oracle Solaris11
/vmfs/volumes/52ef11f6-2f9eb043-4675-000c29ccd561 # cd Oracle\ Solaris11/
/vmfs/volumes/52ef11f6-2f9eb043-4675-000c29ccd561/Oracle Solaris11 #
7.List the *.vmx files under oracle Solaris 11 and edit “Oracle Solaris11.vmx” file. By default it will be your guest hostname.vmx.
/vmfs/volumes/52ef11f6-2f9eb043-4675-000c29ccd561/Oracle Solaris11 # ls -lrt |grep *.vmx
-rw-r--r--    1 root     root           271 Feb  3 04:24 Oracle Solaris11.vmxf
-rwxr-xr-x    1 root     root          2901 Feb  3 09:00 Oracle Solaris11.vmx
/vmfs/volumes/52ef11f6-2f9eb043-4675-000c29ccd561/Oracle Solaris11 #
8.Add the below lines to “Oracle Solaris11.vmx” file. “vnc.port” should be unique across all the virtual guests.The last two digits may vary from 00 to 99. (Ex:5900 to 5999). You can give your own password on “vnc.password” .
RemoteDisplay.vnc.enabled = "TRUE"
RemoteDisplay.vnc.port = "5901"
RemoteDisplay.vnc.password = "unix@123"
[box type=”warning”]
- You have to halt the virtual machine to edit the configuration file. If you edit the configuration file while its running ,then the added lines will be disappear because the cache file will overwrite the original file
[/box]
9.The .vmx file should be something like this.
/vmfs/volumes/52ef11f6-2f9eb043-4675-000c29ccd561/Oracle Solaris11 # tail  Oracle\ Solaris11.vmx
cleanShutdown = "FALSE"
softPowerOff = "FALSE"
tools.remindInstall = "TRUE"
ide1:0.clientDevice = "TRUE"
ctkEnabled = "TRUE"
scsi0:0.ctkEnabled = "TRUE"
RemoteDisplay.vnc.enabled = "TRUE"
RemoteDisplay.vnc.port = "5901"
RemoteDisplay.vnc.password = "unix@123"
/vmfs/volumes/52ef11f6-2f9eb043-4675-000c29ccd561/Oracle Solaris11 #
[box type=”success”]
- If you want to configure the VNC virtual hardware console for second virtual guest,then you need to vnc.port = “5902”.You can’t use the same port number for more than one hosts.
[/box]
10.Power on the virtual machine from vsphere client.
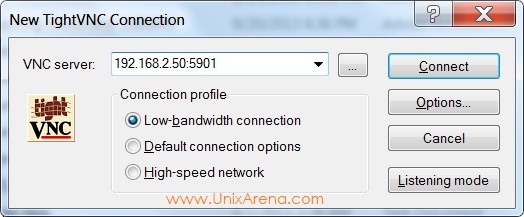
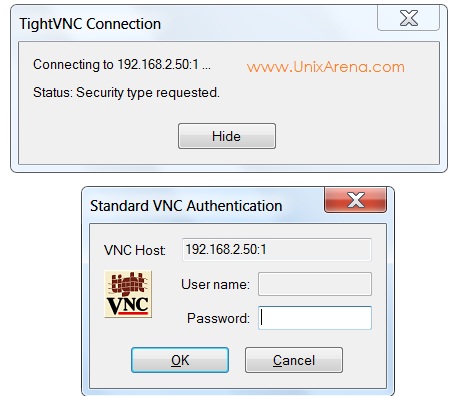
11.Download Tightvnc and open it in your laptop/desktop.Enter the ESXi server IP address and virtual machine port number and click on connect.
12.You need to provide the VNC password which you have given in step 9.
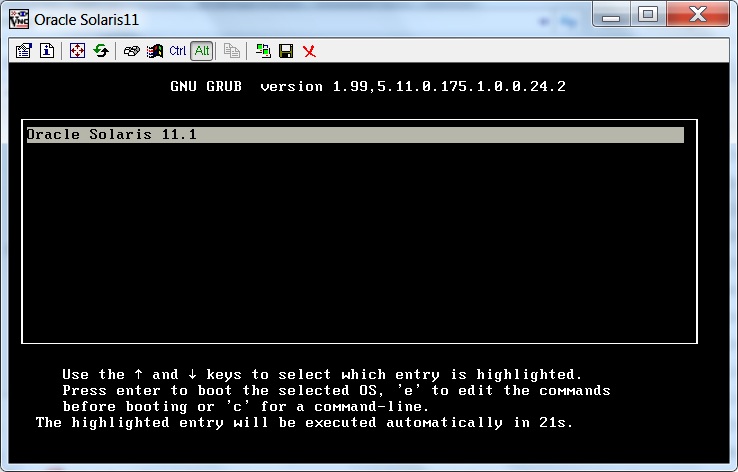
13.You will get the virtual hardware console like the below one. From this screen ,you can also reboot the virtual machine .
Hope this article will help you to setup the VNC consoles for virtual guest on VMware ESXi.
Thank you for visiting UnixArena.
akemando says
Hey dude it is a quite useful tutorial!!!… Muchas gracias!!
Spock says
Very informative article! I did not know you could connect to a VMs console via VNC.