


AWS Cloud platform offers various methods to connect with cloud services. AWS console is very familiar to all since its web-based. But web-console alone can’t fulfill the customer needs. In development, we might be accessing the cloud services very frequently and the command-line interface will be very quick and provide efficient outputs. Cloud service offering requires a lot of customizing in an order to make them useable for real-world use-cases and awsCLI really helps to accelerate the automation for provisioning, managing, and controlling the cloud resources. All programmatic access to your AWS resources takes place via an API call, and all API calls must be signed for authentication and authorization.
The AWS CLI v2 offers several new features including improved installers, new configuration options such as AWS Single Sign-On (SSO), and various interactive features. Note that there will be slight differences between AWS CLI versions. Some of the options might not be available with older versions.
Prerequisites of AWS CLI:
- Python 2 version 2.6.5+ or Python 3 version 3.3+
- Windows, Linux, macOS, or Unix Operating System
Install awscli on Linux:
1. Download the awscli binary package from AWS.
$ curl "https://awscli.amazonaws.com/awscli-exe-linux-x86_64.zip" -o "awscliv2.zip"


lingesh@unixarena:~$ curl "https://awscli.amazonaws.com/awscli-exe-linux-x86_64.zip" -o "awscliv2.zip"
  % Total    % Received % Xferd  Average Speed   Time    Time     Time  Current
                                 Dload  Upload   Total   Spent    Left  Speed
100 43.5M  100 43.5M    0     0  3012k      0  0:00:14  0:00:14 --:--:-- 1877k
lingesh@unixarena:~$
2. unzip the awscli package.
lingesh@unixarena:~$ unzip awscliv2.zip
Archive:  awscliv2.zip
   creating: aws/
   creating: aws/dist/
  inflating: aws/install
  inflating: aws/THIRD_PARTY_LICENSES
  inflating: aws/README.md
   creating: aws/dist/_struct/
   creating: aws/dist/awscli/
   creating: aws/dist/cryptography/
   creating: aws/dist/cryptography-3.3.2-py3.8.egg-info/
   creating: aws/dist/docutils/
   creating: aws/dist/include/
   creating: aws/dist/lib/
   creating: aws/dist/zlib/
  inflating: aws/dist/_decimal.cpython-38-x86_64-linux-gnu.so
  inflating: aws/dist/termios.cpython-38-x86_64-linux-gnu.so
  inflating: aws/dist/_contextvars.cpython-38-x86_64-linux-gnu.so
  inflating: aws/dist/libbz2.so.1
  inflating: aws/dist/grp.cpython-38-x86_64-linux-gnu.so
  inflating: aws/dist/_ruamel_yaml.cpython-38-x86_64-linux-gnu.so
  inflating: aws/dist/_lzma.cpython-38-x86_64-linux-gnu.so
  inflating: aws/dist/_posixsubprocess.cpython-38-x86_64-linux-gnu.so
  inflating: aws/dist/_socket.cpython-38-x86_64-linux-gnu.so
  inflating: aws/dist/_hashlib.cpython-38-x86_64-linux-gnu.so
  inflating: aws/dist/_sha512.cpython-38-x86_64-linux-gnu.so
  inflating: aws/dist/_ssl.cpython-38-x86_64-linux-gnu.so
  inflating: aws/dist/_asyncio.cpython-38-x86_64-linux-gnu.so
  inflating: aws/dist/select.cpython-38-x86_64-linux-gnu.so
  inflating: aws/dist/libz.so.1
3. Navigate to the extracted directory and list the files.
lingesh@unixarena:~$ cd aws/
lingesh@unixarena:~/aws$ ls -lrt
total 80
-rw-r--r--  1 lingesh lingesh 68279 Feb  3 22:31 THIRD_PARTY_LICENSES
-rw-r--r--  1 lingesh lingesh  1465 Feb  3 22:31 README.md
-rwxr-xr-x  1 lingesh lingesh  4047 Feb  3 22:31 install
drwxr-xr-x 10 lingesh lingesh  4096 Feb  8 17:01 dist
lingesh@unixarena:~/aws$
4. Install the awscli by invoking the “install” script.
lingesh@unixarena:~/aws$ sudo ./install
[sudo] password for lingesh:
You can now run: /usr/local/bin/aws --version
lingesh@unixarena:~/aws$
5. Check the installed awscli version.
lingesh@unixarena:~/aws$  /usr/local/bin/aws --version
aws-cli/2.4.16 Python/3.8.8 Linux/5.4.0-96-generic exe/x86_64.ubuntu.20 prompt/off
lingesh@unixarena:~/aws$
We have successfully installed awscli on Linux. Let’s explore how to authenticate AWS using awscli.
Configure awscli on Linux
In an order to authenticate, you need to create AWS access keys. Check out this article to create the AWS access keys.
Once you have the access keys, You can configure awscli using the following commands.
lingesh@unixarena:~/aws$ aws configure
AWS Access Key ID [****************SWEG]: xxxxxxxxxxxxxxxxxxxxx
AWS Secret Access Key [****************pkxs]: xxxxxxxxxxxxxxxxxxxxxxx
Default region name [us-east-2]:
The above command creates the following file in your home directory. You can also manually create the following file using the AWS access ID and secret keys.
lingesh@unixarena:~$ ls -lrt ~/.aws/credentials
-rw------- 1 lingesh lingesh 116 Jan  7 18:11 /home/lingesh/.aws/credentials
lingesh@unixarena:~$
Here is the file content.
lingesh@unixarena:~$ cat  ~/.aws/credentials
[default]
aws_access_key_id = XXXXXXXXXXXXXXXXX
aws_secret_access_key = XXXXXXXXxxxxxxxxxxxxXXXXXXXXXXxxxxxx
lingesh@unixarena:~$
Let’s test the awscli. List all the buckets from my AWS account.
lingesh@unixarena:~$ aws s3 ls
2022-02-03 17:05:54 aws-cloudtrail-logs-476227053747-bf8c2698
2022-02-03 16:51:06 useast1bucketlingesh
lingesh@unixarena:~$
We have successfully configured awscli on Linux.
Install and Configure awscli on Windows:
Installing awscli on windows is pretty straightforward. Just download the Windows MSI installer package from AWS and just run through the wizards. Note: AWS supports the AWS CLI on Microsoft-supported versions of 64-bit Windows. You need admin rights to install the software.
1. Download and execute the AWS CLI MSI installer for Windows (64-bit).
2. Alternatively, you can run the “msiexec” command to run the MSI installer. Open the command prompt and run the following command.
-> msiexec.exe /i https://awscli.amazonaws.com/AWSCLIV2.msi

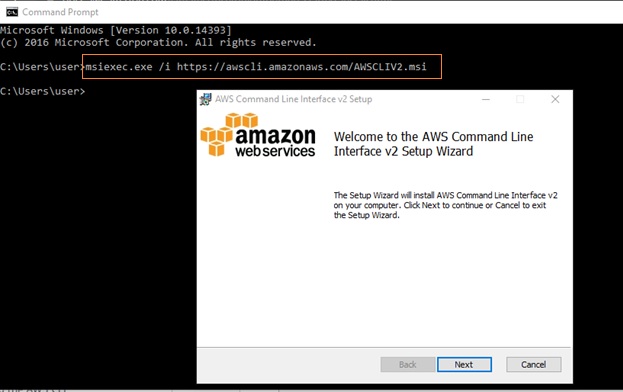
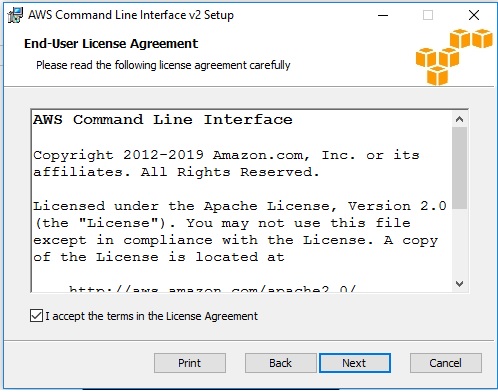
3. Agree to the EUS to continue.

4. If you wish to modify the installation path, you can change it here.

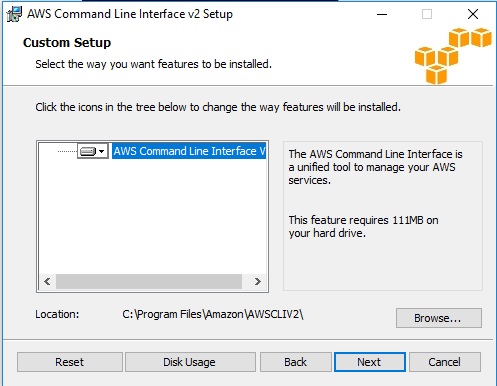
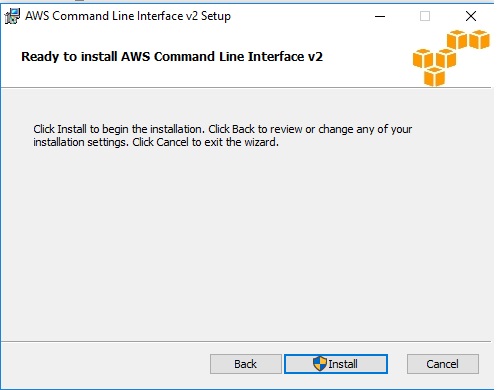
5. Click “Install” to begin the installation.

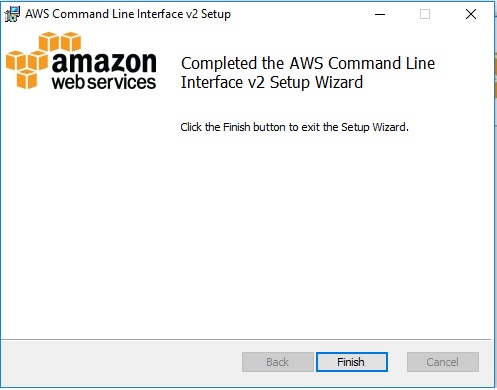
6. Click “Finish” to complete the awscli installation.
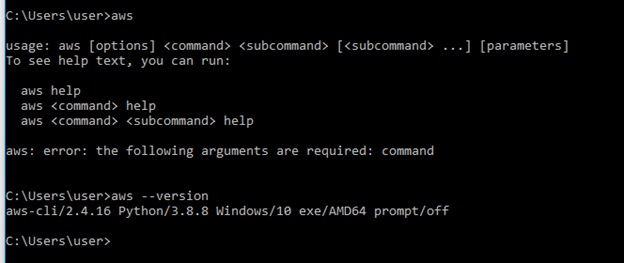
7. Let’s test the awscli command.

In case, if you can’t find the “aws” command, use the following command to find the “aws” executable.
C:\Users\lingesh> where /R c:\ aws
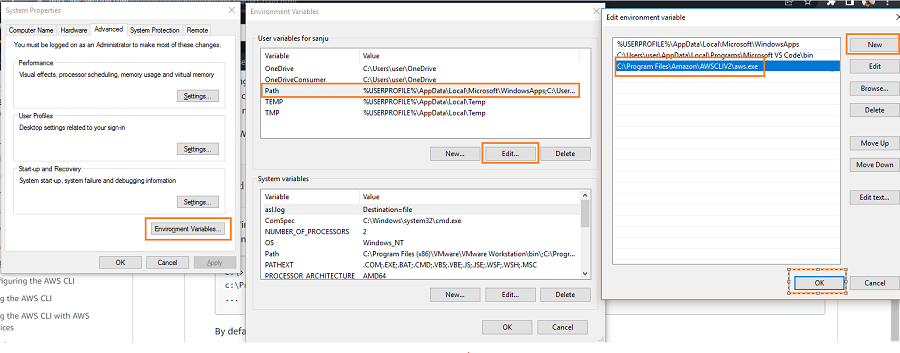
C:\Program Files\Amazon\AWSCLIV2\aws.exeYou might need to set the environment variables if your command prompt is not able to find the “aws” command. Open the environment variables using the following command.
rundll32.exe sysdm.cpl,EditEnvironmentVariablesChoose Edit environment variables for your account. Choose PATH, and then choose NEW to add the exact path of AWS.

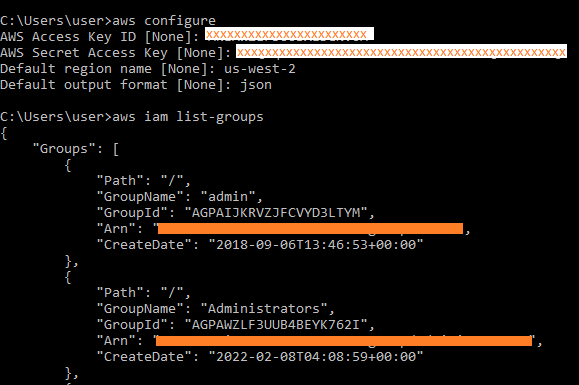
Configure awscli on Windows
Once you have the AWS access ID and secret keys, it’s identical to Linux awscli configuration. Use the “aws configure” command to complete the configuration.

Hope this article is informative to you.