


How to enable Azure native backup for Linux and Windows instances in Azure? To enable the Azure native backup, you need to set up a recovery service vault. Recovery service vault is an online-storage entity in Azure that’s used to hold data, such as backup copies, recovery points, and backup policies. It supports both Local-redundant storage(LRD) and Geo-redundant storage (GRS).
Note: Azure native backup requires VM agent to be installed on the servers. This enables backup extension can communicate with azure backup services.
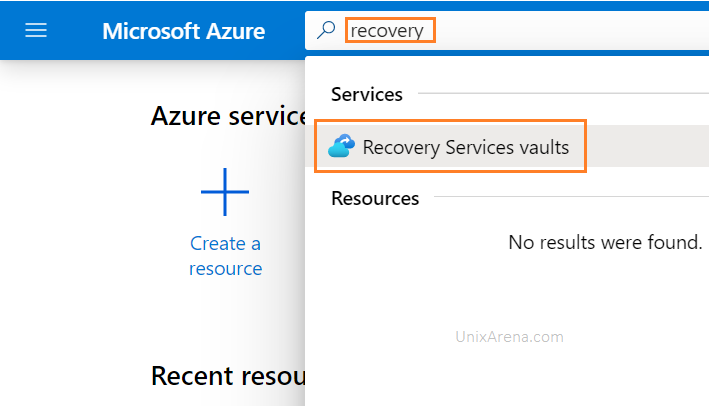
Create recovery Service vault
1. Login to azure portal.
2. Navigate to recovery service vault page.

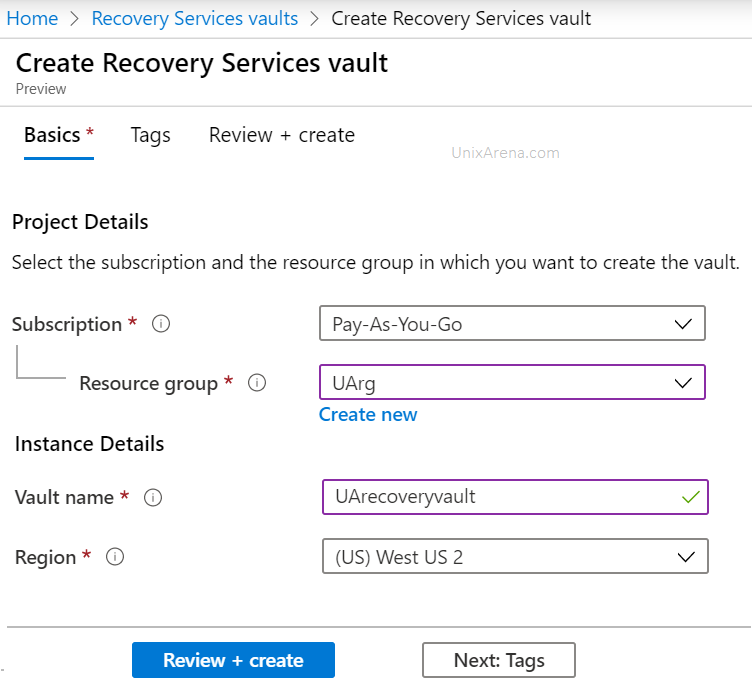
3. Create a new recovery service vault.


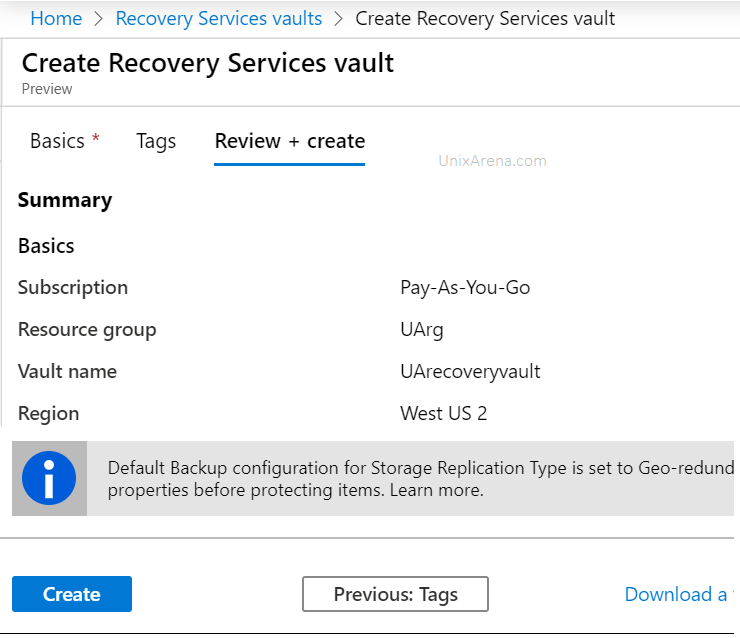
4. Select the subscription and resource group. Enter the vault name and select the region.

5. Click on create .

Configure azure backup policy
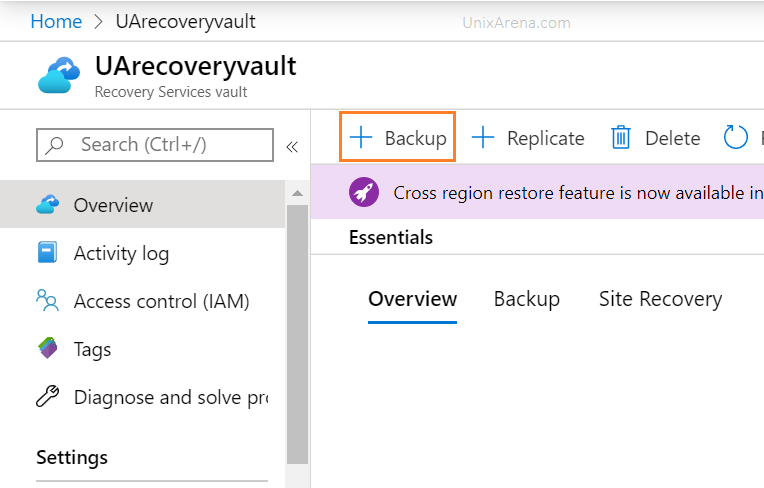
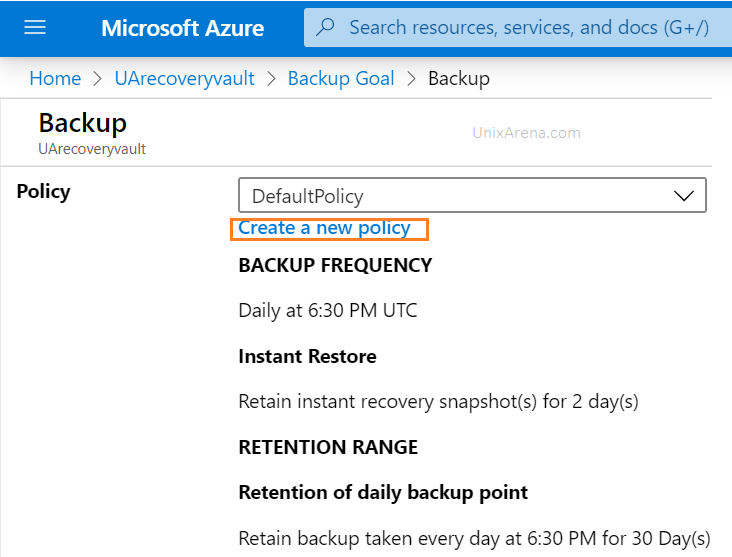
1. Click on newly created recovery service vault and click on backup

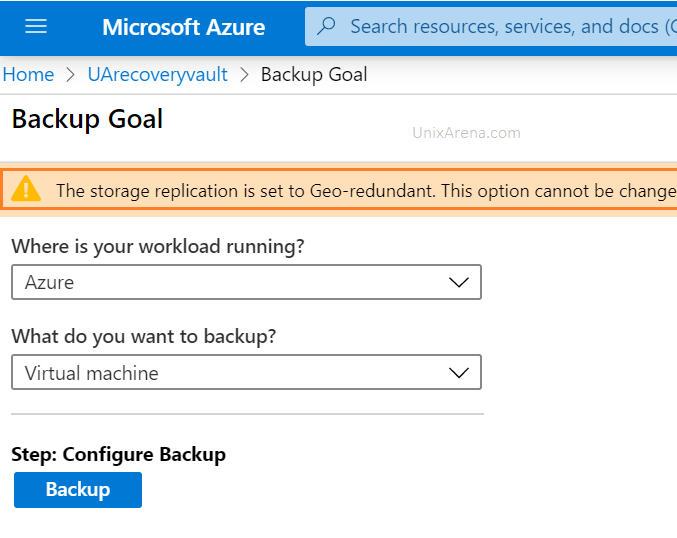
2. Select the workload type. Click on highlighted link to choose between geo-redundant vs local redundant.

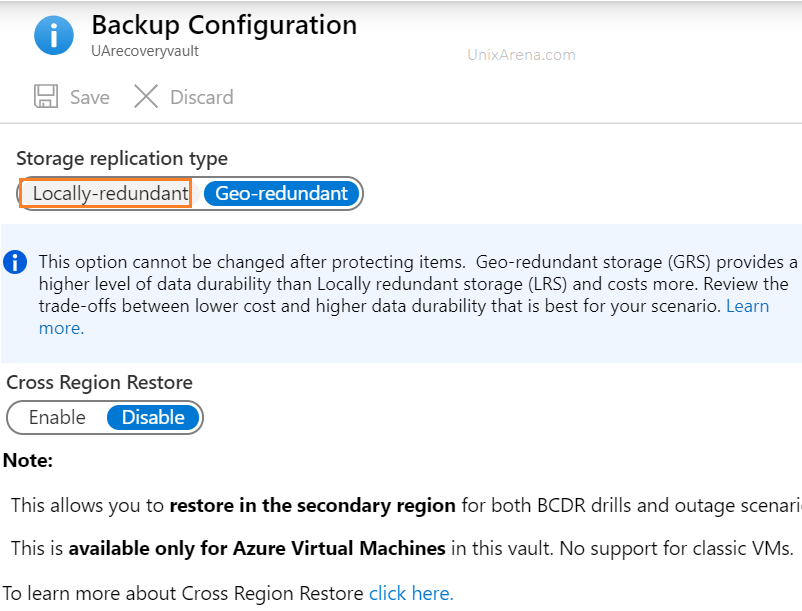
3. Based on your requirement, you choose the type of data redundancy. Since my workload is not so critical, i am choosing local redundant.

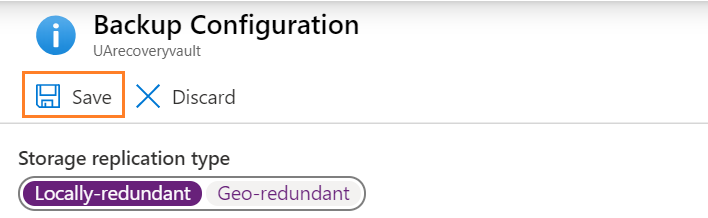
4. Save the configuration. Click on Backup to configure the policy.

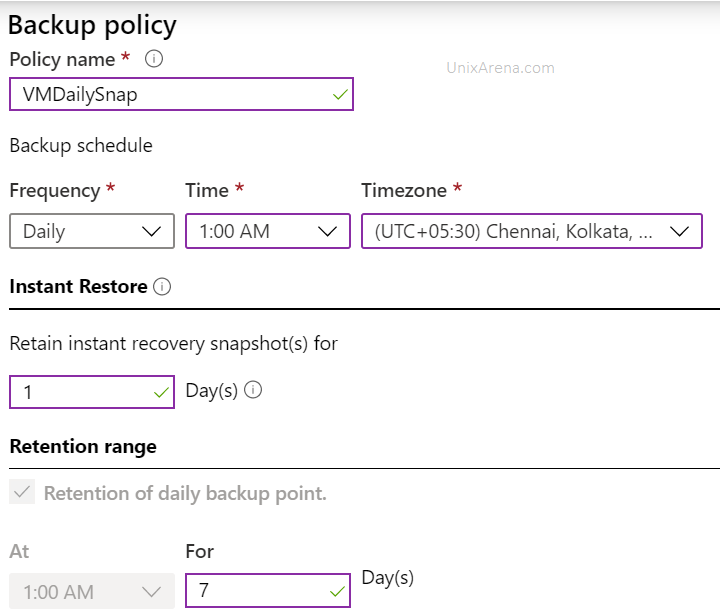
5. Create a custom policy according to you need.

6. Enter the policy name and select the frequency, retention period for daily.

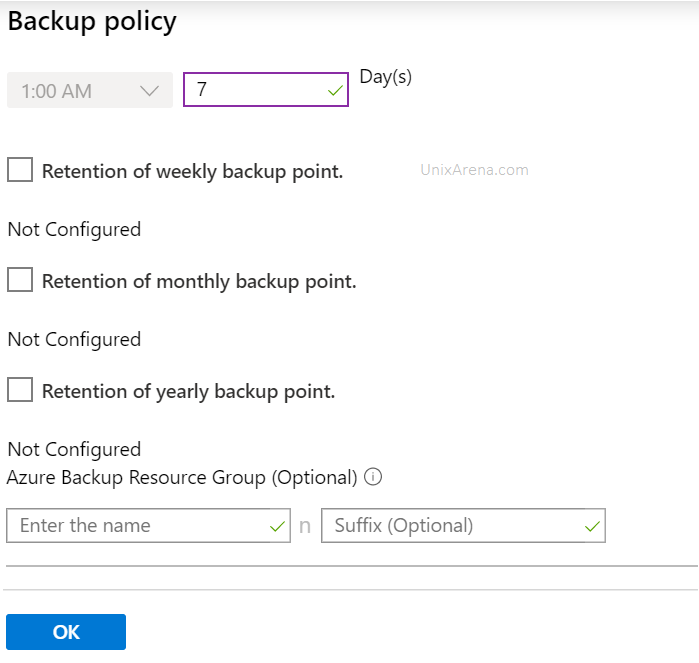
7. You have option to configure weekly, monthly and yearly retention as well. Click “OK” to create the policy.

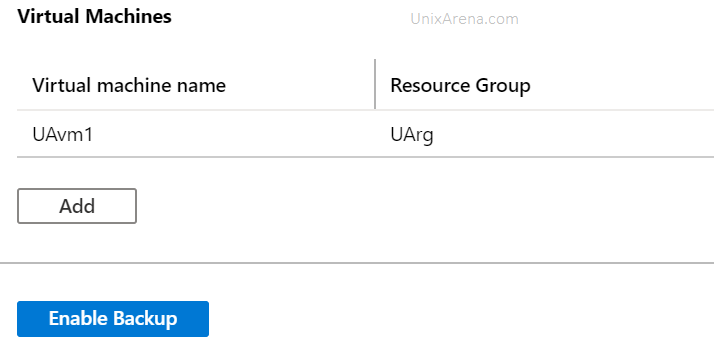
8. Add a Linux/Windows virtual machine to enable to newly configured backup.

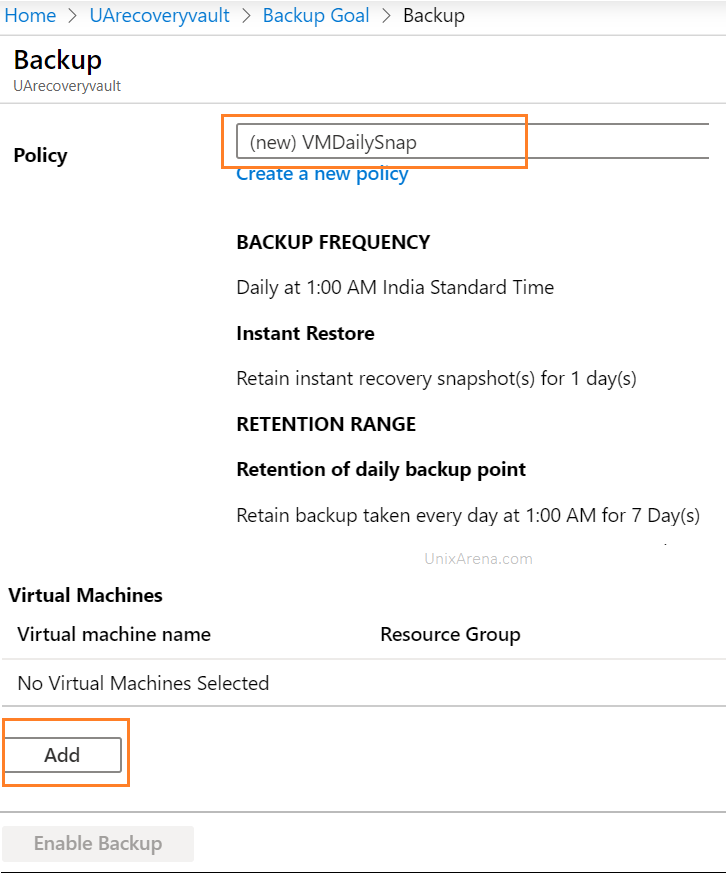
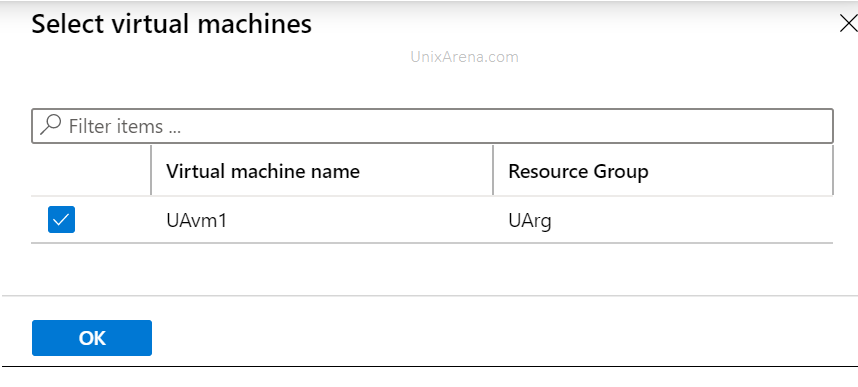
9. Select the virtual machine.

11. Click on “Enable Bakcup”

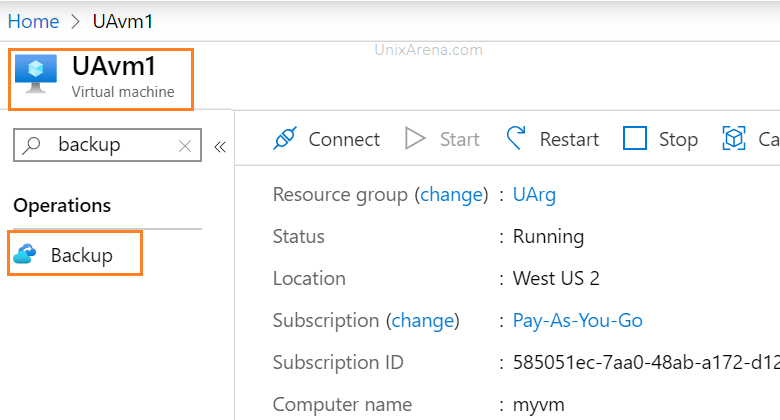
12. You can also enable backup from VM’s backup section.

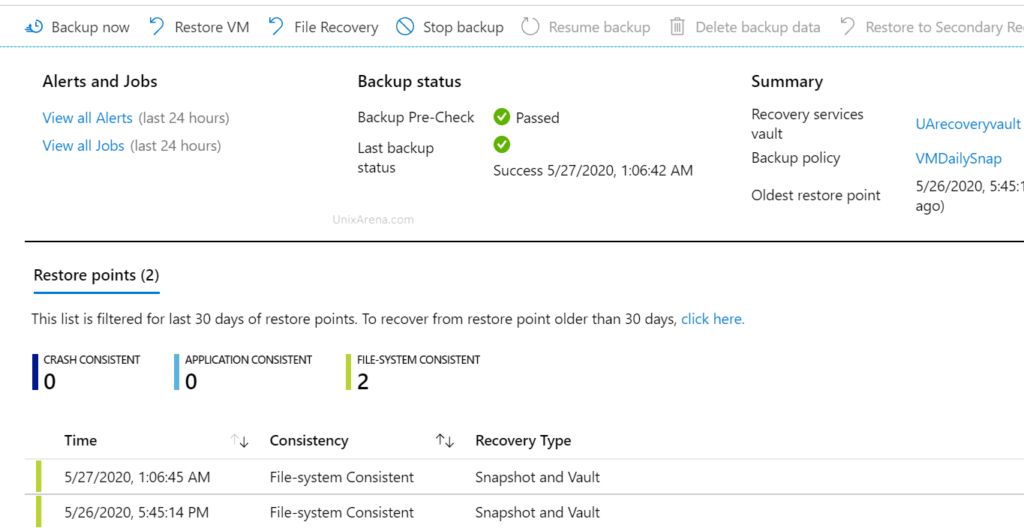
Validate the azure backup
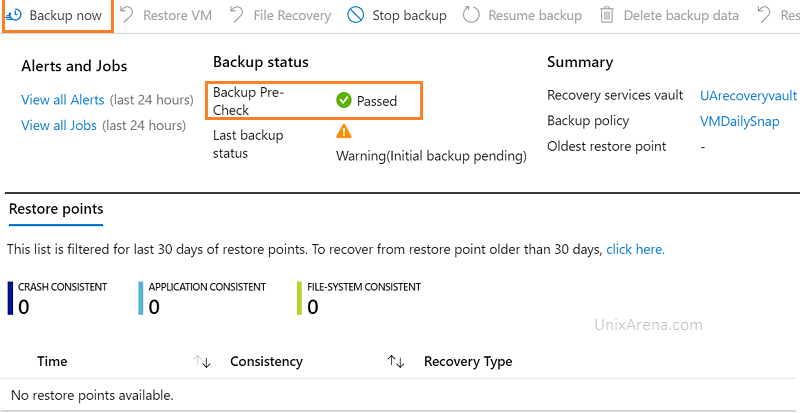
1. Navigate to backup items or VM which we had selected to take backup.
2. You could see the message that backup’s pre-check might passed in a few minutes.

Hope this article is informative to you. Share it! Comment it!! Be Sociable!!!