Ansible doesn’t require an agent to push the changes but it needs few configurations on the client side to access the server and perform the tasks without prompting for username/ password/other authentication. I would recommend using non-root user for Ansible setup but ensure that user is consistent across your environment. Let’s setup the servers for Ansible automation.
Environment :
- Ansible user – sysadmin
- Elevated Access – sudo
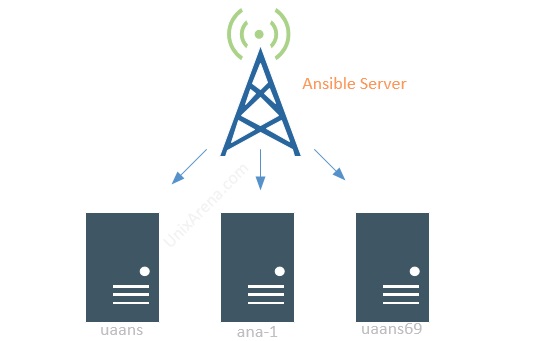
- Ansible Server – ansible-server
- Client Servers (Just for Demo. You can add as many as client nodes)
- uaans69 – RHEL 6.9
- uaans – RHEL 7
- ana-1 – RHEL 7
- Authentication- SSH public key
Configure Password Less Authentication – Ansible
1. Login to Ansible server (Control Node) as an user.
[sysadmin@ansible-server ~]$ id -a
uid=1000(sysadmin) gid=1000(sysadmin) groups=1000(sysadmin)
[sysadmin@ansible-server ~]$ uname -n
ansible-server
[sysadmin@ansible-server ~]$
2. Generate new ssh key if it’s not done already. This key will be copied to all the ansible clients to provide the passwordless access.
[sysadmin@ansible-server ~]$ ssh-keygen -t rsa
Generating public/private rsa key pair.
Enter file in which to save the key (/home/sysadmin/.ssh/id_rsa):
Created directory '/home/sysadmin/.ssh'.
Enter passphrase (empty for no passphrase):
Enter same passphrase again:
Your identification has been saved in /home/sysadmin/.ssh/id_rsa.
Your public key has been saved in /home/sysadmin/.ssh/id_rsa.pub.
The key fingerprint is:
SHA256:2B4nZLweGolgyJY0gfWXILB1Pe72XdmpszRW8a4y5cY sysadmin@ansible-server
The key's randomart image is:
+---[RSA 2048]----+
|o*= o.           |
|++o+ .oo         |
|o+o ..o.+     .  |
|.. . o.* .     o |
|    ..+ S .  o...|
|      o= =  o.+. |
|     ...o. .+=  .|
|        . .o=.E. |
|            .*.  |
+----[SHA256]-----+
[sysadmin@ansible-server ~]$
[sysadmin@ansible-server ~]$ ls -lrt .ssh
total 12
-rw-r--r--. 1 sysadmin sysadmin  405 Jul  3 08:38 id_rsa.pub
-rw-------. 1 sysadmin sysadmin 1675 Jul  3 08:38 id_rsa
[sysadmin@ansible-server ~]$
Ensuring that “sysadmin” user is created on all the servers.
3. Transfer the ssh public key to Ansible clients. Here is the list of servers which will be added as ansible client.
- 192.168.3.150 – uaans69
- 192.168.3.201 – ana-1
- 192.168.3.20 – uaans
[sysadmin@ansible-server ~ ]$ cd .ssh/
[sysadmin@ansible-server .ssh]$ ssh-copy-id -i id_rsa.pub uaans69
/bin/ssh-copy-id: INFO: Source of key(s) to be installed: "id_rsa.pub"
The authenticity of host 'uaans69 (192.168.3.150)' can't be established.
RSA key fingerprint is SHA256:mmbl7G1sTVJGdfgMvgZ8ptaoIX46sNGxPGM1GSaA6EY.
RSA key fingerprint is MD5:60:86:f6:8f:d0:0d:a4:3c:76:87:cf:98:50:fb:22:f9.
Are you sure you want to continue connecting (yes/no)? yes
/bin/ssh-copy-id: INFO: attempting to log in with the new key(s), to filter out any that are already installed
/bin/ssh-copy-id: INFO: 1 key(s) remain to be installed -- if you are prompted now it is to install the new keys
sysadmin@uaans69's password:

Number of key(s) added: 1

Now try logging into the machine, with:   "ssh 'uaans69'"
and check to make sure that only the key(s) you wanted were added.

[sysadmin@ansible-server .ssh]$ ssh-copy-id -i id_rsa.pub ana-1
/bin/ssh-copy-id: INFO: Source of key(s) to be installed: "id_rsa.pub"
The authenticity of host 'ana-1 (192.168.3.201)' can't be established.
ECDSA key fingerprint is SHA256:a8kjhbIMymnkGB6LMD0tZ6ip03XqCn9bNPke2x2ZCn8.
ECDSA key fingerprint is MD5:7d:65:54:65:f0:e0:c7:d6:19:fb:1d:7b:a2:2e:93:bd.
Are you sure you want to continue connecting (yes/no)? yes
/bin/ssh-copy-id: INFO: attempting to log in with the new key(s), to filter out any that are already installed
/bin/ssh-copy-id: INFO: 1 key(s) remain to be installed -- if you are prompted now it is to install the new keys
sysadmin@ana-1's password:

Number of key(s) added: 1

Now try logging into the machine, with:   "ssh 'ana-1'"
and check to make sure that only the key(s) you wanted were added.

[sysadmin@ansible-server .ssh]$ ssh-copy-id -i id_rsa.pub uaans
/bin/ssh-copy-id: INFO: Source of key(s) to be installed: "id_rsa.pub"
The authenticity of host 'uaans (192.168.3.20)' can't be established.
ECDSA key fingerprint is SHA256:JrvB5W3cEYZA/+onnyMJP6uIrQlSCK+iVSMbr9p2B74.
ECDSA key fingerprint is MD5:2d:9d:e3:6b:fe:5b:27:a5:89:3c:fe:6a:01:51:7c:65.
Are you sure you want to continue connecting (yes/no)? yes
/bin/ssh-copy-id: INFO: attempting to log in with the new key(s), to filter out any that are already installed
/bin/ssh-copy-id: INFO: 1 key(s) remain to be installed -- if you are prompted now it is to install the new keys
sysadmin@uaans's password:

Number of key(s) added: 1

Now try logging into the machine, with:   "ssh 'uaans'"
and check to make sure that only the key(s) you wanted were added.

[sysadmin@ansible-server .ssh]$
4. Let’s test our work. We should be able to login to all the client as “sysadmin” user without password.
[sysadmin@ansible-server ~]$ ssh uaans
[sysadmin@uaans ~]$ logout
Connection to uaans closed.
[sysadmin@ansible-server ~]$ ssh uaans69
[sysadmin@uaans69 ~]$ logout
Connection to uaans69 closed.
[sysadmin@ansible-server ~]$ ssh ana-1
Last login: Sat Jun 30 10:00:47 2018
[sysadmin@ana-1 ~]$ logout
Connection to ana-1 closed.
[sysadmin@ansible-server ~]$
It works.
5. Login to each client node and update sudoers file like below. This will provide the elevated access to “sysadmin” user.
[root@uaans69 ~]# cat /etc/sudoers |grep sysadmin
sysadmin         ALL=(ALL)       NOPASSWD: ALL
[root@uaans69 ~]#
We have successfully setup the Ansible server and client nodes for Ansible Automation. Ansible user, keys and Sudo privileges can be injected into the VM template to make the VM ready for ansible automation without doing all the above steps for new VM server to bring under ansible engine.
The Next step would be setting up the Ansible inventory.
Leave a Reply