


This article will walk you through the Amazon AWS dashboard along with setting up IAM (Identity Access Management ). It has legacy and modern dashboards which can be set by users at their convenient. I will be using latest dashboard during this tutorial. Once you have signed in to AWS console , you need to setup IAM to enable more security features to your account. The root account is simply the account created when first setup your AWS account and it has complete Admin access. So its essential to enable security features like MFA (Multi-Factor-Authentication) and configuring additional root users on that account. IAM consists users, groups , polices documents and roles. This is similar to users management on any Unix or windows operating system.
Let’s walk you through the virtual LAB.
AWS – Web Console
1.Login to Amazon AWS console using email account.


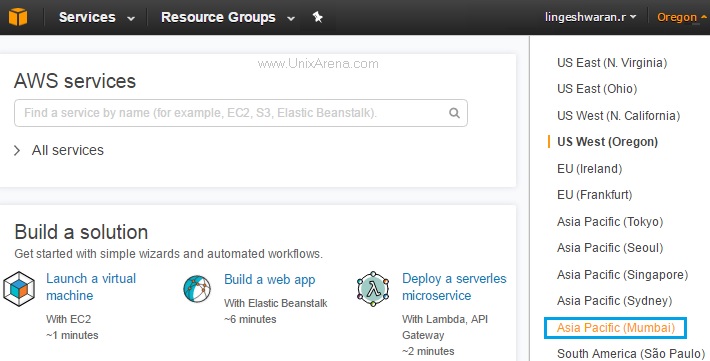
2. Once you have logged in , setup the near by AWS region for better performance. By default, AWS selects Oregon region and I have set it to “Asia Pacific (Mumbai)” which is near to my location.

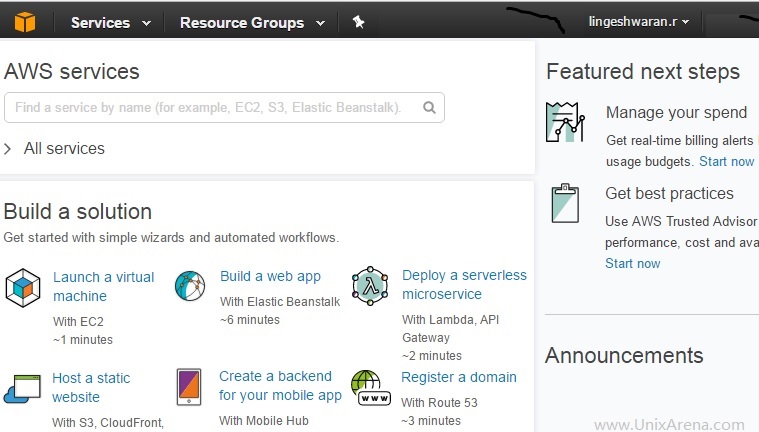
3. Here is the AWS console Home Page. You could only see “solutions” are displaying in home console instead of AWS services when you compare to old console.

4. To see all the AWS services, click on “All services” which is below to the search bar. You could also click on “Services” from menu to see the available AWS services.

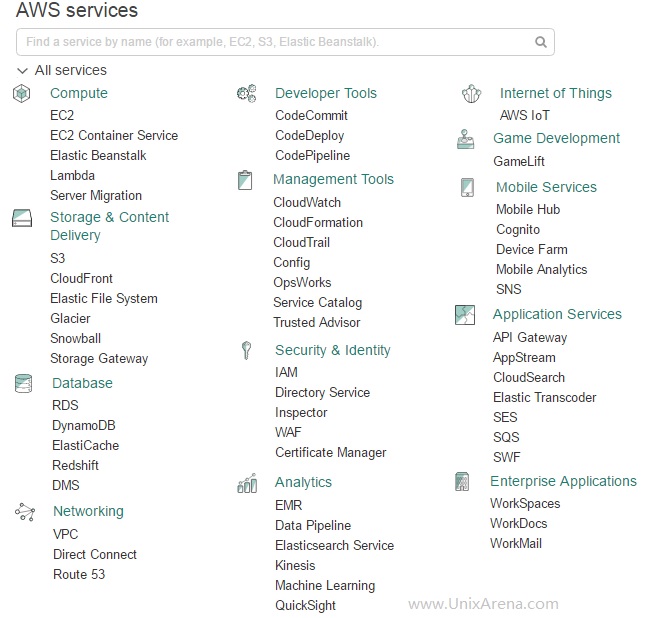
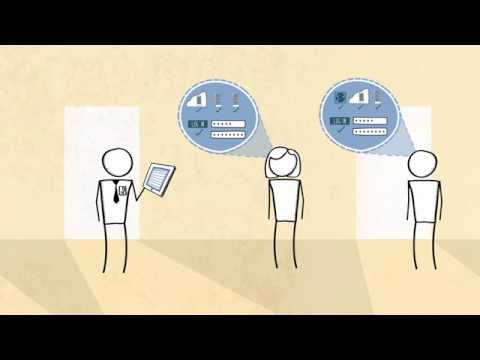
5. Click on “IAM” from “Security & Identity” tab to enable security features to the root account. The below video will help you understand how IAM works and why it’s so important in AWS .
Setup IAM (Identity Access Management)
Action items:
- Customize the direct Console URL.
- Enhance Account Security.
Customize the direct Console URL
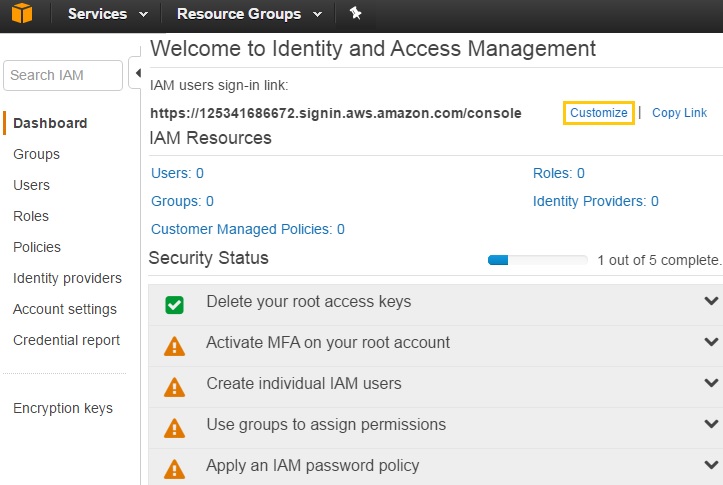
1. Here is the “IAM” Management console for brand new AWS accounts. AWS offers the direct console access to access every account. You can set the preferred URL for your account. Click on “customize” to setup new URL for direct console.

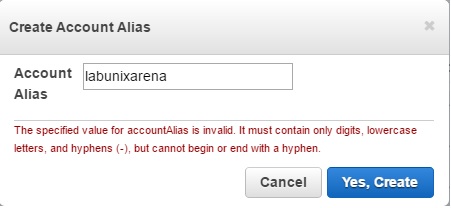
2. Enter new custom URL part.

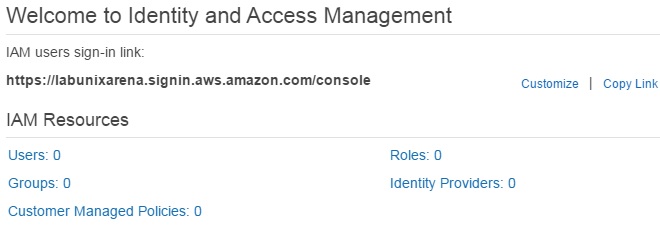
3. Here is the new direct console URL for your AWS account.

Enhance Account Security:
Action items :
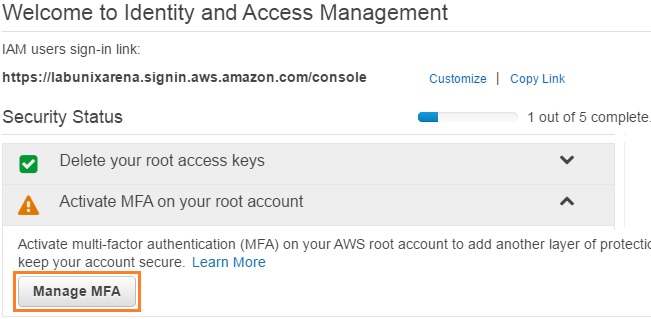
- Activate MFA on your root account
- Create individual IAM users
- Users group to assign permissions
- Apply an IAM policy
Activate MFA on your root account:
1. Select “Activate MFA on your root account” tab and Click on Manage MFA .

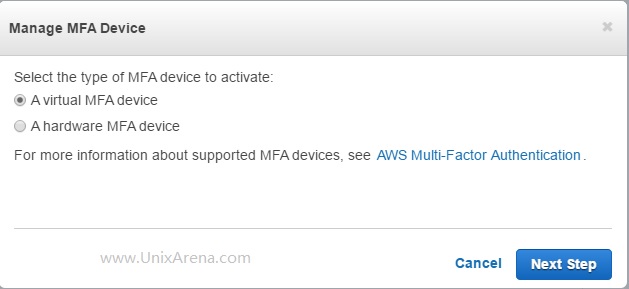
2. Select the MFA type as virtual. Hardware MFA device require physical RSA token or similar to that.

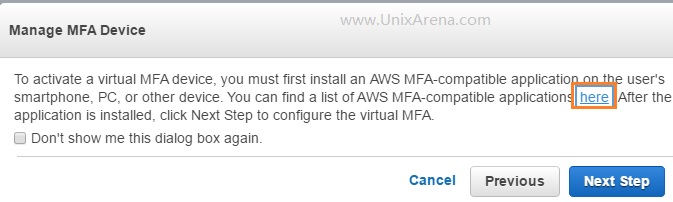
3. Follow the link to see the supported devices for virtual MFA. Click on Next to step to continue.

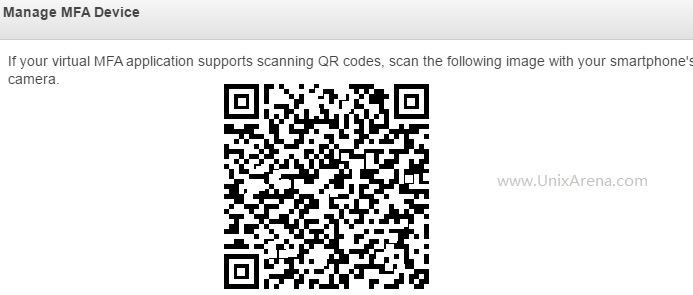
4. Here is your QR.

5. Here is the supported MFA applications for AWS.

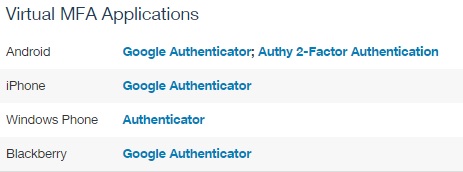
5. Take your smart phone and install “Google Authenticator” . If you have Android smart phone, download fro google play.
6. Choose SCAN QR in google authenticator and scan the QR code which is displaying in your laptop. (Refer Step 4)
7. Enter the Authentication code 1 from Google Authenticator app.

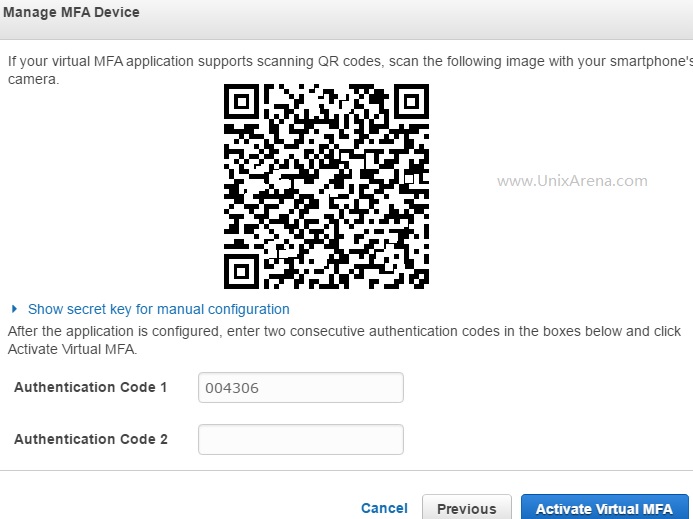
You must enter code2 which is next available random codes from google authenticator. Once it’s done, Activate Virtual MFA.
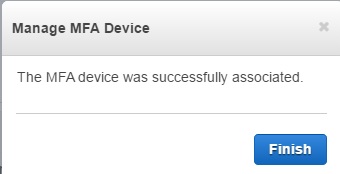
8. On Successful activation, You will get message like below.

9. Refresh the screen to see the latest security status.

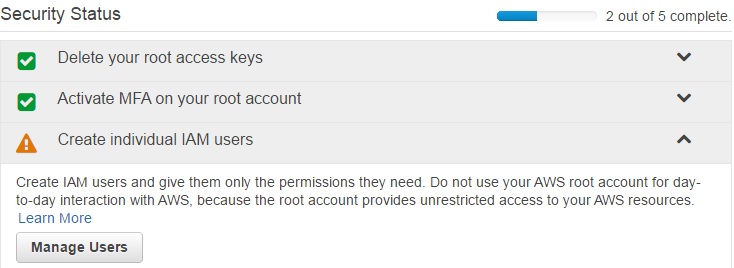
We will continue the following actions demonstrations on upcoming articles.
- Create individual IAM users
- Users group to assign permissions
- Apply an IAM policy
Hope this article is informative to you . Share it ! Comment it !! Be Sociable !!!