This article is going to demonstrate the deployment of NAKIVO Backup & Replication V6. Nakivo is very easy to deploy, doesn’t need any separate Windows management server since it can run purely as a pre-built virtual appliance. NAKIVO Backup & Replication provides image-based VMware VM backup. For each VM backup, you can save up to 1,000 recovery points and rotate them on a daily, weekly, monthly, and yearly basis. All backup jobs are forever-incremental and use VMware Changed Block Tracking to quickly identify changed data, which results in fast backups. To save storage space, all VM backups are automatically compressed and deduplicated across entire backup repository.
NAKIVO Backup & Replication requires 2 CPU cores and 4 GB RAM. The product can be installed on:
Linux:
- Ubuntu 12.04 Server (x64)
- Red Hat Enterprise Linux 6.3 (x64)
- SUSE Linux Enterprise 11 SP2 (x64)
Windows:
- Windows Server 2012 R2 Standard
- Windows Server 2012 Standard
- Windows Server 2008 R2 Standard
- Windows 8 Professional (x64)
- Windows 7 Professional (x64)
NAKIVO also provides VMware virtual Appliance . We can simply download and import a pre-configured VMware Virtual Appliance on vCenter.
1.Download NAKIVO_Backup_Replication_VA_v6.0.1.12926_Full_Solution_NFR from NAKIVO.
2. Login vsphere Web-client to deploy the NAKIVO virtual Appliance v6.
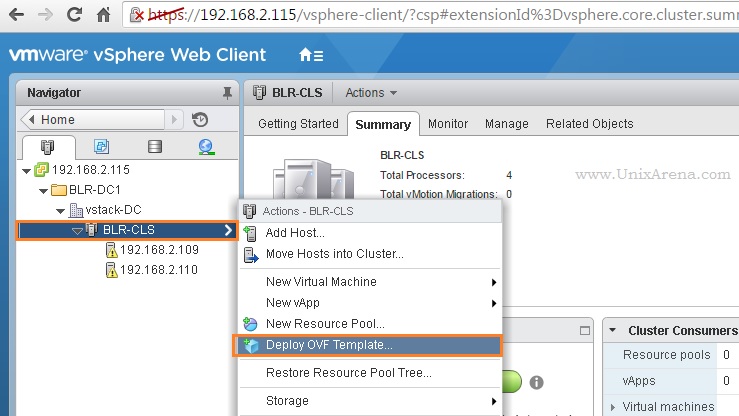
3. Navigate to the hosts & clusters . Select the cluster and right click to select “Deploy OVF Template”.
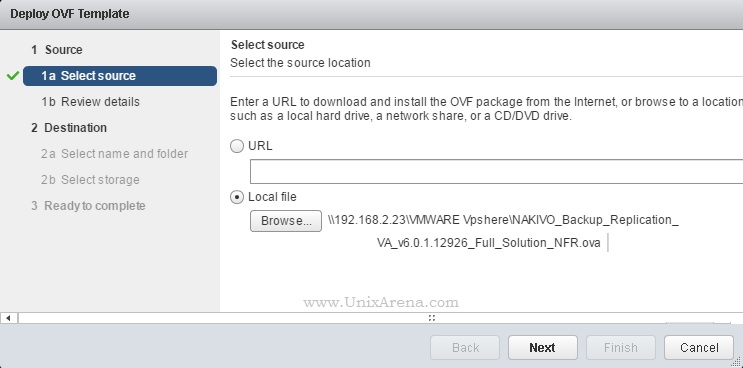
4. Browse the directory and select the downloaded file “NAKIVO_Backup_Replication_VA_v6.0.1.12926_Full_Solution_NFR.ova”
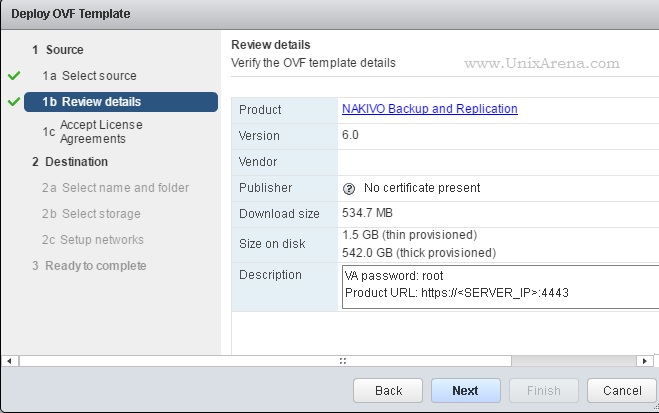
5. Review the OVF template details. In Description, you find the appliance login credentials.
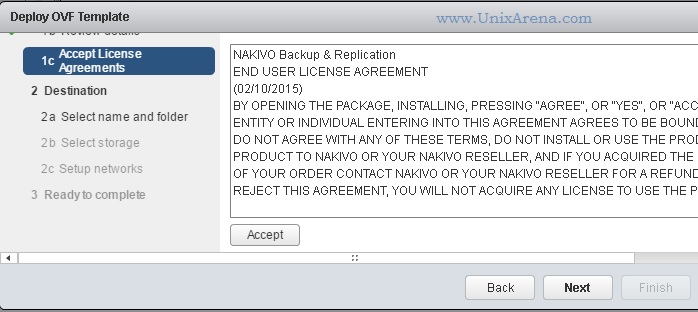
6. Accept the license .
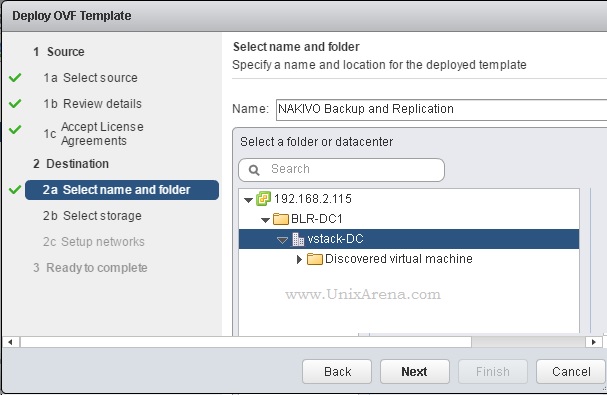
7. Select the datacenter.
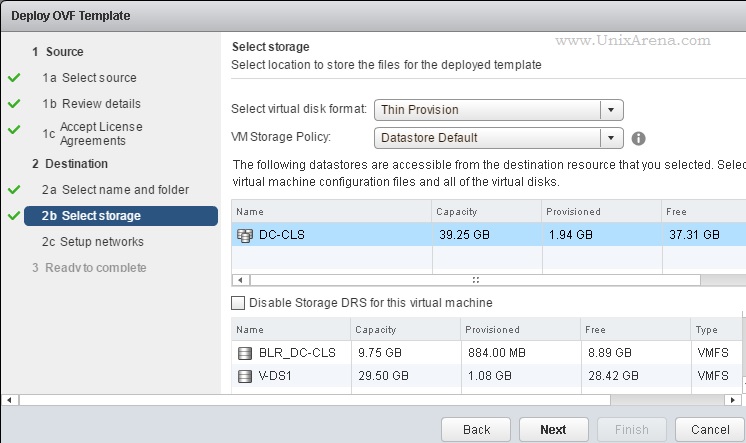
8. Select the virtual disk format and Datastore.
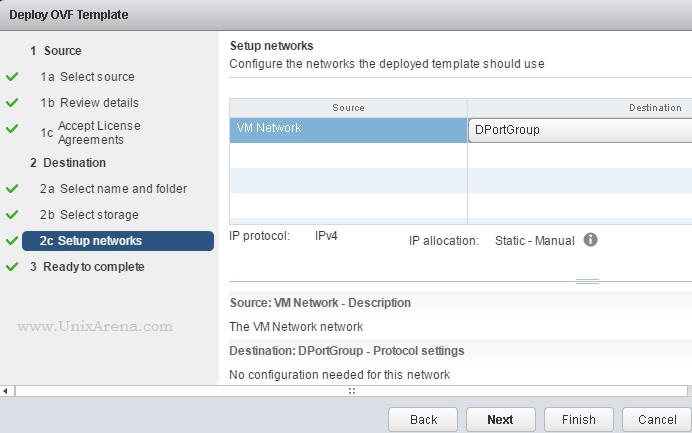
9. Select the VM network.
10 . Click finish to complete the deployment wizard.

11. Once the appliance is deployed, You can see the appliance like below.
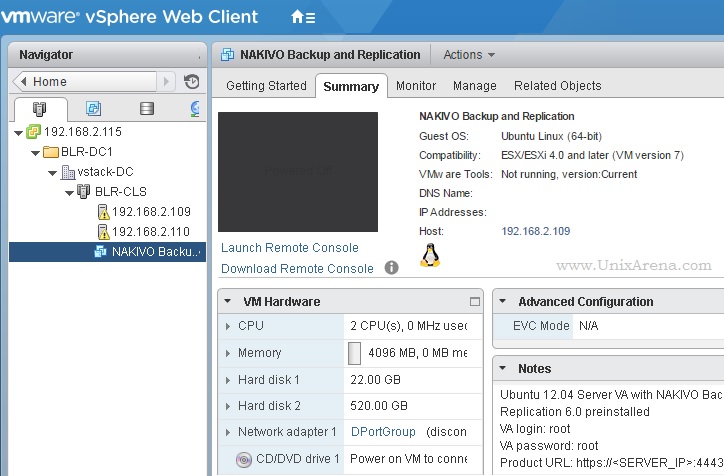
We have successfully deployed the NAKIVO Backup & Replication V6 for VMware. In the upcoming article, we will see that how to connect appliance with vCenter to perform the VM backup and recovery.
Leave a Reply