• Skip to primary navigation
  • Skip to main content
  • Skip to primary sidebar

UnixArena

  • Home
  • kubernetes
  • DevOps
    • Terraform
    • Jenkins
    • Docker
    • Openshift
      • OKD
    • Ansible engine
    • Ansible Tower
      • AWX
    • Puppet
  • Cloud
    • Azure
    • AWS
    • Openstack
    • Docker
  • VMware
    • vCloud Director
    • VMware-Guests
    • Vcenter Appliance 5.5
    • vC OPS
    • VMware SDDC
    • VMware vSphere 5.x
      • vSphere Network
      • vSphere DS
      • vShield Suite
    • VMware vSphere 6.0
    • VSAN
    • VMware Free Tools
  • Backup
    • Vembu BDR
    • Veeam
    • Nakivo
    • Azure Backup
    • Altaro VMBackup
    • Spinbackup
  • Tutorials
    • Openstack Tutorial
    • Openstack Beginner’s Guide
    • VXVM-Training
    • ZFS-Tutorials
    • NetApp cDot
    • LVM
    • Cisco UCS
    • LDOM
    • Oracle VM for x86
  • Linux
    • How to Articles
    • Q&A
    • Networking
    • RHEL7
  • DevOps Instructor-led Training
  • Contact

Deploy KVM instance using Virt-Manger (VMM)- GUI – Part 5

December 18, 2015 By Cloud_Devops Leave a Comment

Virt-Manager is powerful GUI tool to manage the multiple KVM hosts and it’s associated VM’s. It support’s XEN virtualization too. It can be installed on KVM hypervisor hosts or on centralized management host to manage the multiple hyper-visors from one place.  Using virt-manager,  you can start, pause(suspend), shutdown VMs, display VM details (Ex: VCPUs, memory, disk space), add devices to VMs, clone the VM’s and create a new VMs. The latest version provides the interface to migrate the running VM from KVM host to another if we use the shared storage pool(Live migration).

Let’s launch the virt-manager.

Launching the virt-manger from KVM hosts:

1.Login to the KVM host as root user .  (Make sure X11 forwarding is enabled & you have installed the terminal emulation software : Ex: Moba Xterm)

2. Execute virt-manager command to launch the GUI.

virt-Manager
virt-Manager


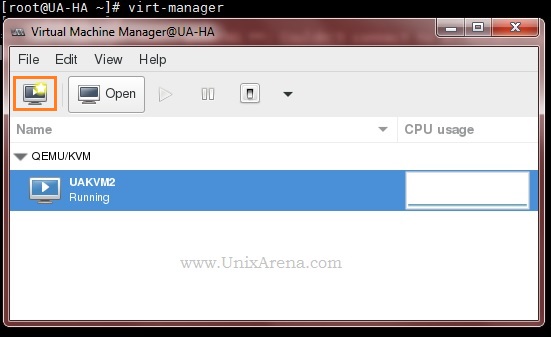
3. Click the highlighted icon to create the new VM.  (See the above screenshot).


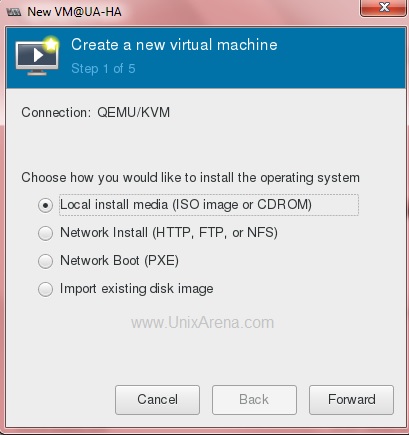
4. Specify the installation source method. Let me use the local ISO image.

Select the KVM guest Installation source
Select the KVM guest Installation source method


5. Specify the ISO image path .

Specify the ISO image location - KVM guest
Specify the ISO image location – KVM guest


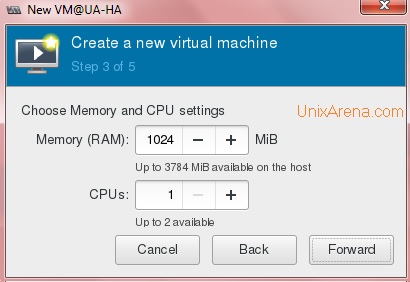
6. Allocate the resources for KVM guest.  (Ex: vCPU’s & Memory)

Set the resource limits - KVM
Set the resource limits – KVM


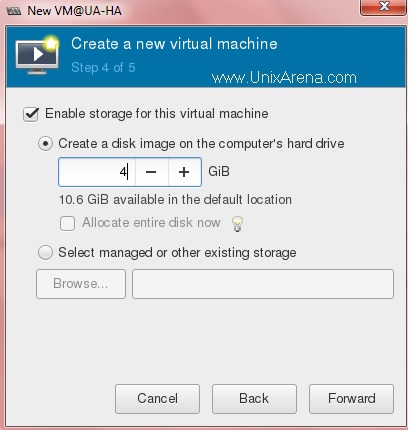
7. Create the virtual disk  for Guest installation (root disk of the guest OS).

Specify the disk image size - KVM
Specify the disk image size – KVM Guest


8. Enter the VM name and specify the bridge which we have created earlier (Refer the KVM tutorial)  to provide the external network access to the Guest.

Enter the VM name and specify bridge


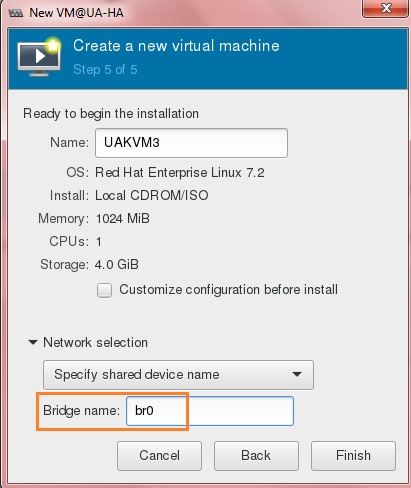
9. Click finish to create the VM.

KVM - Guest Domain creation 8
KVM – Guest Domain creation


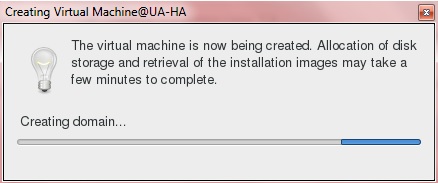
once the VM is created, you will get the console like below.

KVM Guest console
KVM Guest console


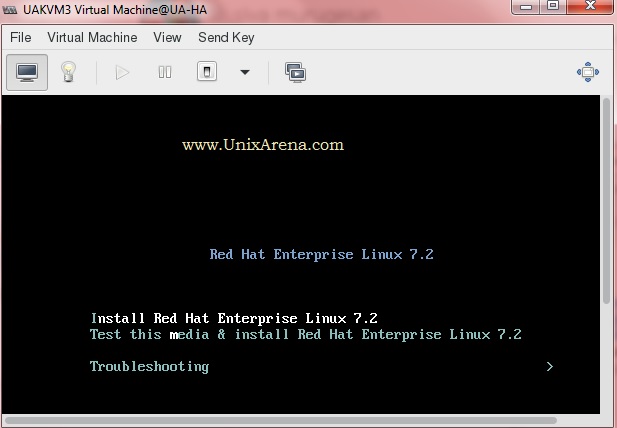
You can complete the VM installation.


10 .To view the KVM guest hardware details , click on the highlighted icon.

To see the VM hardware details - KVM
To see the VM hardware details – KVM


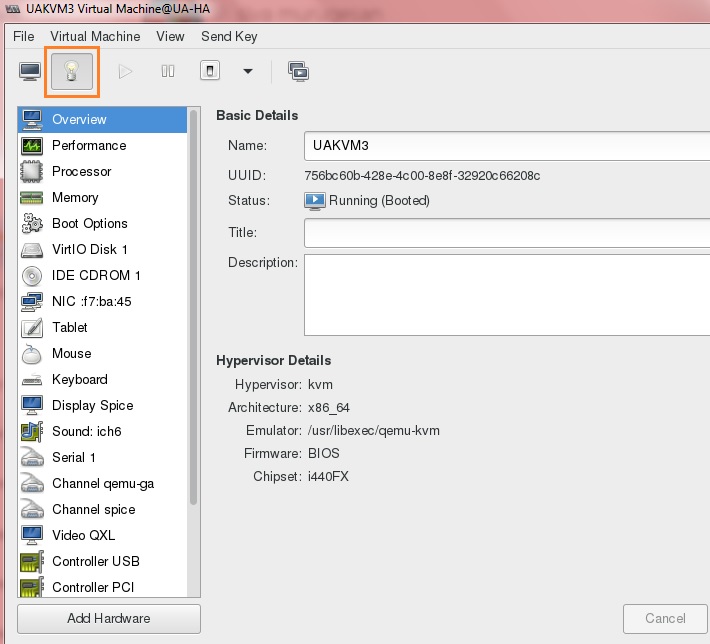
You can also add the new virtual hardware using the above window.  (Adding new disks , NIC etc..)


11. KVM also provides the force VM power off option. (Just like removing the power card in physical server.)

KVM guest - Force power off Option
KVM guest – Force power off Option


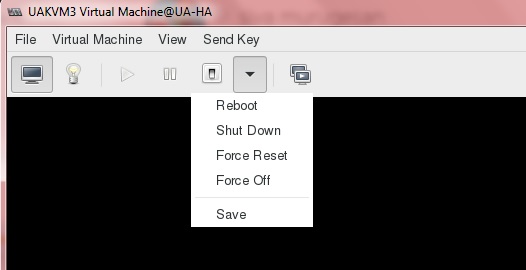
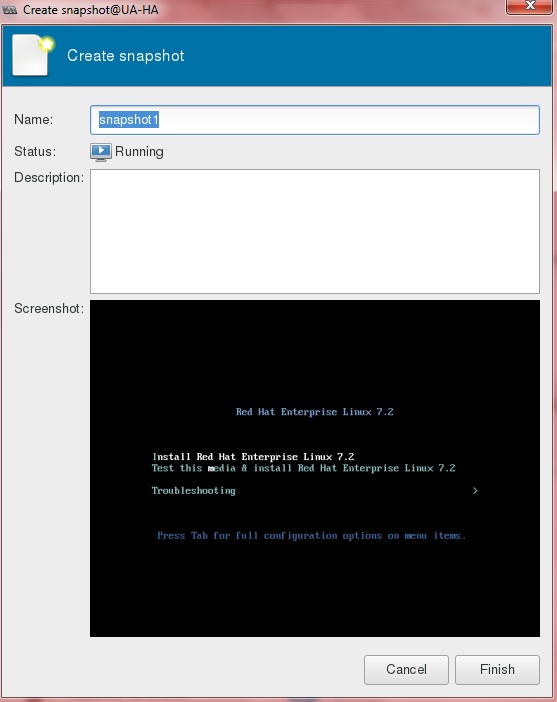
12. KVM support snapshots . virt-manager provides the interfaces to take the running machine snapshots.

Take the snapshot of KVM guest


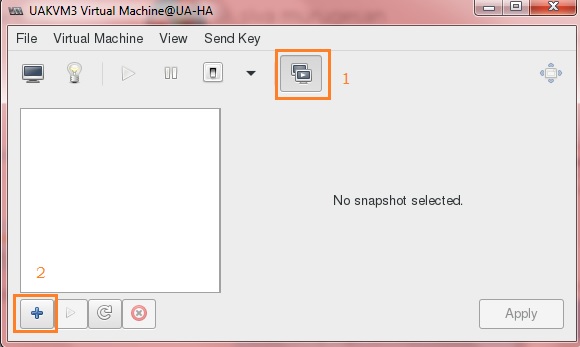
Click on the “+” icon to create the snapshot for VM.

Guest Snapshot name
Guest Snapshot name


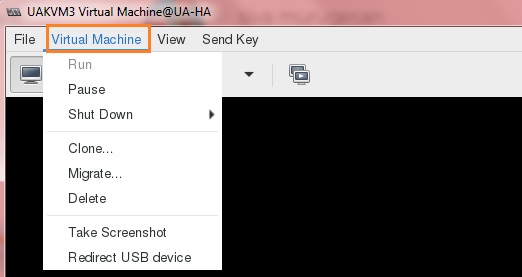
13. VMM (Virtual Machine Manager) also provides the interface to migrate or clone the VM . Just click VM’s Virtual Machine tab.

KVM Guest - Migrate clone Delete
KVM Guest – Migrate clone Delete


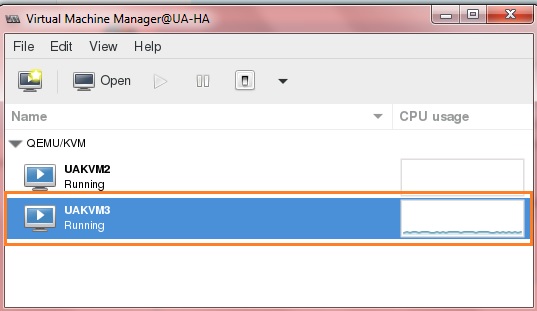
14. You can launch the VM’s console any time by just double clicking the listed VM.

Clone & Live Migration option


Centralized KVM Hosts Management: (Like VMware vSphere Client )

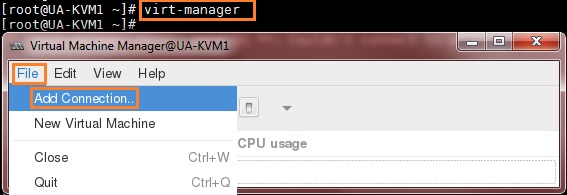
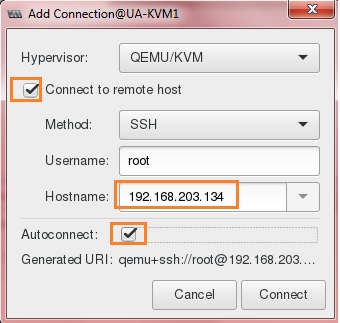
If you have installed the VMM  on other than KVM node, you need to connect the KVM hosts using ssh.

1. Configure the ssh password less authentication for root user between KVM Management node and KVM hosts.

2. Login to the Management node where you have installed virt-manager.  (with X11 forwarding ).

3.Execute the virt-manager command to launch the VMM GUI.

VMM on Management Node - KVM
VMM on Management Node – KVM


4. Enter the KVM host IP..

Connect Remote KVM host - VMM
Connect Remote KVM host – VMM


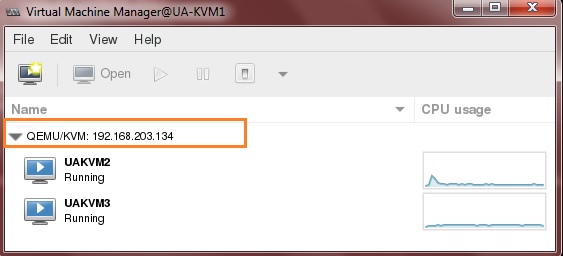
You should be able to get the window like below .

KVM Management Node
KVM Management Node


Hope this article is informative to you.

Share it ! Comment it !! Be Sociable !!!

Filed Under: Linux KVM, Redhat Enterprise Virtualization, Redhat-LINUX, RHEL7 Tagged With: KVM, Linux KVM, Redhat Enterprise Virtualization, Redhat Linux

Reader Interactions

Leave a Reply Cancel reply

Your email address will not be published. Required fields are marked *

Primary Sidebar

Follow UnixArena

  • Facebook
  • LinkedIn
  • Twitter

Copyright © 2025 · UnixArena ·

Go to mobile version