


This article will demonstrates that how to install and configure the object storage node for Openstack environment. Object storage node is responsible for account , container, and object services. For the tutorial simplicity, I will use the block storage server as object storage server. We will add new storage LUN for object storage service and create the single partition with whole disk. Object storage service supports all the filesystem which supports xattr (Extended Attributes) . In our tutorial , we will use XFS for the demonstration.
Here is my storage node’s /etc/hosts file contents. These entries are present on all other openstack nodes as well.
root@OSSTG-UA:~# cat /etc/hosts |head -4
192.168.203.131         OSCMP-UA        Compute-Node
192.168.203.130         OSCTRL-UA       Controller-Node
192.168.203.132         OSNWT-UA        Network-Node
192.168.203.133         OSSTG-UA        Storage-Node
root@OSSTG-UA:~#
Install & Configure rsync:
1.Login to the openstack object storage node .
2.Install the rsync and other supporting packages.
root@OSSTG-UA:~# apt-get install xfsprogs rsync
Reading package lists... Done
Building dependency tree
Reading state information... Done
rsync is already the newest version.
Suggested packages:
  xfsdump attr quota
The following NEW packages will be installed:
  xfsprogs
0 upgraded, 1 newly installed, 0 to remove and 37 not upgraded.
Need to get 508 kB of archives.
After this operation, 2,691 kB of additional disk space will be used.
Do you want to continue? [Y/n] Y
Get:1 http://in.archive.ubuntu.com/ubuntu/ trusty/main xfsprogs amd64 3.1.9ubuntu2 [508 kB]
Get:2 http://in.archive.ubuntu.com/ubuntu/ trusty/main xfsprogs amd64 3.1.9ubuntu2 [508 kB]
Fetched 485 kB in 4min 47s (1,688 B/s)
Selecting previously unselected package xfsprogs.
(Reading database ... 94221 files and directories currently installed.)
Preparing to unpack .../xfsprogs_3.1.9ubuntu2_amd64.deb ...
Unpacking xfsprogs (3.1.9ubuntu2) ...
Processing triggers for man-db (2.6.7.1-1ubuntu1) ...
Setting up xfsprogs (3.1.9ubuntu2) ...
Processing triggers for libc-bin (2.19-0ubuntu6.6) ...
root@OSSTG-UA:~#
3. In my storage node, /dev/sdc is free disk. Create a primary partition on that.
root@OSSTG-UA:~# fdisk /dev/sdc
Device contains neither a valid DOS partition table, nor Sun, SGI or OSF disklabel
Building a new DOS disklabel with disk identifier 0xff89c37d.
Changes will remain in memory only, until you decide to write them.
After that, of course, the previous content won't be recoverable.

Warning: invalid flag 0x0000 of partition table 4 will be corrected by w(rite)

Command (m for help): m
Command action
   a   toggle a bootable flag
   b   edit bsd disklabel
   c   toggle the dos compatibility flag
   d   delete a partition
   l   list known partition types
   m   print this menu
   n   add a new partition
   o   create a new empty DOS partition table
   p   print the partition table
   q   quit without saving changes
   s   create a new empty Sun disklabel
   t   change a partition's system id
   u   change display/entry units
   v   verify the partition table
   w   write table to disk and exit
   x   extra functionality (experts only)

Command (m for help): n
Partition type:
   p   primary (0 primary, 0 extended, 4 free)
   e   extended
Select (default p): p
Partition number (1-4, default 1):
Using default value 1
First sector (2048-20971519, default 2048):
Using default value 2048
Last sector, +sectors or +size{K,M,G} (2048-20971519, default 20971519):
Using default value 20971519

Command (m for help): p

Disk /dev/sdc: 10.7 GB, 10737418240 bytes
255 heads, 63 sectors/track, 1305 cylinders, total 20971520 sectors
Units = sectors of 1 * 512 = 512 bytes
Sector size (logical/physical): 512 bytes / 512 bytes
I/O size (minimum/optimal): 512 bytes / 512 bytes
Disk identifier: 0xff89c37d

   Device Boot      Start         End      Blocks   Id  System
/dev/sdc1            2048    20971519    10484736   83  Linux

Command (m for help): w
The partition table has been altered!

Calling ioctl() to re-read partition table.
Syncing disks.
root@OSSTG-UA:~#
4. Format the partition with XFS filesystem.
root@OSSTG-UA:~# mkfs.xfs /dev/sdc1
meta-data=/dev/sdc1              isize=256    agcount=4, agsize=655296 blks
         =                       sectsz=512   attr=2, projid32bit=0
data     =                       bsize=4096   blocks=2621184, imaxpct=25
         =                       sunit=0      swidth=0 blks
naming   =version 2              bsize=4096   ascii-ci=0
log      =internal log           bsize=4096   blocks=2560, version=2
         =                       sectsz=512   sunit=0 blks, lazy-count=1
realtime =none                   extsz=4096   blocks=0, rtextents=0
root@OSSTG-UA:~#
5. Create the new mount point for newly created filesystem.
root@OSSTG-UA:~# mkdir -p /srv/node/sdc1
root@OSSTG-UA:~# ls -ld /srv/node/sdc1
drwxr-xr-x 2 root root 4096 Oct 22 04:22 /srv/node/sdc1
root@OSSTG-UA:~#
6.Edit the /etc/fstab and the line below.
/dev/sdc1 /srv/node/sdc1 xfs noatime,nodiratime,nobarrier,logbufs=8 0 2
7.Mount the filesystem.
root@OSSTG-UA:~# mount /srv/node/sdc1
root@OSSTG-UA:~# df -h /srv/node/sdc1
Filesystem      Size  Used Avail Use% Mounted on
/dev/sdc1        10G   33M   10G   1% /srv/node/sdc1
root@OSSTG-UA:~#
8.Create new file called “/etc/rsyncd.conf” and update the following contents.
uid = swift
gid = swift
log file = /var/log/rsyncd.log
pid file = /var/run/rsyncd.pid
address = 192.168.203.133

[account]
max connections = 2
path = /srv/node/
read only = false
lock file = /var/lock/account.lock

[container]
max connections = 2
path = /srv/node/
read only = false
lock file = /var/lock/container.lock

[object]
max connections = 2
path = /srv/node/
read only = false
lock file = /var/lock/object.lock
9.Enable the rsync by editing “/etc/default/rsync” file.
root@OSSTG-UA:~# grep ENABLE /etc/default/rsync
RSYNC_ENABLE=true
root@OSSTG-UA:~#
10.Start the rsync service.
root@OSSTG-UA:~# service rsync start
 * Starting rsync daemon rsync                                                                                                                                [ OK ]
root@OSSTG-UA:~#
Install and Configure Object Storage Components:
1.Login to the storage node.
2. Install the Object storage components.
root@OSSTG-UA:~# apt-get install swift swift-account swift-container swift-object
Reading package lists... Done
Building dependency tree
Reading state information... Done
The following extra packages will be installed:
  python-dnspython python-netifaces python-swift python-xattr
Suggested packages:
  swift-bench
The following NEW packages will be installed:
  python-dnspython python-netifaces python-swift python-xattr swift
  swift-account swift-container swift-object
0 upgraded, 8 newly installed, 0 to remove and 37 not upgraded.
Need to get 465 kB of archives.
After this operation, 2,861 kB of additional disk space will be used.
Do you want to continue? [Y/n] Y
3. Download the accounting, container, and object service configuration files from the Object Storage source repository.
root@OSSTG-UA:~# curl -o /etc/swift/account-server.conf  https://raw.githubusercontent.com/openstack/swift/stable/juno/etc/account-server.conf-sample
  % Total    % Received % Xferd  Average Speed   Time    Time     Time  Current
                                 Dload  Upload   Total   Spent    Left  Speed
100  6128  100  6128    0     0   1617      0  0:00:03  0:00:03 --:--:--  1617
root@OSSTG-UA:~# curl -o /etc/swift/container-server.conf  https://raw.githubusercontent.com/openstack/swift/stable/juno/etc/container-server.conf-sample
  % Total    % Received % Xferd  Average Speed   Time    Time     Time  Current
                                 Dload  Upload   Total   Spent    Left  Speed
100  6399  100  6399    0     0   1730      0  0:00:03  0:00:03 --:--:--  1730
root@OSSTG-UA:~# curl -o /etc/swift/object-server.conf  https://raw.githubusercontent.com/openstack/swift/stable/juno/etc/object-server.conf-sample
  % Total    % Received % Xferd  Average Speed   Time    Time     Time  Current
                                 Dload  Upload   Total   Spent    Left  Speed
100 10022  100 10022    0     0   2738      0  0:00:03  0:00:03 --:--:--  2738
root@OSSTG-UA:~#
root@OSSTG-UA:/etc/swift# ls -lrt
total 28
-rw-r--r-- 1 root root  6128 Oct 22 05:09 account-server.conf
-rw-r--r-- 1 root root  6399 Oct 22 05:09 container-server.conf
-rw-r--r-- 1 root root 10022 Oct 22 05:10 object-server.conf
root@OSSTG-UA:/etc/swift#
4.Edit the /etc/swift/account-server.conf file and update the following sections.
In the [DEFAULT] section,
[DEFAULT]
.......
bind_ip = 192.168.203.133
bind_port = 6002
user = swift
swift_dir = /etc/swift
devices = /srv/node
In the [pipeline:main] section, enable the require modules.
[pipeline:main]
pipeline = healthcheck recon account-server
In the [filter:recon] section, set the cache directory.
[filter:recon]
use = egg:swift#recon
recon_cache_path = /var/cache/swift
5. Edit the /etc/swift/container-server.conf file and update the following sections.
In the [DEFAULT] section,
[DEFAULT]
bind_ip = 192.168.203.133
bind_port = 6001
user = swift
swift_dir = /etc/swift
devices = /srv/node
In the [pipeline:main] section,
[pipeline:main]
pipeline = healthcheck recon container-server
In the [filter:recon] section,
[filter:recon]
use = egg:swift#recon
recon_cache_path = /var/cache/swift
5. Edit the /etc/swift/object-server.conf file and update the following sections.
In the [DEFAULT] section,
[DEFAULT]
bind_ip = 192.168.203.133
bind_port = 6000
user = swift
swift_dir = /etc/swift
devices = /srv/node
In the [pipeline:main] section,
[pipeline:main]
pipeline = healthcheck recon object-server
In [filter:recon] section,
[filter:recon]
use = egg:swift#recon
recon_cache_path = /var/cache/swift
6.Change the mount point permission.
root@OSSTG-UA:/etc/swift# chown -R swift:swift /srv/node
root@OSSTG-UA:/etc/swift# cd /srv/node
root@OSSTG-UA:/srv/node# ls -lrt
total 0
drwxr-xr-x 2 swift swift 6 Oct 22 04:22 sdc1
root@OSSTG-UA:/srv/node#
7. Create the recon cache directory.
root@OSSTG-UA:/srv/node# mkdir -p /var/cache/swift
root@OSSTG-UA:/srv/node# chown -R swift:swift /var/cache/swift
root@OSSTG-UA:/srv/node# ls -ld /var/cache/swift
drwxrwxr-x 2 swift swift 4096 Aug  6 15:16 /var/cache/swift
root@OSSTG-UA:/srv/node#
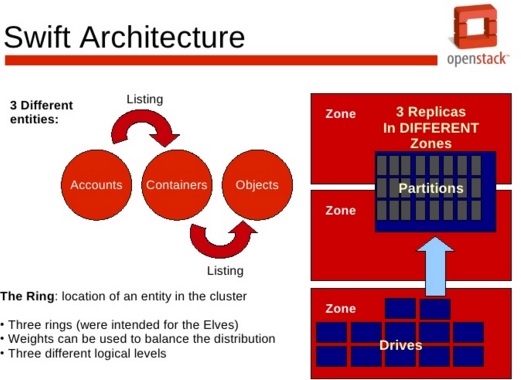
We have successfully configured the Object storage service on storage node. In the next article, we will create the initial rings (object ring, container ring and account ring).
Hope this article is informative to you. Share it !! Be Sociable !!!