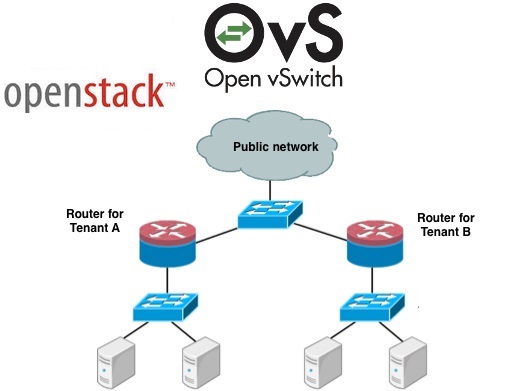
Configuring the Neutron services in openstack is quite lengthy process since we need to make the necessary configuration changes on controller node (API node), Network node & Compute node. In the previous article , we have configured the neutron services on Openstack controller node. This article will demonstrate that how to configure the Network node for Neutron networking. The network node primarily handles the L3 layer networking. It is responsible for internal and external routing. It offers DHCP service for virtual networks within the openstack environment. We need to enable the few kernel parameter before installing the openstack networking packages on Networking node.
Let’s configure the Neutron for our environment.
- Install & Configure Neutron Related services on Controller Node
- Install & Configure Neutron Related services for Network Node (We Are here)
- Install & Configure Neutron Related Services for Compute Node
Configure prerequisites on Network Node:
1. Login to openstack Network node.
2. Edit the sysctl.conf file and add the lines below .
net.ipv4.ip_forward=1
net.ipv4.conf.all.rp_filter=0
net.ipv4.conf.default.rp_filter=0
3.Dynamically load the configuration which you have added in sysctl.conf.
root@OSNWT-UA:~# sysctl -p
net.ipv4.ip_forward = 1
net.ipv4.conf.all.rp_filter = 0
net.ipv4.conf.default.rp_filter = 0
root@OSNWT-UA:~#
4. Install the networking components on Network Node.
root@OSNWT-UA:~# apt-get install neutron-plugin-ml2 neutron-plugin-openvswitch-agent neutron-l3-agent neutron-dhcp-agent neutron-metadata-agent
Reading package lists... Done
Building dependency tree
Reading state information... Done
The following extra packages will be installed:
Here is the attached console logs for the package installation.
Neutron installation on Network Node – logs
5. Configure the Networking common components. This configuration will setup the authentication methods , MQ configuration and other plugins.
- Configure the Networking service to use the Identify service “keystone”. Edit the “/etc/neutron/neutron.conf ”
and add the following keys in [DEFAULT] section.
[DEFAULT]
...
auth_strategy = keystone
- Add the following keys to the [keystone_authtoken] section
[keystone_authtoken]
auth_url = http://controller:5000
auth_host = OSCTRL-UA
auth_protocol = http
auth_port = 35357
admin_tenant_name = service
admin_user = neutron
admin_password = neutron123
- Configure Networking to use the message broker “Rabbit MQ” :
[DEFAULT]
...
rpc_backend = neutron.openstack.common.rpc.impl_kombu
rabbit_host = OSCTRL-UA
rabbit_password = rabbit123
- Configure Networking to use the Modular Layer 2 (ML2) plug-in and associated services:
[DEFAULT]
...
core_plugin = ml2
service_plugins = router
allow_overlapping_ips = True
verbose = True
- Comment out any lines in the [service_providers] section.
Configure the Layer-3 (L3) agent on Network Node:
1. Edit the “/etc/neutron/l3_agent.ini ” file and add the following lines under the [DEFAULT] section.
[DEFAULT]
interface_driver = neutron.agent.linux.interface.OVSInterfaceDriver
use_namespaces = True
verbose = True
Configure the DHCP agent:
1. Edit the /etc/neutron/dhcp_agent.ini file and add the following keys to the [DEFAULT] section.
interface_driver = neutron.agent.linux.interface.OVSInterfaceDriver
dhcp_driver = neutron.agent.linux.dhcp.Dnsmasq
use_namespaces = True
verbose = True
Configure the metadata agent:
1. Edit the “/etc/neutron/metadata_agent.ini ” file and add the following keys to the [DEFAULT] section.
[DEFAULT]
auth_url = http://OSCTRL-UA:5000/v2.0
auth_region = RegionOne
admin_tenant_name = service
admin_user = neutron
admin_password = neutron123
nova_metadata_ip = OSCTRL-UA
metadata_proxy_shared_secret = metadatapass
Configure the Modular Layer 2 (ML2) plug-in:
1. Edit the “/etc/neutron/plugins/ml2/ml2_conf.ini” like below. Replace the IP address with the IP address of the instance tunnels network interface on your network node.
root@OSNWT-UA:~# cat /etc/neutron/plugins/ml2/ml2_conf.ini |egrep -v "#|^$"
[ml2]
type_drivers = flat,vlan,gre,vxlan
tenant_network_types = gre
mechanism_drivers = openvswitch
[ml2_type_flat]
flat_networks = external
[ml2_type_vlan]
[ml2_type_gre]
tunnel_id_ranges = 1:1000
[ml2_type_vxlan]
[securitygroup]
enable_security_group = True
enable_ipset = True
firewall_driver = neutron.agent.linux.iptables_firewall.OVSHybridIptablesFirewallDriver
[agent]
tunnel_types = gre
[ovs]
local_ip = 192.168.204.10
bridge_mappings = external:br-ex
root@OSNWT-UA:~#
Configuration on the Controller Node:
The below steps need to be executed on the Controller Node.
1.Login to the openstack controller node.
2.Edit the “/etc/nova/nova.conf” configuration file & add the following keys to [DEFAULT] section.
[DEFAULT]
...
service_neutron_metadata_proxy = true
neutron_metadata_proxy_shared_secret = metadatapass
3.Restart the nova-api service.
root@OSCTRL-UA:~# service nova-api restart
nova-api stop/waiting
nova-api start/running, process 28975
root@OSCTRL-UA:~#
Configure the Open vSwitch (OVS) service on Network Node:
Open vSwtich provides the virtual networking framework for instances . br-init (Integration Bridge) handles the internal traffic within OVS. br-ext (External Bridge) handles the external instance traffic with OVS. The external bridge requires a port on the physical external network interface to provide instances with external network access.
Let’s see how we can add the integration & external bridge.
1. Restart the OVS service on network node.
root@OSNWT-UA:~# service openvswitch-switch restart
openvswitch-switch stop/waiting
openvswitch-switch start/running
root@OSNWT-UA:~#
2. Create the Integration bridge if its not already exists.
root@OSNWT-UA:~# ovs-vsctl add-br br-int
root@OSNWT-UA:~#
3.Create the External Bridge.
root@OSNWT-UA:~# ovs-vsctl add-br br-ex
root@OSNWT-UA:~#
4. Add a port to the external bridge that connects to the physical external network interface.
root@OSNWT-UA:~# ovs-vsctl add-port br-ex eth2
root@OSNWT-UA:~#
Finalize the Neutron Installation & Configuration on Network Node:
1. Restart the agents.
root@OSNWT-UA:~# service neutron-plugin-openvswitch-agent restart
neutron-plugin-openvswitch-agent stop/waiting
neutron-plugin-openvswitch-agent start/running, process 6477
root@OSNWT-UA:~# service neutron-l3-agent restart
stop: Unknown instance:
neutron-l3-agent start/running, process 6662
root@OSNWT-UA:~# service neutron-dhcp-agent restart
neutron-dhcp-agent stop/waiting
neutron-dhcp-agent start/running, process 6707
root@OSNWT-UA:~# service neutron-metadata-agent restart
neutron-metadata-agent stop/waiting
neutron-metadata-agent start/running, process 6731
root@OSNWT-UA:~#
2. Check the service status ,
root@OSNWT-UA:~# service neutron-plugin-openvswitch-agent status; service neutron-l3-agent status;service neutron-dhcp-agent status;service neutron-metadata-agent status
neutron-plugin-openvswitch-agent start/running, process 6477
neutron-l3-agent start/running, process 6662
neutron-dhcp-agent start/running, process 6707
neutron-metadata-agent start/running, process 6731
root@OSNWT-UA:~#
Verify Network Node Operation:
1. Login to the controller node.
2. Source the admin credentials
root@OSCTRL-UA:~# cat admin.rc
export OS_USERNAME=admin
export OS_PASSWORD=admin123
export OS_TENANT_NAME=admin
export OS_AUTH_URL=http://OSCTRL-UA:35357/v2.0
root@OSCTRL-UA:~# source admin.rc
root@OSCTRL-UA:~#
3. List the neutron agents.
root@OSCTRL-UA:~# neutron agent-list
+--------------------------------------+--------------------+----------+-------+----------------+---------------------------+
| id                                   | agent_type         | host     | alive | admin_state_up | binary                    |
+--------------------------------------+--------------------+----------+-------+----------------+---------------------------+
| 12d30025-2b13-4edf-806a-cfea51089c1e | L3 agent           | OSNWT-UA | :-)   | True           | neutron-l3-agent          |
| 26b7634d-7e81-4d84-9458-af95db545828 | Metadata agent     | OSNWT-UA | :-)   | True           | neutron-metadata-agent    |
| 6a65089e-7af5-4fe0-b746-07bc8fa7d7d0 | DHCP agent         | OSNWT-UA | :-)   | True           | neutron-dhcp-agent        |
| ad45ceea-6fa4-4cad-af17-ae7e40becb4b | Open vSwitch agent | OSNWT-UA | :-)   | True           | neutron-openvswitch-agent |
+--------------------------------------+--------------------+----------+-------+----------------+---------------------------+
root@OSCTRL-UA:~#
“Alive & Admin_state_up” shows that how successfully we have configured the neutron services on Network node.
Hope this article is informative to you . In the next article , we will configure neutron related services for compute Node.
