


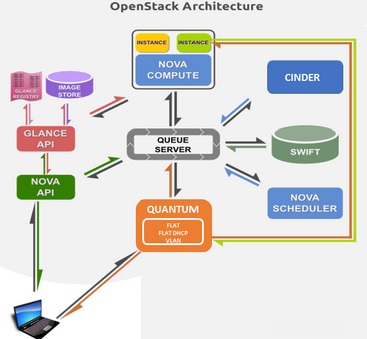
Controller node is the heart of the OpenStack platform which manages the various services. This article helps you to configure the Mysql DB & Rabbit MQ messaging service on Openstack controller node. Each service must be protected with a password for security reason. Each service will invoke for the password whenever you are trying to use it. In a real production environment, Openstack will be recommended to use the random password using OpenSSL command. These passwords will be generated by the pwgen program.
You need to generate “N” number of passwords which needed for each OpenStack services. Here I would like to keep the simple password for each service since its a test environment.
| Service Name (Key) | Password |
| Database password (no variable used) | stack (Set root password ) |
| RABBIT_PASS | rabbit123 |
| KEYSTONE_DBPASS | keydb123 |
| ADMIN_PASS | admin123 |
| GLANCE_DBPASS | glancedb123 |
| GLANCE_PASS | glance123 |
| NOVA_DBPASS | novadb123 |
| NOVA_PASS | nova123 |
| DASH_DBPASS | dsahdb123 |
| CINDER_DBPASS | cinderdb123 |
| CINDER_PASS | cinder123 |
| NEUTRON_DBPASS | neutrondb123 |
| NEUTRON_PASS | neutron123 |
| HEAT_DBPASS | heatdb123 |
| HEAT_PASS | heat123 |
| CEILOMETER_DBPASS | celidb123 |
| CEILOMETER_PASS | celi123 |
| TROVE_DBPASS | trovedb123 |
| TROVE_PASS | trove123 |
Controller Node setup:
1. Most of the OpenStack services require Database to store the information. On the controller node, install the MySQL Server and client packages, and the Python library. During the installation, the system will prompt to set the password for Mysql root user. (According to my password table, I set as “stack”)
root@OSCTRL-UA:/mnt# apt-get install python-mysqldb mysql-server
Reading package lists... Done
Building dependency tree
Reading state information... Done
mysql start/running, process 3585
Setting up libhtml-template-perl (2.95-1) ...
Setting up python-mysqldb (1.2.3-2ubuntu1) ...
Processing triggers for ureadahead (0.100.0-16) ...
Setting up mysql-server (5.5.44-0ubuntu0.14.04.1) ...
Processing triggers for libc-bin (2.19-0ubuntu6.6) ...
root@OSCTRL-UA:/mnt#
2. Edit the /etc/mysql/my.cnf file.
Under the [mysqld] section, set the following keys to enable InnoDB, UTF-8 character set, and UTF-8 collation by default.
[mysqld]
...
default-storage-engine = innodb
collation-server = utf8_general_ci
init-connect = 'SET NAMES utf8'
character-set-server = utf8
set the bind-address key to the management IP address of the controller node to enable access by other nodes via the management network.
bind-address = 192.168.203.130
3. Restart the MySQL database service to take effect of new settings.
root@OSCTRL-UA:/mnt# service mysql restart
mysql stop/waiting
mysql start/running, process 3778
root@OSCTRL-UA:/mnt#
4. Secure the MySQL database. You must delete the anonymous users that are created when the database is first started. Otherwise, database connection problems occur when you follow the instructions in this guide.
root@OSCTRL-UA:~# mysql_secure_installation

NOTE: RUNNING ALL PARTS OF THIS SCRIPT IS RECOMMENDED FOR ALL MySQL
      SERVERS IN PRODUCTION USE!  PLEASE READ EACH STEP CAREFULLY!


In order to log into MySQL to secure it, we'll need the current
password for the root user.  If you've just installed MySQL, and
you haven't set the root password yet, the password will be blank,
so you should just press enter here.

Enter current password for root (enter for none):
OK, successfully used password, moving on...

Setting the root password ensures that nobody can log into the MySQL
root user without the proper authorisation.

You already have a root password set, so you can safely answer 'n'.

Change the root password? [Y/n] n
 ... skipping.

By default, a MySQL installation has an anonymous user, allowing anyone
to log into MySQL without having to have a user account created for
them.  This is intended only for testing, and to make the installation
go a bit smoother.  You should remove them before moving into a
production environment.

Remove anonymous users? [Y/n] y
 ... Success!

Normally, root should only be allowed to connect from 'localhost'.  This
ensures that someone cannot guess at the root password from the network.

Disallow root login remotely? [Y/n] y
 ... Success!

By default, MySQL comes with a database named 'test' that anyone can
access.  This is also intended only for testing, and should be removed
before moving into a production environment.

Remove test database and access to it? [Y/n] y
 - Dropping test database...
ERROR 1008 (HY000) at line 1: Can't drop database 'test'; database doesn't exist
 ... Failed!  Not critical, keep moving...
 - Removing privileges on test database...
 ... Success!

Reloading the privilege tables will ensure that all changes made so far
will take effect immediately.

Reload privilege tables now? [Y/n] y
 ... Success!

Cleaning up...


All done!  If you've completed all of the above steps, your MySQL
installation should now be secure.

Thanks for using MySQL!


root@OSCTRL-UA:~#
5. Login to the other three nodes and install the python-mysqldb library.
#Openstack Compute Nodes
192.168.203.131 OSCMP-UA
#Openstack Network (Neutron)
192.168.203.132 OSNWT-UA
#Openstack Storage (swift & Cinder)
192.168.203.133 OSSTG-UA
root@OSSTG-UA:~# apt-get install python-mysqldb
Reading package lists... Done
Building dependency tree
Reading state information... Done
The following extra packages will be installed:
  libmysqlclient18 mysql-common
Unpacking python-mysqldb (1.2.3-2ubuntu1) ...
Setting up mysql-common (5.5.44-0ubuntu0.14.04.1) ...
Setting up libmysqlclient18:amd64 (5.5.44-0ubuntu0.14.04.1) ...
Setting up python-mysqldb (1.2.3-2ubuntu1) ...
Processing triggers for libc-bin (2.19-0ubuntu6.6) ...
root@OSSTG-UA:~#


root@OSNWT-UA:~# apt-get install python-mysqldb


root@OSCMP-UA:~# apt-get install python-mysqldb
Configure message broker service:
OpenStack requires message broker to coordinate the operations and status information among services. It typically runs on the controller node. Openstack supports RabbitMQ, Qpid, and ZeroMQ. In our test environment, we will use RabbitMQ since we are running OpenStack on Ubuntu.
1. Install RabbitMQ on Openstack Controller Node.
root@OSCTRL-UA:~# apt-get install rabbitmq-server
Reading package lists... Done
Building dependency tree
Reading state information... Done
The following extra packages will be installed:
  erlang-asn1 erlang-base erlang-corba erlang-crypto erlang-diameter
  erlang-edoc erlang-eldap erlang-erl-docgen erlang-eunit erlang-ic
  erlang-inets erlang-mnesia erlang-nox erlang-odbc erlang-os-mon
  erlang-parsetools erlang-percept erlang-public-key erlang-runtime-tools
  erlang-snmp erlang-ssh erlang-ssl erlang-syntax-tools erlang-tools
  erlang-webtool erlang-xmerl libltdl7 libodbc1 libsctp1 lksctp-tools
Suggested packages:
  erlang erlang-manpages erlang-doc xsltproc fop erlang-ic-java
  erlang-observer libmyodbc odbc-postgresql tdsodbc unixodbc-bin
The following NEW packages will be installed:
  erlang-asn1 erlang-base erlang-corba erlang-crypto erlang-diameter
  erlang-edoc erlang-eldap erlang-erl-docgen erlang-eunit erlang-ic
  erlang-inets erlang-mnesia erlang-nox erlang-odbc erlang-os-mon
  erlang-parsetools erlang-percept erlang-public-key erlang-runtime-tools
  erlang-snmp erlang-ssh erlang-ssl erlang-syntax-tools erlang-tools
  erlang-webtool erlang-xmerl libltdl7 libodbc1 libsctp1 lksctp-tools
  rabbitmq-server
Setting up erlang-webtool (1:16.b.3-dfsg-1ubuntu2.1) ...
Setting up erlang-tools (1:16.b.3-dfsg-1ubuntu2.1) ...
Setting up erlang-nox (1:16.b.3-dfsg-1ubuntu2.1) ...
Setting up lksctp-tools (1.0.15+dfsg-1) ...
Setting up rabbitmq-server (3.2.4-1) ...
Adding group `rabbitmq' (GID 116) ...
Done.
Adding system user `rabbitmq' (UID 110) ...
Adding new user `rabbitmq' (UID 110) with group `rabbitmq' ...
Not creating home directory `/var/lib/rabbitmq'.
 * Starting message broker rabbitmq-server                                                                                                                    [ OK ]
Processing triggers for libc-bin (2.19-0ubuntu6.6) ...
Processing triggers for ureadahead (0.100.0-16) ...
root@OSCTRL-UA:~#
2. RabbitMQ installs with default account “guest”. Since its test environment, we can use the same. Let me set the pre-defined password according to the table.
root@OSCTRL-UA:~# rabbitmqctl change_password guest rabbit123
Changing password for user "guest" ...
...done.
root@OSCTRL-UA:~#
Good, Now you are ready to install OpenStack services! We will see the Openstack service installation in upcoming articles.