

Service profile concept has been extracted from virtual machine and applying it for physical servers in UCS. When you configure VM , you need to specify LAN and SAN access, I/O configurations, firmware versions (Hardware version), boot order, network VLAN and physical port. Cisco Unified computing is going to allow the exactly same characteristics of VM for physical servers with the help of mezzanine card. This will help to re-provision the servers in quick time. Prior to creating the service profile template, we need to create all the appropriate policies, pools and interface templates.
Creating Service Profile Template:
1. Login to UCS manager.
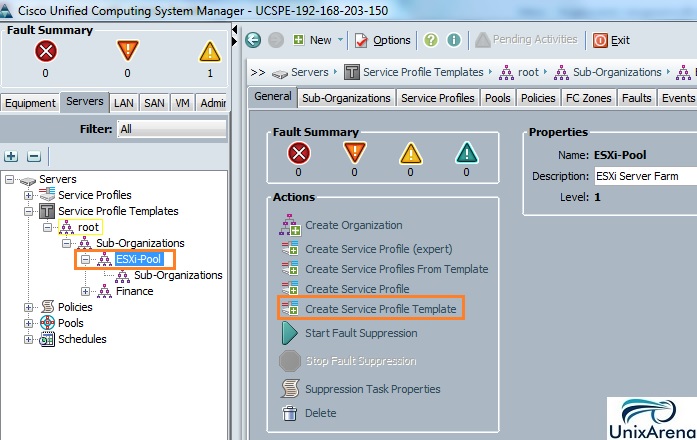
2. Navigate to “Servers” tab – > Service Profile Templates – > root – > Sub organization – > Select ESXi pool . From the action , click on “Create Service profile templates”.
Note: ESXi-pool sub-organization has been created earlier.
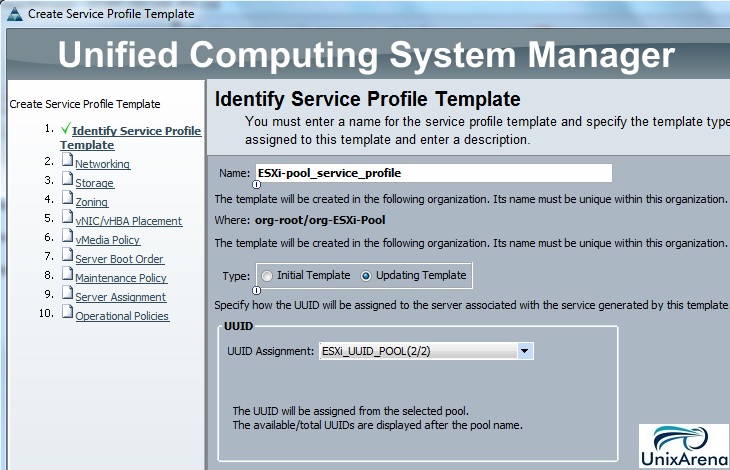
3. Enter the service profile template name. In the radio button, select ” Updating template” . From the UUID assignment , select the UUID pool which we have created earlier.
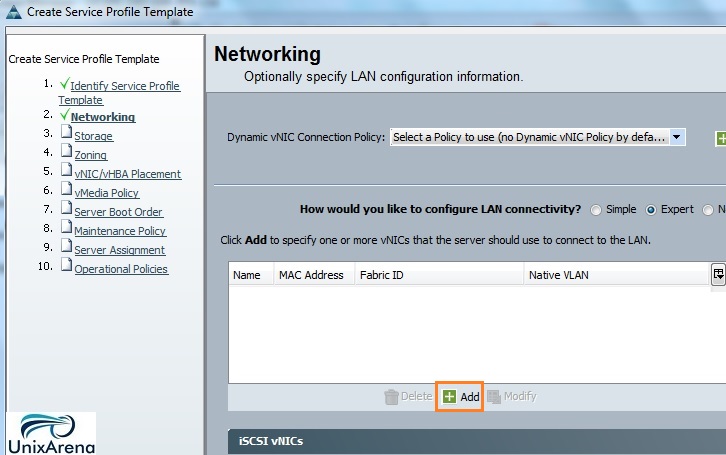
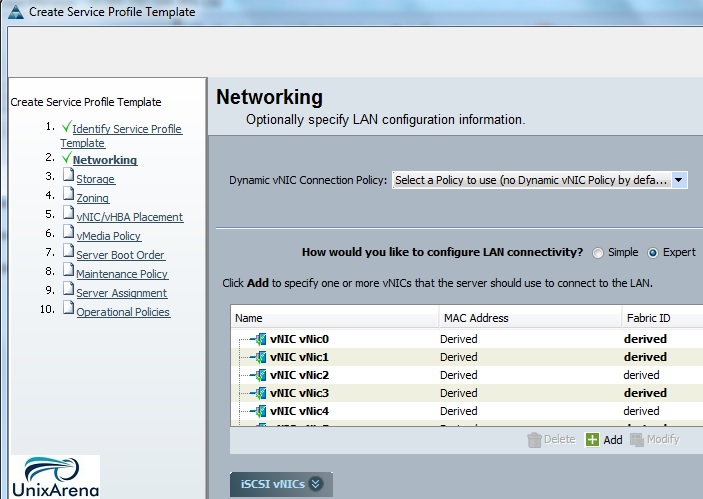
4. In the Radio button , choose LAN connectivity as “Expert”. Click on “Add” to specify one or more vNICs. Here i am planning to add 6 vNICs (3 for Fabric A & 3 for Fabric B)
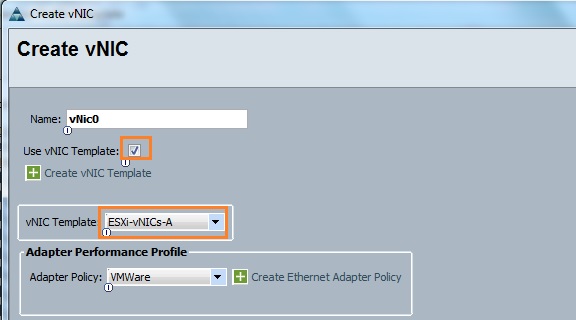
5. The first vNIC should go to the Fabric A. Select ” Use vNIC Template” and from the drop down list , select the vNIC template for Fabric A. This vNIC template has been created earlier.
6. The Second vNIC should go through the Fabric B.
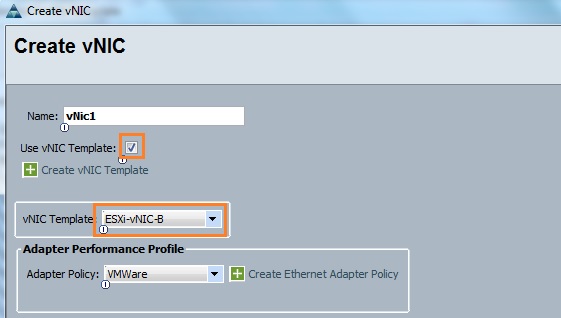
Repeat the same for another couple of vNIC’s per vNIC templates.
7. Once you have added the all the 6 vNICs , you can see the listed vNICs like below.
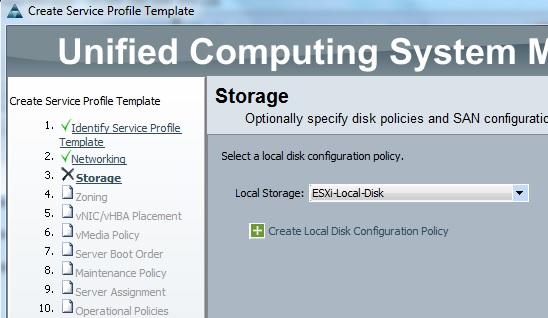
8. Select the local disk configuration policy. This local disk policy has been created earlier. Refer this Link.
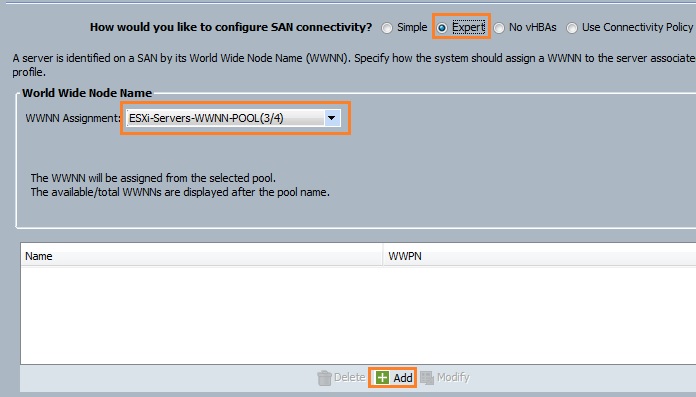
9. In the radio button , choose “Expert” for configuring SAN connectivity . From the World wide Node name , Select the WWNN pool which we have created earlier. Click on “Add” to create vHBA’s.
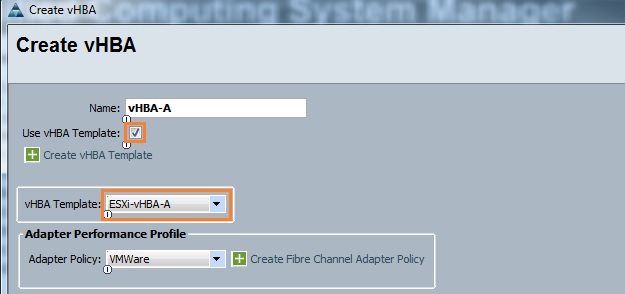
10 . Enter the first vHBA name and select “Use vHBA Template” . From the dropdown list , select the vHBA template ,we have created earlier.
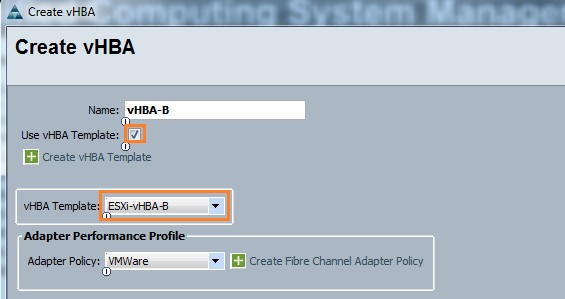
11. Create one more vHBA for Fabric B’s vHBA template.
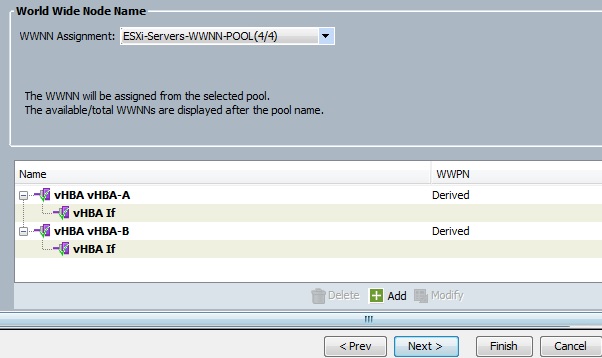
12. Once you have added the both vHBA’s, it will list like below.
13. Skip “Zoning” , “vNIC/vHBA Placement” , “vMedia Policy”. (Click on Next with Defaults)
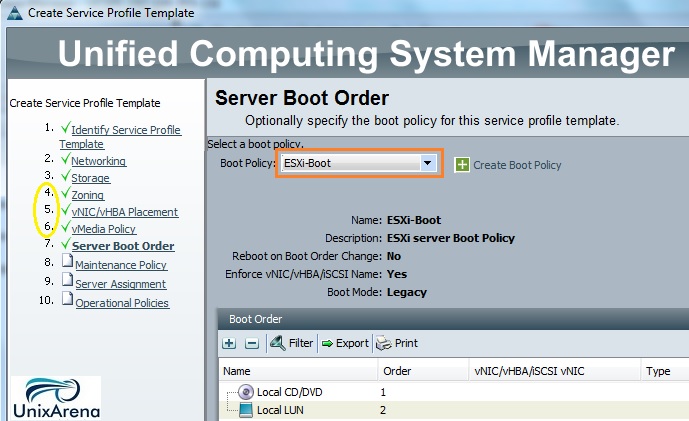
14. Specify the “Boot Policy ” which we have created earlier.
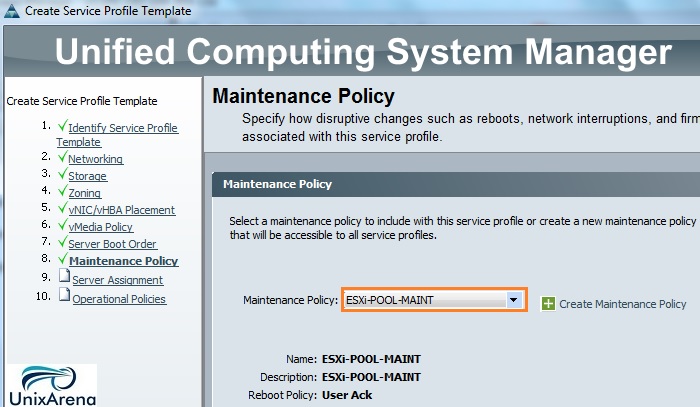
15. Select the Maintenance policy which we have created earlier.
16. Select the server pool for template assignment.

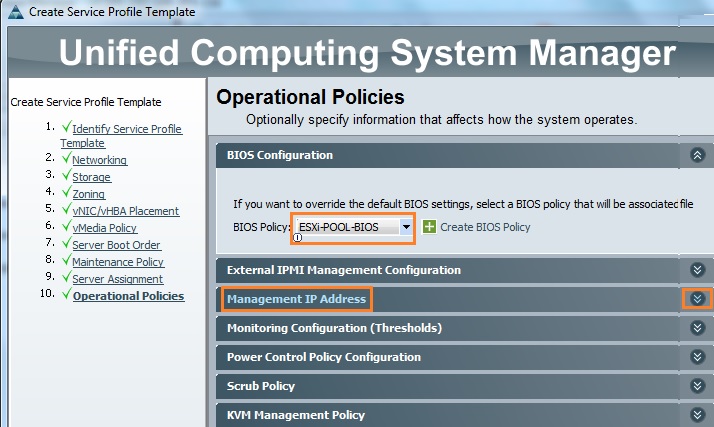
17. Select the BIOS policy which we have created earlier.
Click “Finish” to create the new service profile template. Once its created successfully , you will get pop-up like below.
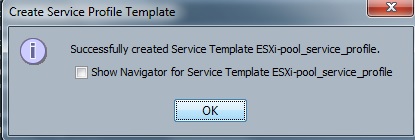
At this point ,we have just created the service profile template but yet to attach with any blades. In the next article , we will see the service profile association to the blades.
Hope this article is informative to you .