

Cisco Discovery Protocol (CDP) is used to obtain protocol addresses of neighbouring devices and discover the platform of those devices. This protocol runs on all the Cisco manufactured devices like UCS blades, routers , switches etc. Once you have enabled the CDP protocols on the Cisco UCS , it sends the periodic messages, known as advertisements, to a multicast address. Each device advertises at least one address at which it can receive SNMP messages. CDP can be enabled or disabled using Cisco Network control Policy. Let’s see that how to enable the CDP on UCS manager. In the second part of the article , we will see that how to create vLAN’s & vSAN’s
Configure Network Control Policy:
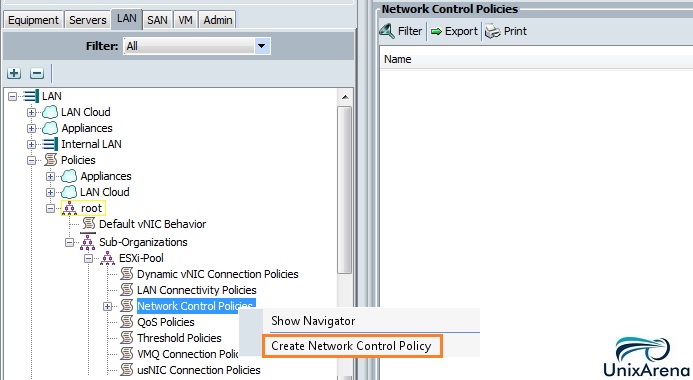
1. Login to UCS manager.
2. Navigate to LAN – > Policies – > root – > Sub-organization – > ESXi-Pool – > Select Network Control Policy. Just Right click and click on “Create Network Control Policy ”
2. Enter the policy name and description. Here you need to specify whether you would like to enable CDP or not.
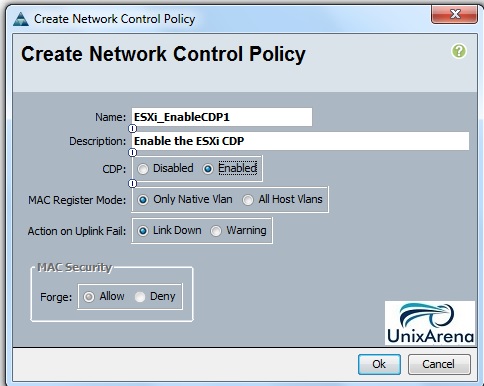
Create Network Control Policy
In the above window , you can control the below settings.
- To enable/disable Cisco Discovery Protocol (CDP) – “Enabled” Here.
- VIF behaves if no uplink port is available in end-host mode – “Link Down selected” Here.
- Whether the server can use different MAC addresses when sending packets to the fabric interconnect.
- Whether MAC registration occurs on a per-VNIC basis or for all VLANs. – “Per VNIC Basis” Here.
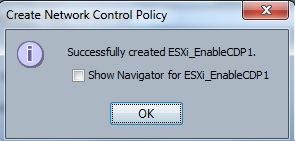
Once the policy is created, you will get the pop-up window like below.
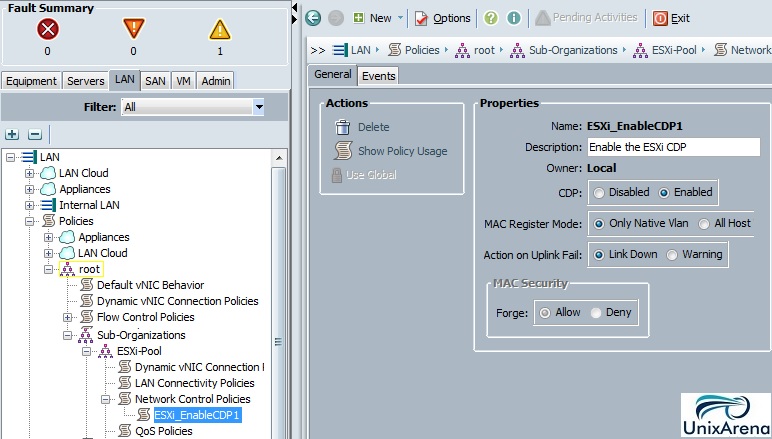
3. Your newly configured network control policy will look like below.
Creating the vLAN’s:
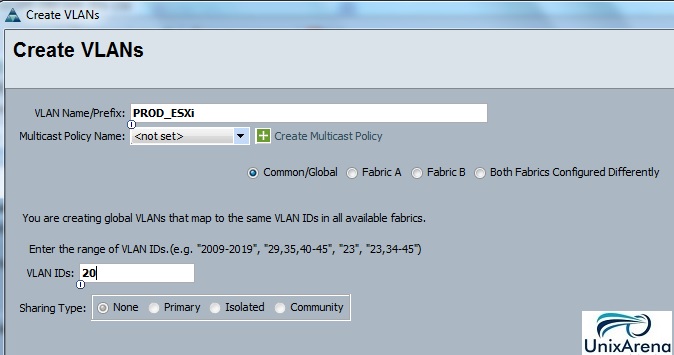
1. Go to the “LAN” tab and then “LAN->LAN Cloud->VLANS”. Right-click on “VLANs” and select “Create VLANs”.

2. Enter the VLAN name and ID:
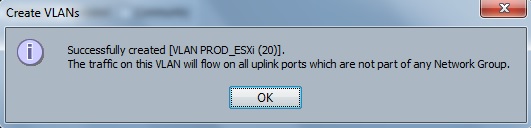
Once the vLAN is created, you will get pop-up like below.
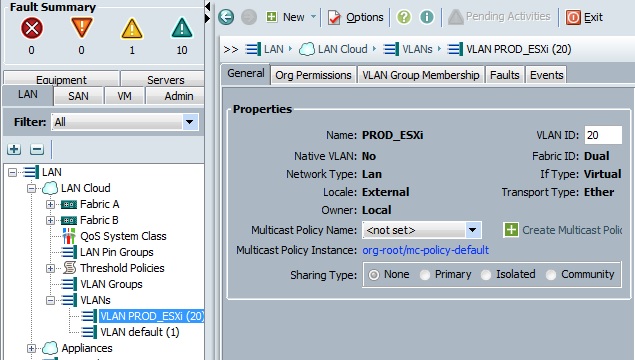
The newly created VLAN will looks like below.
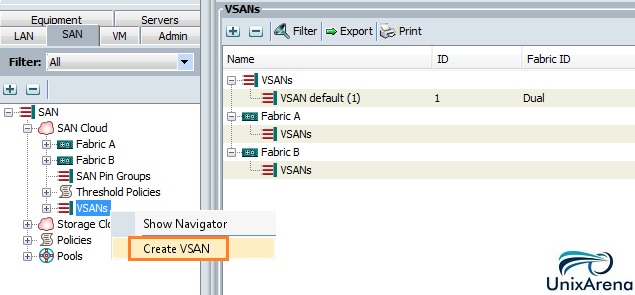
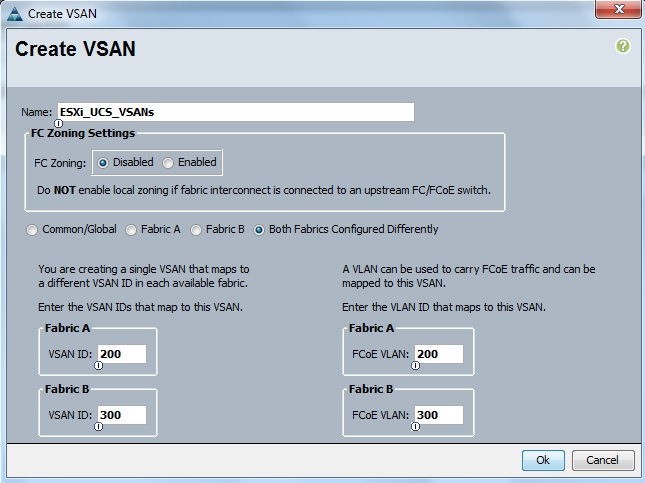
Creating vSAN:
1. Go to the “SAN” tab and then “SAN->SAN Cloud->VSANs”. Right-Click “VSANs” and select “Create VSAN”.
2. Enter the VSAN name and VSAN ID’s and click OK to create it .
Hope this article informative to you . In the next article, we will see that how to create a vNIC template on Cisco UCS.