We need to define that how the vNIC will be get connected to the LAN. UCS manager will not create a VM-FEX port profile with the right settings automatically when you create a vNIC template. System must have MAC pool to create the vNIC template. Server pools must have two vNIC templates. One is going out the Fabric “A” side of the fabric and one going out the Fabric “B” side. We need to specify the appropriate VLANs, MAC Pool and Network Control Policy. In this article ,we will see that how to create a vNIC template in the first part and second part , we will see that creation of vHBA template.
1. Login to UCS Manager.
2. Navigate to LAN – > Plocies – > root – > Sub-organization – > ESXi-pool – > vNIC template.

3. Enter the name , description . Here you need to select the MAC pool , Network control policy, VLAN’s which we have created earlier.

You will get pop-up like below once the vNIC template is created.

We have successfully created the vNIC template for Fabric A . Let’s create the vNIC template for Fabric B.
4. Navigate to LAN – > Plocies – > root – > Sub-organization – > ESXi-pool – > vNIC template.
5. Enter the vNIC name for Fabric B and select the Fabric ID as fabric B . Select the MAC pool and Network control policy for the template.

You will get pop-up like below once the vNIC template is ready for Fabric-B

6. Once the both template are created , you will screen like below.

Creating the vHBA template:
Servers pools should have two templates. One going out the “ Fabric A” side and another going out the “Fabric B” side.
1. Go to the “SAN” tab, then “Policies->root->Sub-Organization->vHBA Templates”. Right-click on “vHBA Templates” and select “Create vHBA Template”.

2.Give the template a name, specify the Fabric ID and select “Updating Template”. Also specify the appropriate WWPN Pool.

Once the vHBA template is created, you will get pop-up like below.
3. Create the second vHBA template for Fabric B.
4. Specify the appropriate WWPN Pool.

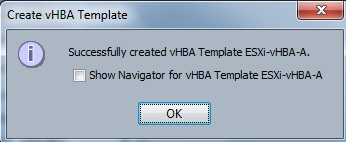
5. Once the vHBA template is created, you will get pop-up like below.

We have successfully created the vNIC template for both the Fabric A/B & vHBA for Fabric A/B .
Hope this article informative to you .
Leave a Reply