


NAKIVO Backup & Replication is one of the fast growing backup solution software for VMware vSphere and Cloud environments. NAKIVO’s initial version just provided the backup solution for Amazon cloud .From 2013 , NAKIVO provides the Backup & Replication solutions for VMware vSphere environments and Cloud as well. According to the NAKIVO Reports Q3 2014 Results, it has 4,100+ Customers and Revenue Growth of 255%. NAKIVO web interface is easy to use and you can setup the backup environment in few clicks.The web interfaces provides the easy VMware infrastructure discovery, ease to use advanced VM protection features, and extensive reporting capabilities. Flash VM boot features provides the fastest VM recovery in the world.
In this article ,we will see how we can deploy NAKIVO Backup & Replication Virtual appliance on VMware vSphere environment.
1. Download the full appliance from the NAKIVO website.
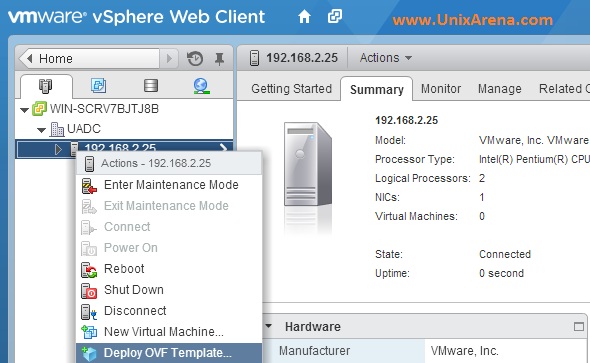
2.Login to VMware vSphere Client and select the ESXi host where you want to deploy the NAKIVO Backup & Replication appliance.
3.Right click the host and select “Deploy OVF template”
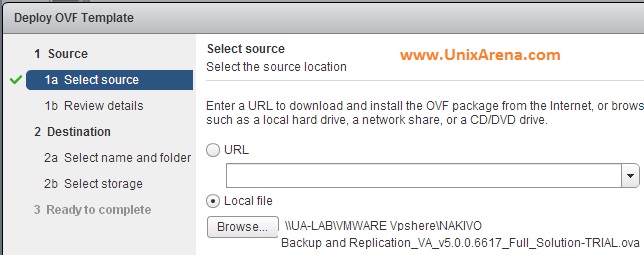
4. Select the NAKIVO applince’s OVA file which yo have download from NAKIVO website.
5. Review the template details .

6. Accept the “End User License Agreement”

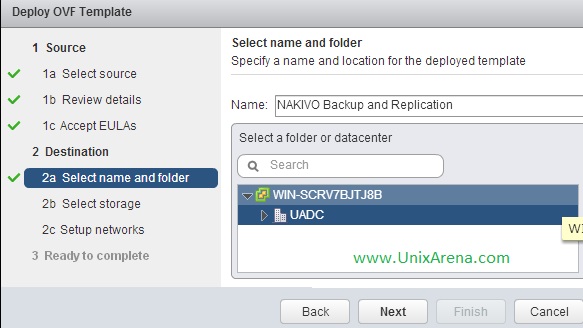
7. Enter the VM name and Select the destination Datacenter.
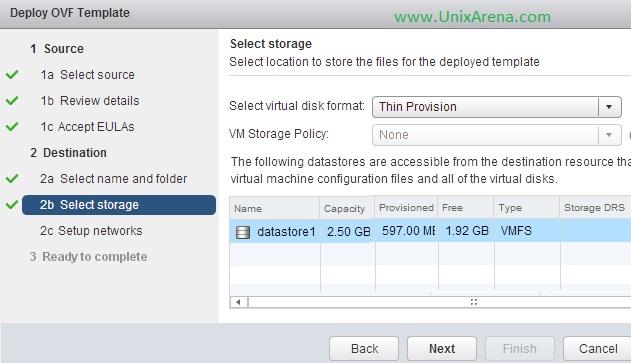
8. Select the datastore for the NAKIVO VM (Backup repository also going to be reside on this Datastore)
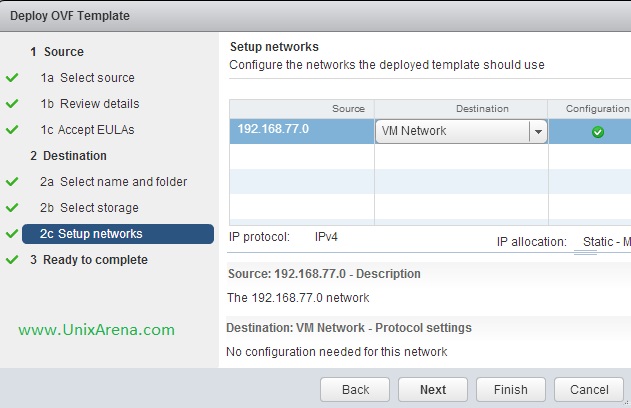
9. Select the VM network
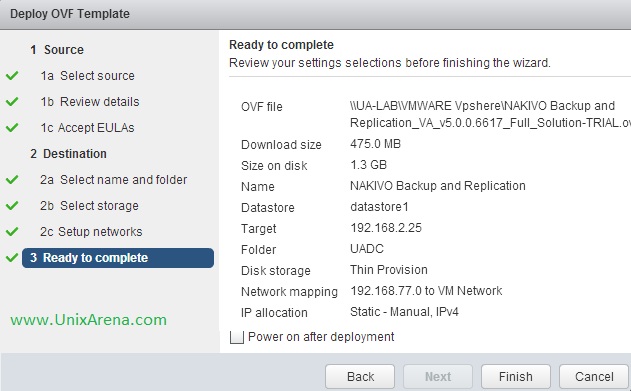
10. Review the details and Click Finish to deploy the appliance.
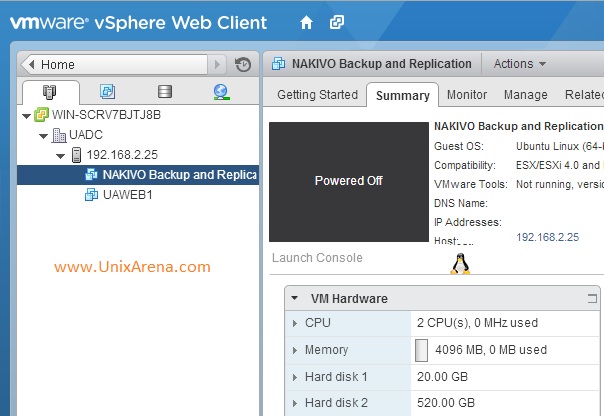
11. NAKIVO Backup & replication VM is ready.
12. Just power On the VM and configure the network as desired. You can see that NAKIVO Backup & Replication Virtual appliance had Director and Transporter installed.
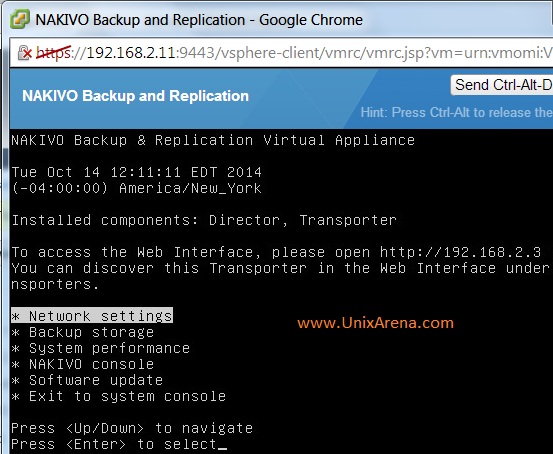
13. I have disabled the DHCP and set the static IP.
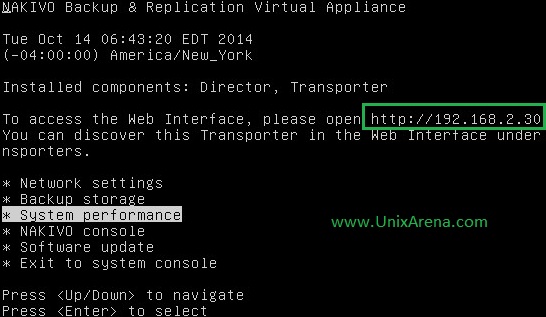
14. Access the web-portal using the configured IP address .
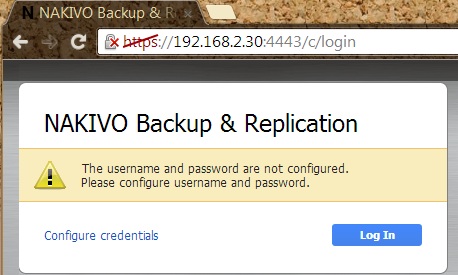
15. Click on “Configure Credentials” . Login using root/root (Default user name /password)
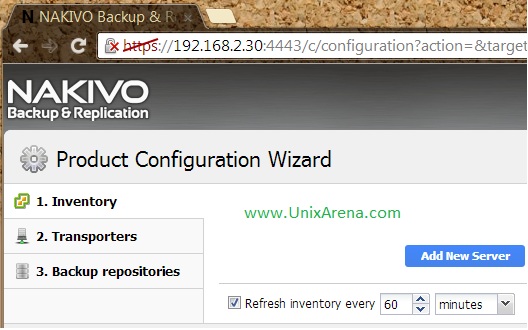
We have successfully deployed the NAKIVO Backup & Replication Virtual appliance.
Share it ! Comment it !! Be Sociable !!!