

This article talks about how openstack works with oracle Solaris 11.2 and how to use it. In the last article ,we have seen that installing pre-configured openstack Solaris image as kernel zones ,bare metal installation and installing it on Virtual box/VMware workstation. Once you have install the Oracle solaris 11.2 – openstack image , then follow this article to boot your first openstack nova instance . Openstack is primarly developed to provide IAAS( Infrastructure As A Service) functionality. Openstack is an opensource software and most of the big companies are backed with openstack since they believes strongly that it is the future of cloud computing.
How Openstack Works ?
Openstack provides set of software packages which can interact with operating system’s core components to create a virtual infrastructure for the end user.To run a virtual machine, what are the core components required ?We need atleast CPU , Memory ,Network , Storage, Image(To install OS). Openstack services communicates with OS kernel and creates these virtual components and provides to the end user.
Have a look at the below diagram.It shows that how openstack services mapped with oracle Solaris core components.
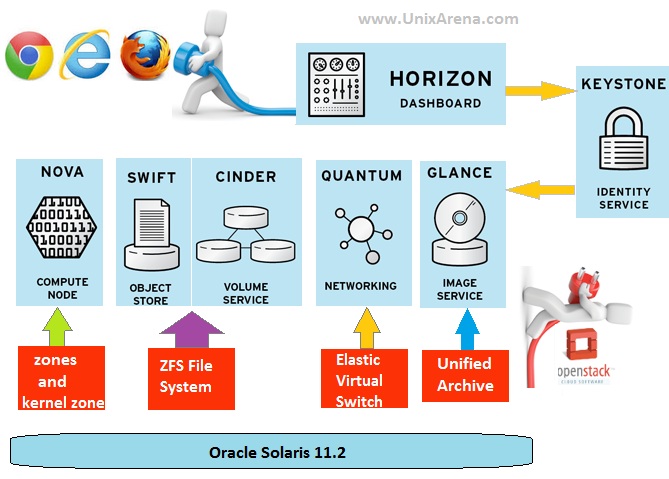
For an example, when storage space required for cloud end user, CINDER service will communicates with ZFS filesystem and get the required space.
Oracle Solaris 11.2 Openstack Cloud :
1. Download Oracle Solaris 11.2 with openstack build archive from oracle and install it .
2. Login to Oracle Solaris 11.2 as root and list the hardware details.
root@UA-CLOUD:~# psrinfo
0       on-line   since 08/25/2014 03:42:56
1       on-line   since 08/25/2014 03:43:11
root@UA-CLOUD:~# prtconf -vp |grep -i mem
Memory size: 8192 Megabytes
        device-memory:  c8200000.00200000.e0000000.10000000
root@UA-CLOUD:~#
3.Make sure that system has minimum 5GB free space on root.
root@UA-CLOUD:~# df -h /
Filesystem             Size   Used  Available Capacity  Mounted on
rpool/ROOT/solaris      20G   3.4G       5.8G    37%    /
root@UA-CLOUD:~#
4.List the currently running local zones.Here there is no local zones are running.
root@UA-CLOUD:~# zoneadm list -cv
  ID NAME             STATUS      PATH                         BRAND      IP
   0 global           running     /                            solaris    shared
root@UA-CLOUD:~#
5.Set the system to valid IPS publisher and make sure it is reachable.
root@UA-CLOUD:~# pkg publisher
PUBLISHER                   TYPE     STATUS P LOCATION
solaris                     origin   online F http://192.168.2.49:909/
root@UA-CLOUD:~#
6.Check what are the virtualizations supported on this hardware.This system will support both kernel zone and non-global zones.
root@UA-CLOUD:~# virtinfo
NAME            CLASS
vmware          current
non-global-zone supported
kernel-zone     supported
root@UA-CLOUD:~#
7.Execute “configure_evs.py” script to setup the public key for evuser.
root@UA-CLOUD:~#  /usr/demo/openstack/configure_evs.py
Generating public/private rsa key pair.
Your identification has been saved in /var/user/evsuser/.ssh/id_rsa.
Your public key has been saved in /var/user/evsuser/.ssh/id_rsa.pub.
The key fingerprint is:
dd:80:c3:c8:2f:65:b3:5d:05:06:be:08:9a:3d:e7:b4 evsuser@UA-CLOUD
Generating public/private rsa key pair.
Created directory '/var/lib/neutron/.ssh'.
Your identification has been saved in /var/lib/neutron/.ssh/id_rsa.
Your public key has been saved in /var/lib/neutron/.ssh/id_rsa.pub.
The key fingerprint is:
46:25:c7:6e:ae:e5:97:e5:87:ad:58:1b:9b:1d:70:5f neutron@UA-CLOUD
Oracle Corporation      SunOS 5.11      11.2    June 2014
Generating public/private rsa key pair.
Created directory '/root/.ssh'.
Your identification has been saved in /root/.ssh/id_rsa.
Your public key has been saved in /root/.ssh/id_rsa.pub.
The key fingerprint is:
32:d1:60:eb:63:c2:5c:00:11:85:a7:43:be:b0:86:4d root@UA-CLOUD
populating authorized_keys
configuring EVS
enabling Neutron
root@UA-CLOUD:~#
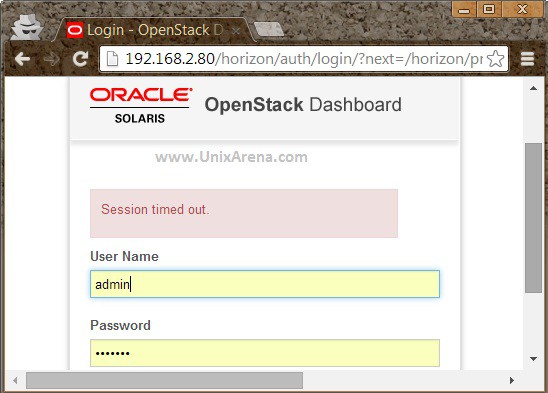
8. Login to horizon dashboard. By default it will be “http://System_IP/horizon/”.Default User name: admin Deafult Password: secrete
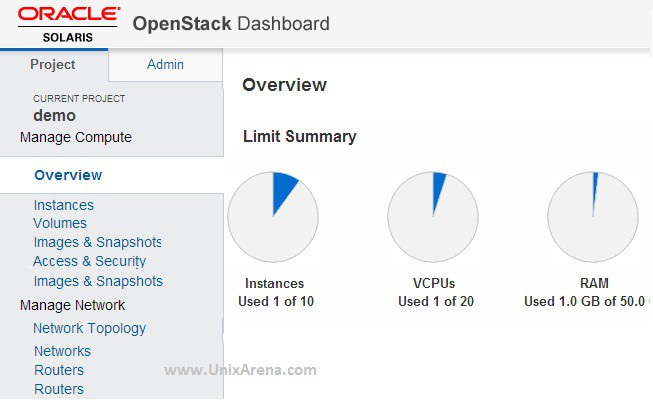
9.Here is the home page of Oracle Solaris’s openstack . Stay with Project page .
10.Create the network for virtual machine . Click on Manage Network – Networks – > Create Network. Enter the network name and click on subnet.
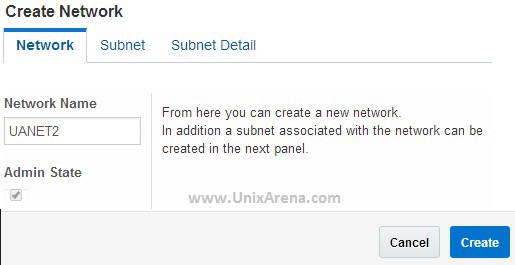
11. Enter the subnet name and network address details with subnet and click on create.
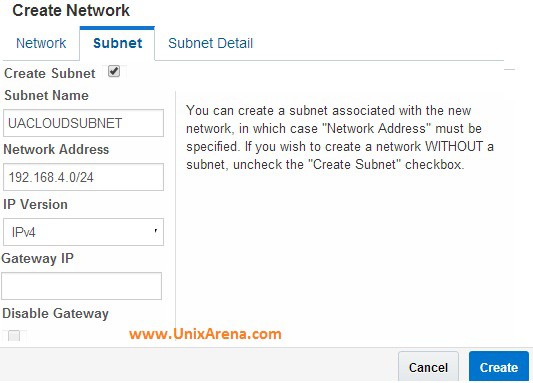
New network has been created and you can assign this network to nova instance which we going to create in the end of this artcile. You can also add N-number of subnet to the existing network by clicking add subnet.

12.Here we will see what changes had made in the OS level .
- New virtual switch has been created
- New VNIC has been created and IP has been assigned
root@UA-CLOUD:~# dladm show-etherstub
LINK
l3stub0
root@UA-CLOUD:~# dladm show-vnic
LINK                OVER              SPEED  MACADDRESS        MACADDRTYPE VIDS
evs1460c5d6_2_0     l3stub0           40000  2:8:20:36:0:17    fixed       201
root@UA-CLOUD:~#
root@UA-CLOUD:~# ipadm
NAME              CLASS/TYPE STATE        UNDER      ADDR
evs1460c5d6_2_0   ip         ok           --         --
   evs1460c5d6_2_0/v4 static ok           --         192.168.4.2/24
lo0               loopback   ok           --         --
   lo0/v4         static     ok           --         127.0.0.1/8
   lo0/v6         static     ok           --         ::1/128
net0              ip         ok           --         --
   net0/v4        static     ok           --         192.168.2.80/24
   net0/v6        addrconf   ok           --         fe80::20c:29ff:fe5e:b310/10
root@UA-CLOUD:~#
What’s next ? We will launch new nova instance . Click Page 2 to Continue …
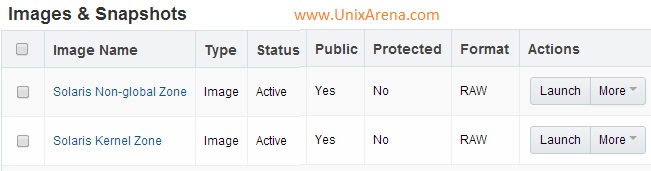
13.Click on Images and snapshots. You can see there are two pre-built images. One for non-global zone and another for kernel zone. If you want to use kernel zone image, make sure your hardware supports nested virtualization.(Refer Step 6).
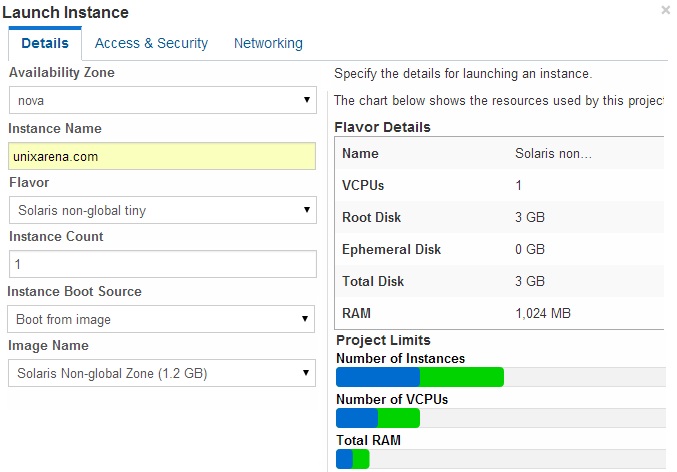
14. If you want “Solaris Non-global zone” , Just click on launch. In the window,enter the instance flavor,image details, access groups, and network.
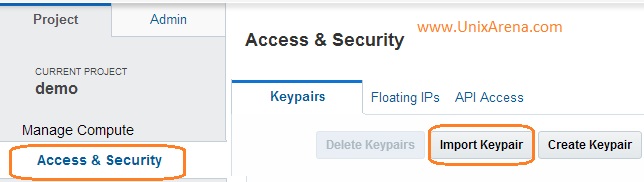
15.Click on Access and Security to provide access to the instance.
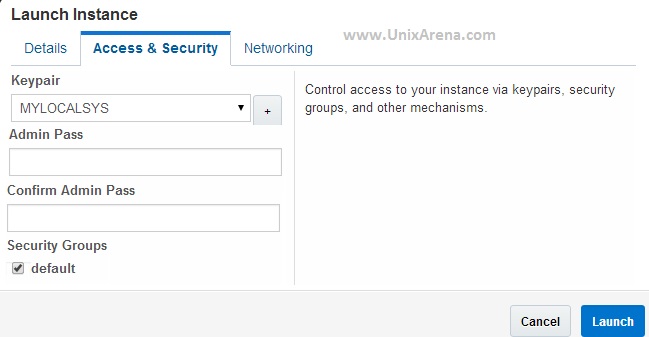
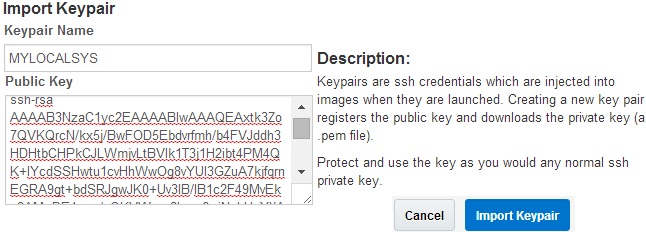
If you do not have keypair, just import it like below from Access & Security .
In this window ,enter the key pair name & public rsa key.You need to provide the key from the system from where you want to access this nova instance.
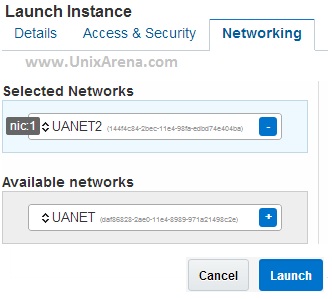
16.In the networking tab , just drag the network which we have created earlier.Click on Launch to start nova instance.
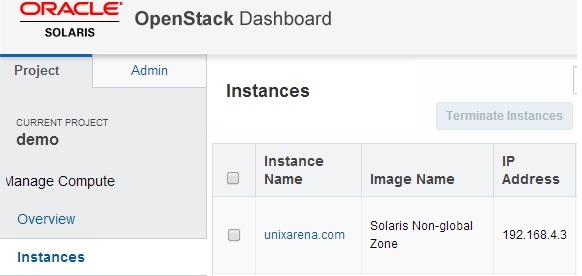
17.In the instance tab , you can see that nova instance is deploying as non-global zone.
How to access this instance ?
You can access the instance from machine keypair you have imported it on openstack.(Refer Step 15)
root@SAN:~# ssh 192.168.4.3
Last login: Mon Aug 25 00:55:09 2014 from 192.168.2.49
Oracle Corporation      SunOS 5.11      11.2    June 2014
root@host-192-168-4-3:~# ipadm
NAME              CLASS/TYPE STATE        UNDER      ADDR
lo0               loopback   ok           --         --
   lo0/v4         static     ok           --         127.0.0.1/8
   lo0/v6         static     ok           --         ::1/128
net0              ip         ok           --         --
   net0/dhcp      inherited  ok           --         192.168.4.3/24
root@host-192-168-4-3:~# df -h /
Filesystem             Size   Used  Available Capacity  Mounted on
rpool/ROOT/solaris     5.8G   1.4G       4.0G    26%    /
root@host-192-168-4-3:~# zonename
instance-0000000c
root@host-192-168-4-3:~# virtinfo
NAME            CLASS
non-global-zone current
vmware          parent
root@host-192-168-4-3:~#
How the nova instance looks from the Oracle Solaris level ? How the filesystems are mapped ?
Oracle Solaris just creates a non-global zone with exclusive IP and creates the dedicated ZFS dataset for that nova instances.
root@UA-CLOUD:~# zoneadm list -cv
  ID NAME             STATUS      PATH                         BRAND      IP
   0 global           running     /                            solaris    shared
   2 instance-0000000c running     /system/zones/instance-0000000c solaris    excl
root@UA-CLOUD:~# zfs list |grep instance-0000000c
rpool/VARSHARE/zones/instance-0000000c                                  1.85G  3.97G    33K  /system/zones/instance-0000000c
rpool/VARSHARE/zones/instance-0000000c/rpool                            1.85G  3.97G    31K  /system/zones/instance-0000000c/root/rpool
rpool/VARSHARE/zones/instance-0000000c/rpool/ROOT                       1.85G  3.97G    31K  legacy
rpool/VARSHARE/zones/instance-0000000c/rpool/ROOT/solaris               1.85G  3.97G  1.36G  /system/zones/instance-0000000c/root
rpool/VARSHARE/zones/instance-0000000c/rpool/ROOT/solaris/var            497M  3.97G  86.4M  /system/zones/instance-0000000c/root/var
rpool/VARSHARE/zones/instance-0000000c/rpool/VARSHARE                   2.49M  3.97G  2.43M  /system/zones/instance-0000000c/root/var/share
rpool/VARSHARE/zones/instance-0000000c/rpool/VARSHARE/pkg                 63K  3.97G    32K  /system/zones/instance-0000000c/root/var/share/pkg
rpool/VARSHARE/zones/instance-0000000c/rpool/VARSHARE/pkg/repositories    31K  3.97G    31K  /system/zones/instance-0000000c/root/var/share/pkg/repositories
rpool/VARSHARE/zones/instance-0000000c/rpool/export                       63K  3.97G    32K  /system/zones/instance-0000000c/root/export
rpool/VARSHARE/zones/instance-0000000c/rpool/export/home                  31K  3.97G    31K  /system/zones/instance-0000000c/root/export/home
root@UA-CLOUD:~#
Same way, you can deploy N-number of nova instances.We will see how to create a new project and how to provide access to specific projects in up coming articles.
Share it ! Comment it !! Be Sociable !!!