


Oracle Solaris 11.2 has integrated with openstack for cloud computing. Many of the Oracle Solaris administrators would like to try the openstack stuffs but deployment is not so easy on it. Since Openstack is new to Solaris administrators, oracle provides the Pre-built templates to install Oracle Solaris 11.2 with openstack package to setup in few minutes . This template can be deployed as kernel zone or bare metal installation(Install directly on physical machine). There are two type of template is available on Oracle downloads. One is UAR file(Unified Archive) which can be used to install the kernel zone with openstack functionality.The second one is USB bootable image which can be used to install global zone (physical servers).
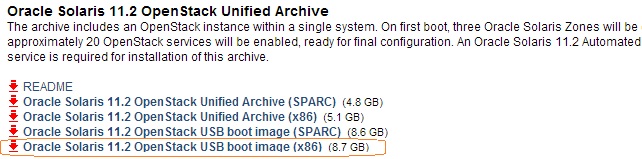
You can deploy the pre-built openstack template as kernel zone..Download “Oracle Solaris 11.2 Open Stack unified Archive (x86)” and keep the file in /var/tmp. Then just use the below commands to create a kernel zone with Pre-built Openstack image.
UA-GLOBAL# zonecfg -z UAOPEN create -t SYSsolaris-kz
UA-GLOBAL# zoneadm -z UAOPEN install -a /var/tmp/sol-11_2-openstack-x86.uar
When you want to deploy this template on physical servers, You need to download “Oracle Solaris 11.2 Open Stack USB boot image (x86)” file on any Solaris 11.2 server. Login to Solaris 11.2 server and connect USB pen drive (>9 GB Size).Use usbcopy command to copy the downloaded USB file to pen drive. (Which makes bootable pendrive)
UA-GLOBAL# usbcopy sol-11_2-openstack-x86.usb
Found the following USB devices:
0:    /dev/rdsk/c9t0d0p0    15.8 GB    DTV      USB 2.0          8.07
Enter the number of your choice: 0
WARNING: All data on your USB storage will be lost.
Are you sure you want to install to
DTV USB 2.0 8.07, 16179 MB at /dev/rdsk/c9t0d0p0 ?  (y/n) y
Once the copying is done, then you can use this pen drive to install Oracle Solaris 11.2 with Pre-configured openstack on physical machines by booting from USB device.
What about installing Oracle Solaris 11.2 with openstack(USB boot image) on VMware workstation ? or Oracle Virtual Box ?
I have been trying to install USB image on VMware workstation or Virtual box from last 3 days but failed .The first problem with VMware workstation is to boot from USB device. The default VMware workstation bios will not support USB boot. After lot of research , i found that by adding below mentioned parameter on virtual machine’s *.vmx file will allow to boot from USB and i was able to boot from USB successfully.
firmware = "efi"
But when the installation kicks ,I got the error saying that “SCSI time out retrying…and finally….Giving up “. After lot of research, i found that VMware workstation is using generic driver to USB and that creates the problem.Sometimes console services will not start when the installation begins and system will ask for user name and password for maintenance mode.
As a second option, i thought of converting USB image to ISO but ISO supports maximum 4GB where Oracle Solaris 11.2 with openstack image size is more than 8GB.
Then finally ,I have switched to Virtual box.I have installed plop boot manager on laptop which will give a option to boot from USB device for virtual box’s VM.
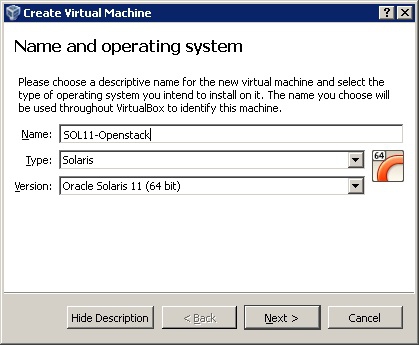
1.Open a virtual Box and create the virtual machine for oracle Solaris 11 64 bit.
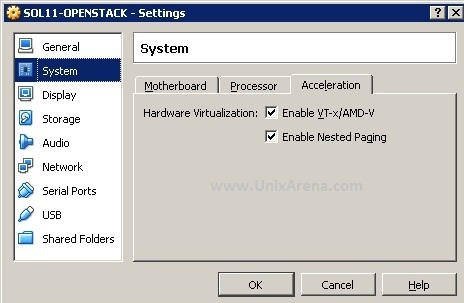
2.Make sure the hardware virtualization is enabled for created VM.
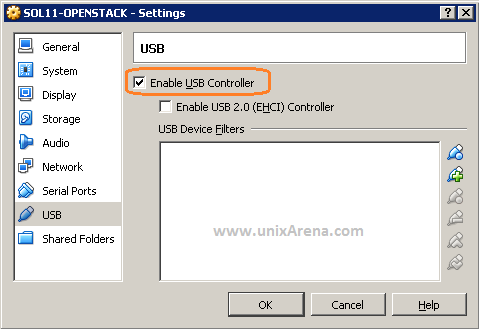
3.Make sure that USB port is enable for new VM.
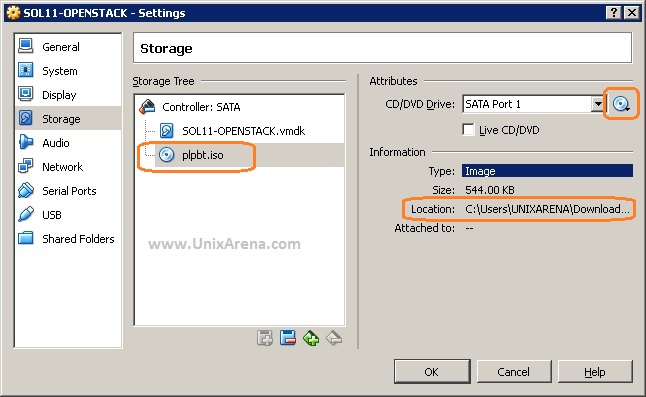
4.Download the plopboot manager and extract it .In this extracted files, you can see plpbt.iso . Just attach this file to VM .
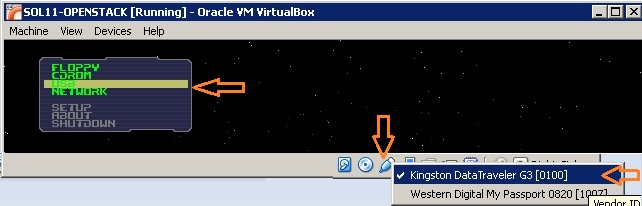
5.Make sure that you have connected the USB pen drive (which we have created in beginning) on the host system (windows 7 or Linux ) and power on the VM. Once you have powered on the VM , you can see that VM has been booted from plop manager.In the bottom, just click the USB icon and connect the pen drive(which we have created in beginning ). Select USB from that list and press enter.
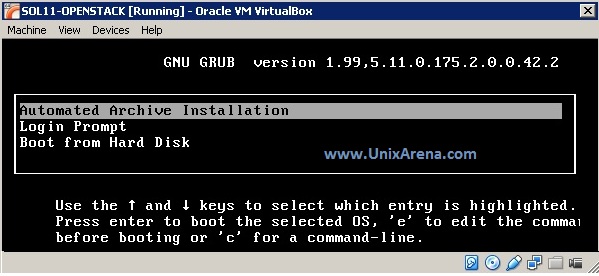
6.Select the installation as “Automated Archive installation”
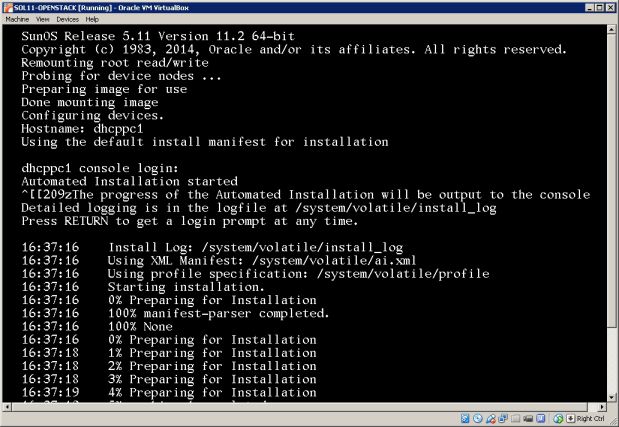
7.You can see that Oracle Solaris is booting from USB drive.
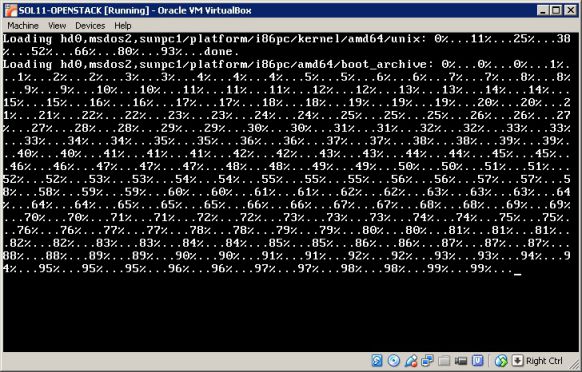
8.Once the boot image is loaded,You can see that installer will be preparing for the system installation.
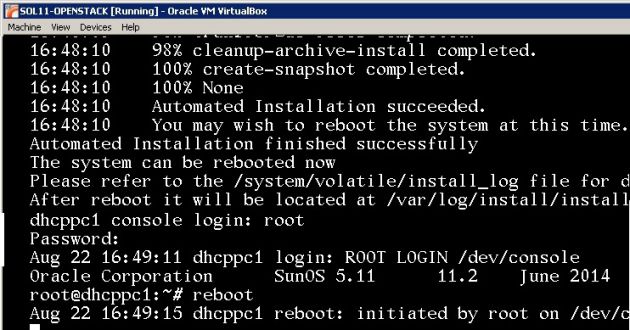
9.Once the image deployment is completed, just login to the system and reboot it .
10. Just power off the virtual machine and remove the plop manager ISO which we have attached. You can also remove the pen drive which is connected to the host.

11.Power of the Virtual machine .It should boot from the hard drive.
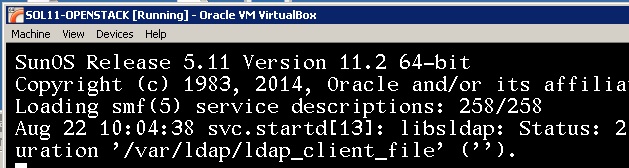
12.System will trigger the post installation.
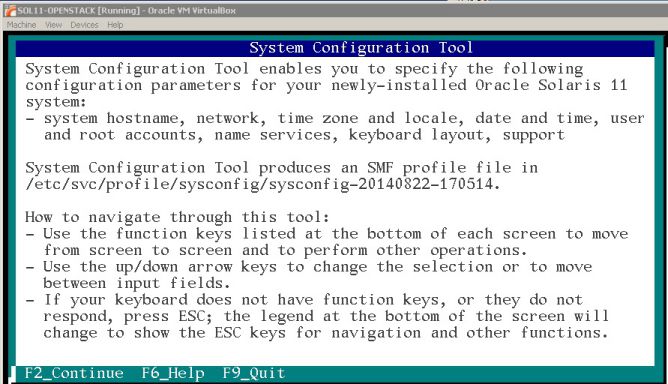
If you have any difficulties to complete this wizard , please refer this article.
13. Once you have complete the system configuration wizard, login to server and check the openstack services.
root@UA-CLOUD:~# svcs -a |grep openstack |grep online
online          8:58:09 svc:/application/openstack/swift/swift-object-updater:default
online          8:58:09 svc:/application/openstack/swift/swift-container-auditor:default
online          8:58:09 svc:/application/openstack/swift/swift-container-server:default
online          8:58:09 svc:/application/openstack/swift/swift-object-server:default
online          8:58:11 svc:/application/openstack/swift/swift-account-reaper:default
online          8:58:11 svc:/application/openstack/swift/swift-container-sync:default
online          8:58:11 svc:/application/openstack/nova/nova-objectstore:default
online          8:58:11 svc:/application/openstack/swift/swift-replicator-rsync:default
online          8:58:11 svc:/application/openstack/swift/swift-object-expirer:default
online          8:58:11 svc:/application/openstack/swift/swift-account-server:default
online          8:58:11 svc:/application/openstack/swift/swift-object-auditor:default
online          8:58:11 svc:/application/openstack/swift/swift-account-replicator:default
online          8:58:11 svc:/application/openstack/glance/glance-scrubber:default
online          8:58:11 svc:/application/openstack/swift/swift-proxy-server:default
online          8:58:11 svc:/application/openstack/swift/swift-object-replicator:default
online          8:58:11 svc:/application/openstack/swift/swift-account-auditor:default
online          8:58:11 svc:/application/openstack/swift/swift-container-replicator:default
online          8:58:11 svc:/application/openstack/swift/swift-container-updater:default
online          8:58:29 svc:/application/openstack/glance/glance-db:default
online          8:58:29 svc:/application/openstack/glance/glance-registry:default
online          8:58:29 svc:/application/openstack/glance/glance-api:default
online          8:58:31 svc:/application/openstack/cinder/cinder-db:default
online          8:58:32 svc:/application/openstack/cinder/cinder-api:default
online          8:58:32 svc:/application/openstack/cinder/cinder-scheduler:default
online          8:58:32 svc:/application/openstack/keystone:default
online          8:58:35 svc:/application/openstack/nova/nova-api-ec2:default
online          8:58:35 svc:/application/openstack/nova/nova-api-osapi-compute:default
online          8:58:35 svc:/application/openstack/cinder/cinder-volume:setup
online          8:58:36 svc:/application/openstack/cinder/cinder-volume:default
online          8:58:37 svc:/application/openstack/nova/nova-conductor:default
online          8:58:38 svc:/application/openstack/nova/nova-scheduler:default
online          8:58:38 svc:/application/openstack/nova/nova-cert:default
online          8:58:38 svc:/application/openstack/nova/nova-compute:default
root@UA-CLOUD:~#
14. We can access the horizon from http://system_ip/horizon link.
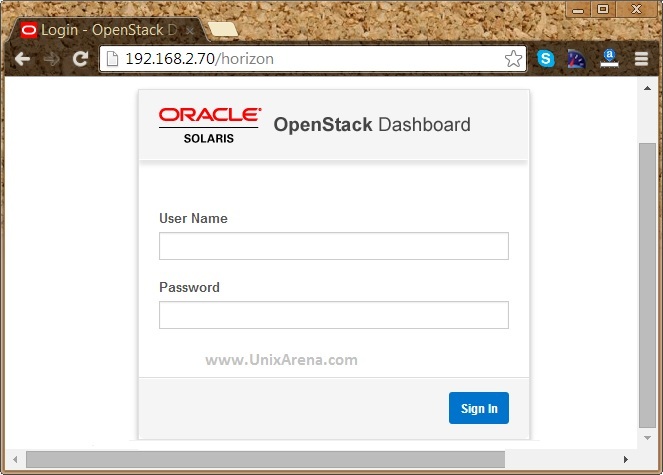
Finally we got the openstack’s horizon dashboard where we can perform the openstack administration.
Check out openstack administration on Solaris.
Do you want to use this virtual machine on VMware workstation ? Here you go.
Share it ! Comment it !! Be Sociable !!!