• Skip to primary navigation
  • Skip to main content
  • Skip to primary sidebar

UnixArena

  • Home
  • kubernetes
  • DevOps
    • Terraform
    • Jenkins
    • Docker
    • Openshift
      • OKD
    • Ansible engine
    • Ansible Tower
      • AWX
    • Puppet
  • Cloud
    • Azure
    • AWS
    • Openstack
    • Docker
  • VMware
    • vCloud Director
    • VMware-Guests
    • Vcenter Appliance 5.5
    • vC OPS
    • VMware SDDC
    • VMware vSphere 5.x
      • vSphere Network
      • vSphere DS
      • vShield Suite
    • VMware vSphere 6.0
    • VSAN
    • VMware Free Tools
  • Backup
    • Vembu BDR
    • Veeam
    • Nakivo
    • Azure Backup
    • Altaro VMBackup
    • Spinbackup
  • Tutorials
    • Openstack Tutorial
    • Openstack Beginner’s Guide
    • VXVM-Training
    • ZFS-Tutorials
    • NetApp cDot
    • LVM
    • Cisco UCS
    • LDOM
    • Oracle VM for x86
  • Linux
    • How to Articles
    • Q&A
    • Networking
    • RHEL7
  • DevOps Instructor-led Training
  • Contact

How to create a VMware Virtual SAN Network ?

June 16, 2014 By Cloud_Devops Leave a Comment

To setup the Virtual SAN cluster environment, you should have the dedicated network for VSAN which provides the inter-cluster communication and also to perform the read and write operation on the remote vSphere systems for virtual machines.Both vSphere Distributed switch and Standard switch supports VSAN network but you need to create dedicated vmkernel adapter. Since the data flow is going to happen through network. you have to assign IP address  in an order to communicate with VSAN cluster systems.

Here we will see how to create new virtual SAN network on vSphere environment.

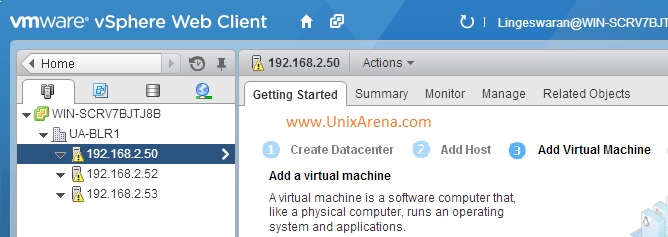
1. Login to vSphere client.

Login to vSphere client

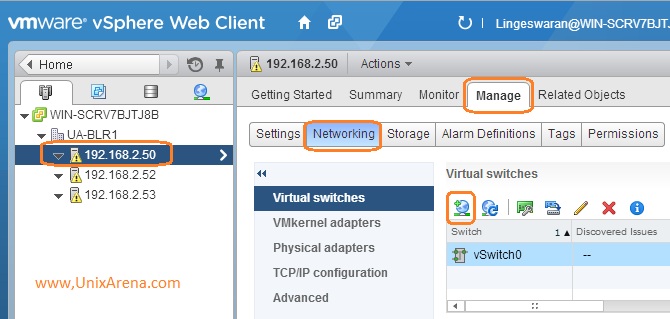
2.Select the ESXi host and navigate to networking. Click on Add host networking.

Add new Vmkernel Adapter
Add new network Adapter

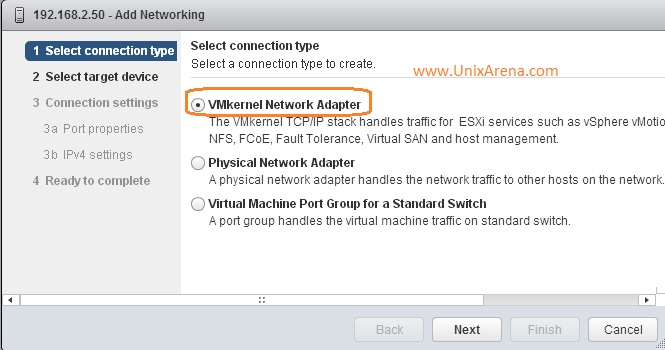
3.Select VMkernel Network adapter.

VMkernel adapter for VSAN network

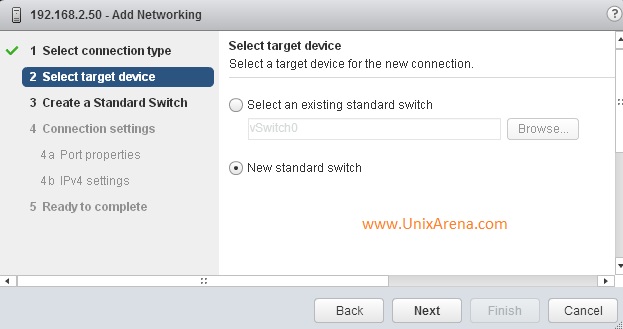
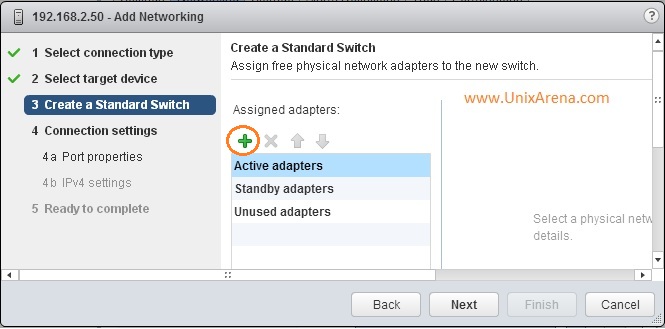
4.Click on New virtual switch for VSAN network.

New vSwitch for VSAN network

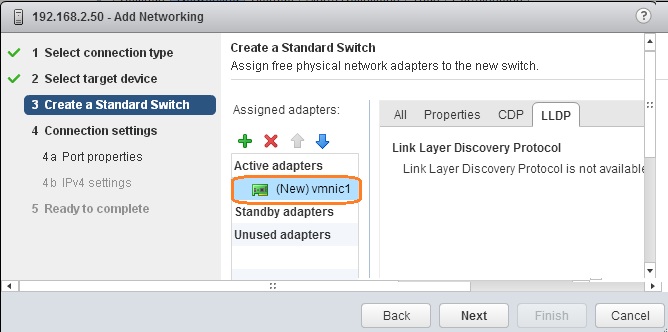
5.Assign a new 1Gbps network adapter to new vSwitch .

Assign a adapter to vSwitch

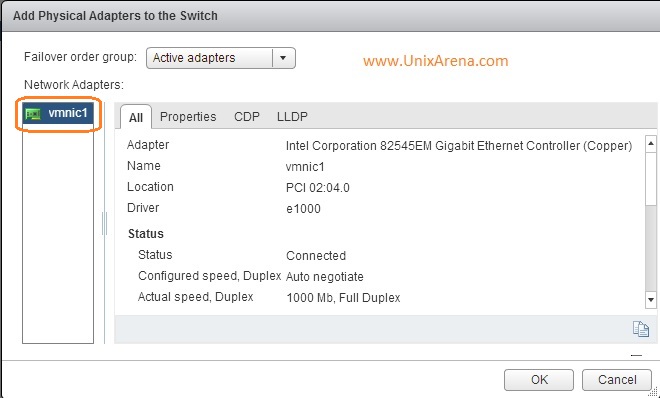
6.Here the adapter selection.

select the Adapter and click OK

7.Click Next to continue

Click Next to continue - VSAN Networking wizard
Click Next to continue – VSAN Networking wizard

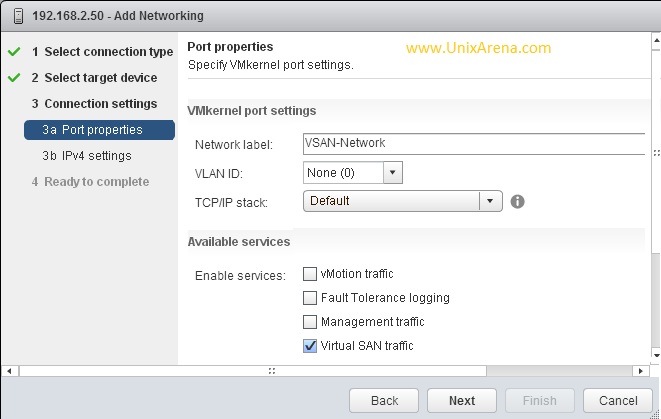
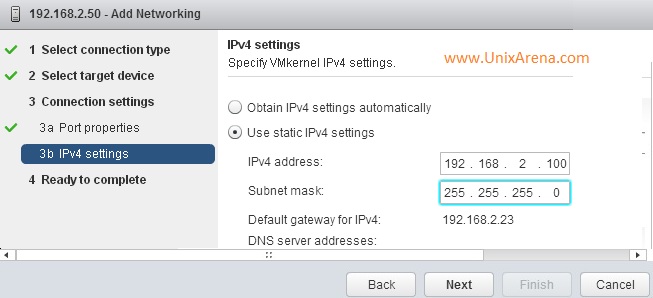
8.Enter the network Label and select the VSAN traffic.

Select the VSAN traffic

9.Enter the IP details.

Enter the IP details

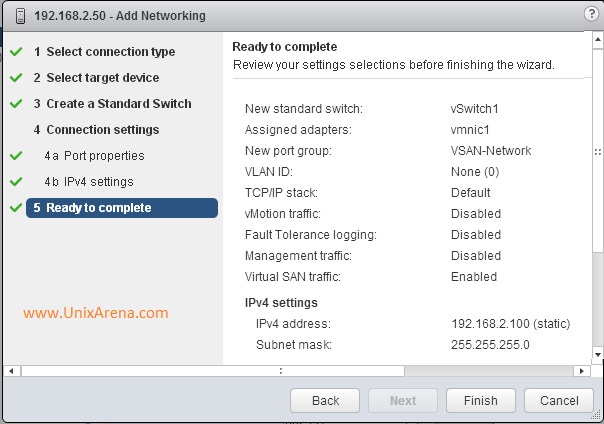
10. Here the summary of the wizard.

Summary of VSAN Network Wizard.

11.If you click on vswitch1, you can see the VMkernel adapter like below.

Node1- 192.168.2.50
Node1- 192.168.2.50

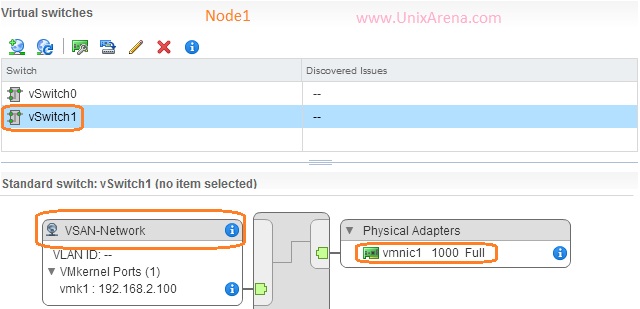
Perform the similar operation on Node2 (192.168.2.52) and Node3 (192.168.2.53). So that all the three ESXi node will be having the dedicated VSAN network.

Node2-192.168.2.52
Node2-192.168.2.52

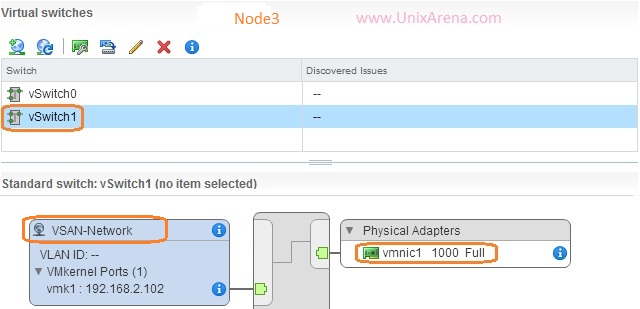
Here is the snap of Node3 VSAN networking.

Node3 - VSAN - Network
Node3 – VSAN – Network

We have successfully created dedicated VSAN network on all the three ESXi hosts.Hope this article is informative to you.

Your next step is to create VSAN cluster.Check out here.

Share it ! Comment it !! Be Sociable !!!

Filed Under: VSAN Tagged With: VSAN

Reader Interactions

Leave a Reply Cancel reply

Your email address will not be published. Required fields are marked *

Primary Sidebar

Follow UnixArena

  • Facebook
  • LinkedIn
  • Twitter

Copyright © 2025 · UnixArena ·

Go to mobile version