


In oracle VM, you have to create a storage repositories to store the virtual disks , ISO files ,template files and VM files.Once you have configured the storage array and configured the server pool, you will be able to create the repositories and present to the Oracle VM servers.These repositories can be created over NFS or SAN LUNS. However, you can’t use multiple LUNS to create the storage repository. If you want to extend the repository size , you need to increase the LUN size or NAS share size from storage end and refresh the repositories to see the new size. But You can create a N number of storage repositories as you need on OVM.
Here we will see how to create a storage repositories over the ISCSI storage physical LUNS and how to create a virtual disks using that repository.
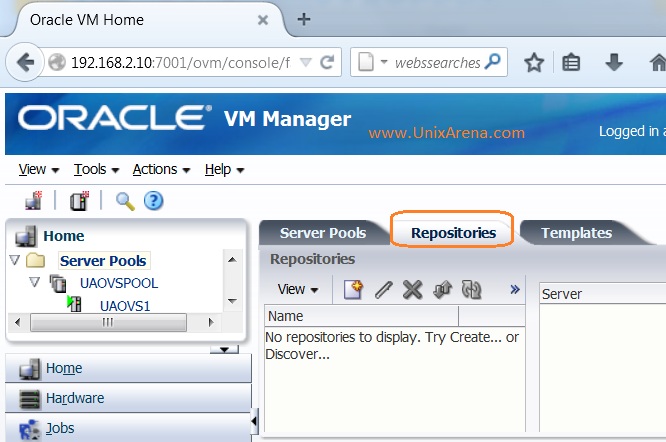
1.Login to oracle VM console and Click on Server pools.

2.Click on Repositories tab.Click on “+” add new repositories
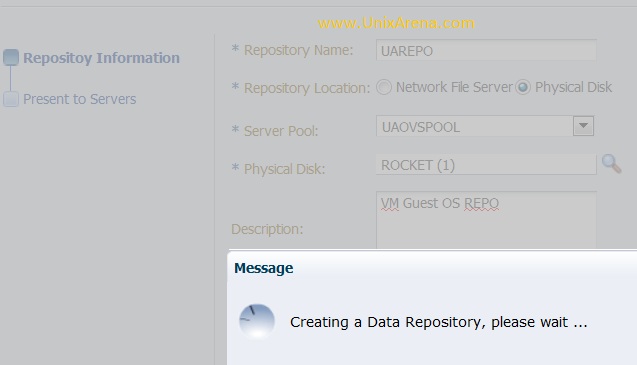
3.Enter the repository name and repository location as physical disk. You have specify which server pool is going to use this repository.
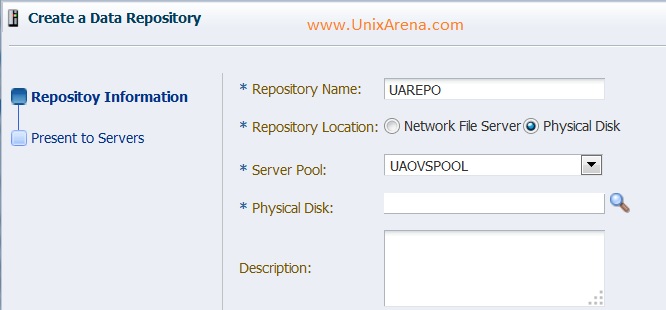
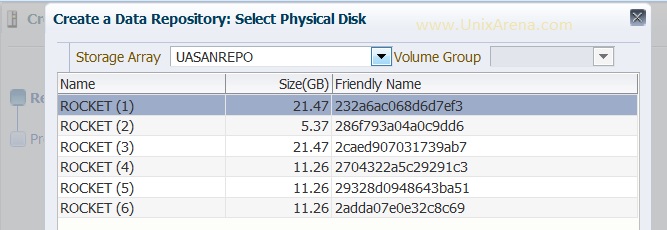
4.Click on the physical disk “search” icon to select the physical disk.
5.Click on OK to create a new repository.
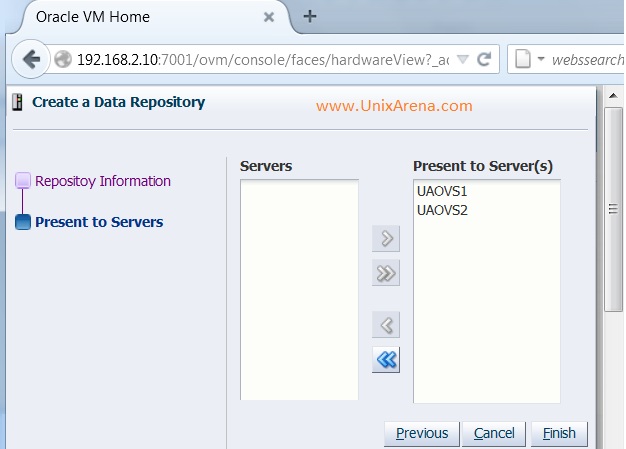
6.Wizard will ask you to present the repositories to servers. You can add the specific servers to that.In My setup UAOVS1 and UAOVS2 are in OVM cluster.
7.Click finish to complete the wizard. You can see the newly created repository under repositories tab.
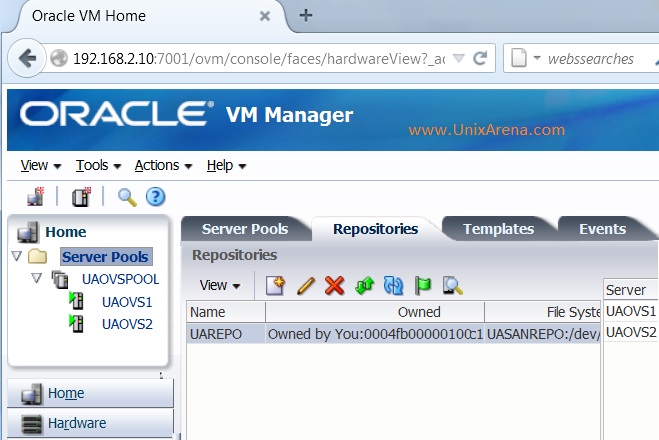
You have successfully created the Storage repository using ISCSI LUN.
In the second part of this article , we will see how to create a virtual disk using this storage repository.We will also see the difference between sparse and non-sparse allocation.
Click Page 2 to continue.
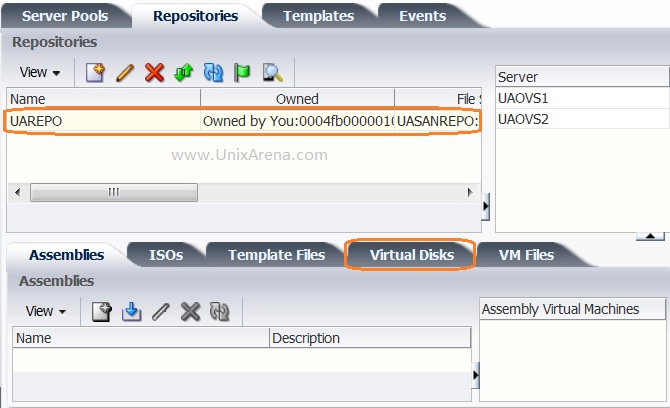
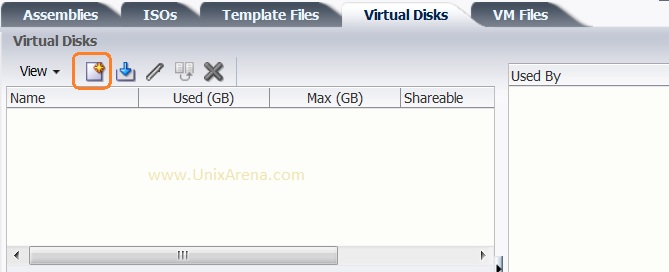
1. Click on the newly created repository and you will see new menu item will display like below snap.Click on the virtual disk to create a new virtual disks using the repository.
2.Click on highlighted icon to create a new virtual disk. It will pop-up new wizard.
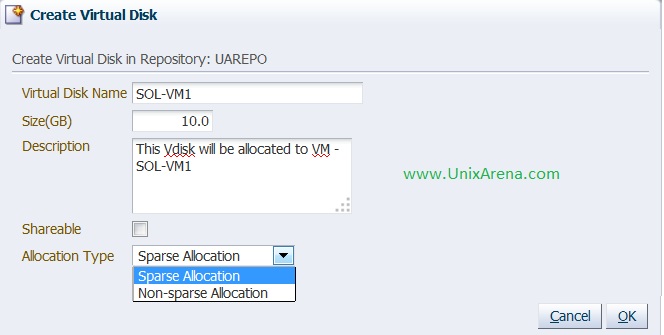
3.Enter the virtual disk name and size .Here i have selected sparse allocation. Click OK to create a virtual disk.
4.Here you can see new virtual disk.
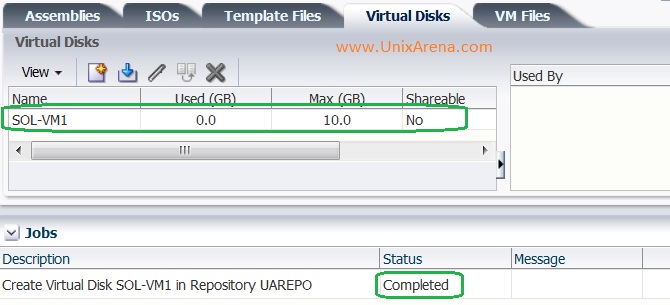
You may be scratching your head to know the difference between sparse allocation and non-sparse allocation. Sparse allocation will not consuming the disks space immediately once you create the virtual disk. It will just consume space of virtual disk’s data. In above image ,you can see virtual disk used space 0.0GB.
Let me try to create a non-sparse disk and see the utilization.

Here is the usage of non-sparse new virtual disk.
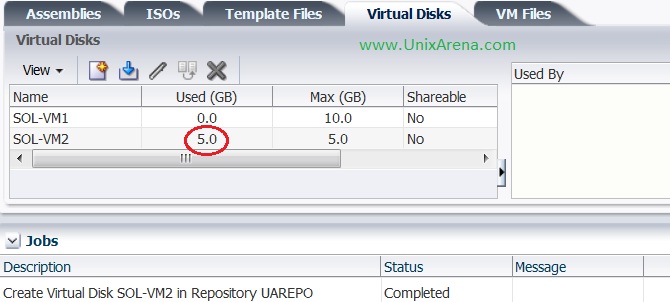
You can see non-sparse disk allocated 5GB immediately .In generic term, Sparse allocation is nothing but thin provisioning and non-sparse allocation is equivalent to thick provisioning.
Hope this article is informative to you.
Share it ! Comment it !! Be Sociable !!!