Redundancy is much more important in virtualization environments since you never know how many virtual components will be impacted if you loose one physical hardware part.When its comes to VMware networking , you can share a single vmnic to N-number of virtual hosts.So one of the physical interface failure could cause big outage on the environment. So the best practice is to combine multiple NIC’S in to one logical unit. Here we will see how we can add an additional vmnic to an existing vSphere distributed switch .
1. Login to vSphere Client and navigate it to “Networking” .

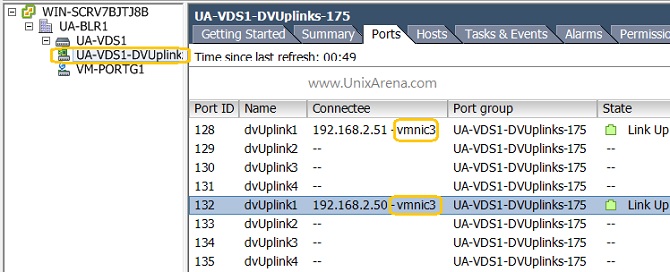
2.Click on the “DVuplinks” to see the existing VMnics associated to the vSphere Distributed switch (UA-VDS1).
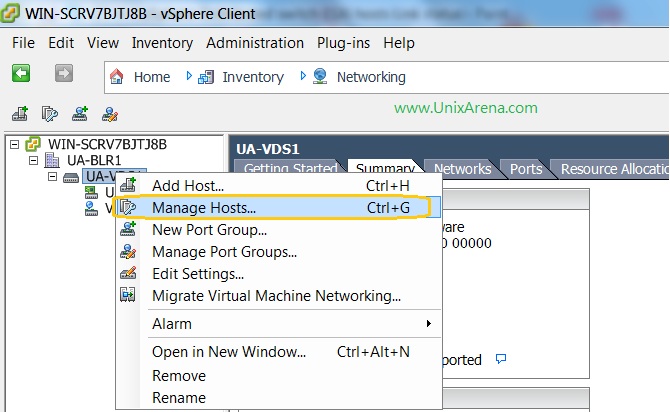
3.Right click on the VDS switch and click on “Manage hosts”
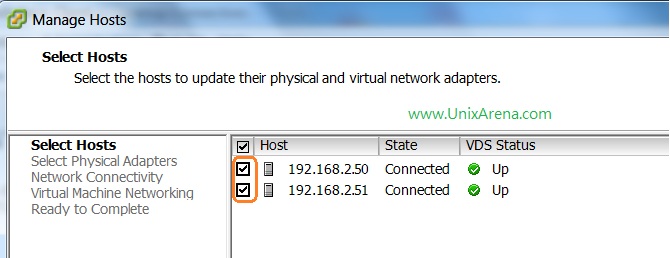
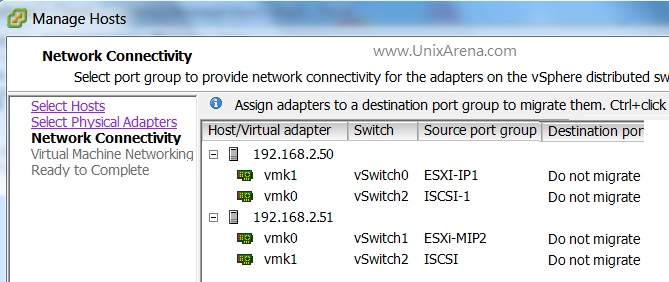
4.Select the ESXi hosts to add the VMnics.
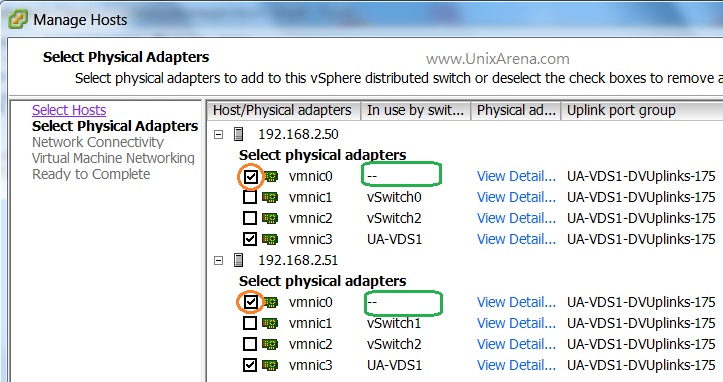
5.Select the available VMnic’s from each ESXi hosts. Here vmnic0 is not assigned to any vswitch or DVswitch.
6.This wizard provides an option to migrate the network to DVswitch. Here I am not performing any migration since its out of scope.
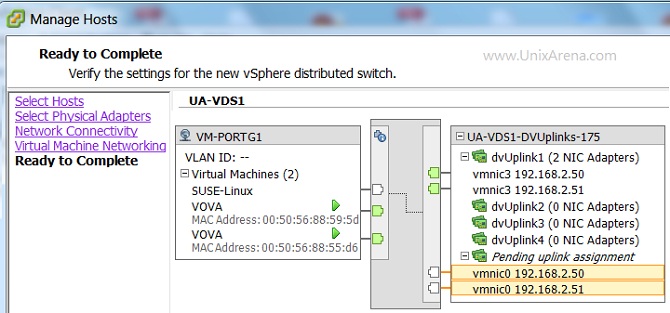
7.Here is the summary of the wizard. Both ESXi host’s vmnic0 will be assigning to UA-VDS DVswitch .
8.Click on the Port groups to see the newly added vmnic.
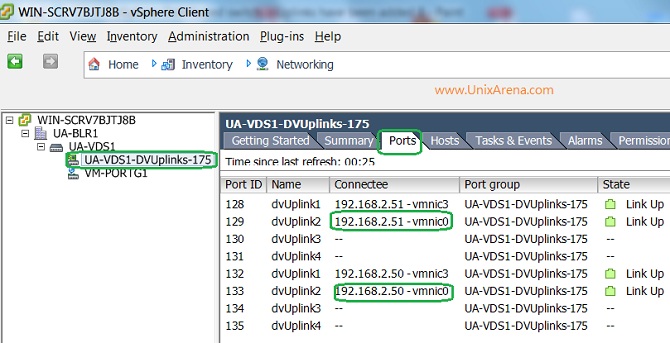
- PORT group Link status
9.You can also see the changes from ESXi host level.
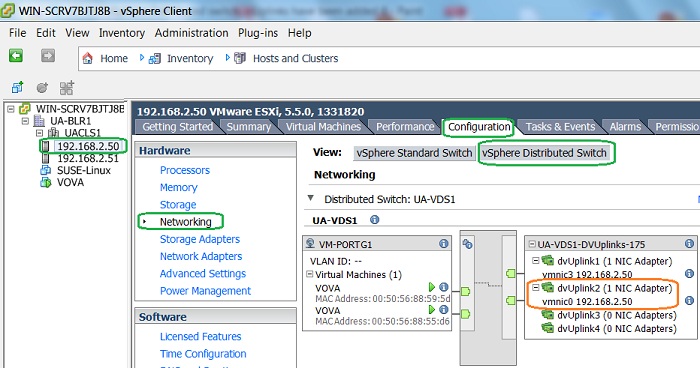
In the above image , you can see “vmnic0” has been added to port group “UA-VDS1-DVUplinks” . This vSphere distributed switch allows maximum four uplinks per ESXi host. This value has been given while creating vSphere distributed switch. Here you can see that just two uplinks port have been used.
If you want to remove the existing uplinks from ESXi host, you use the same wizard.In Step 5 , you can un-check the links which want to remove it from DVswitch. You will get an notification if you break the network redundancy.
Hope this article is informative to you.
Share it ! Like it !! Be sociable !!!
Leave a Reply