
As you all know Oracle Solaris 11 is available for production and most of the customers are preferred to have Solaris 11 on their datacenters. Even I would like to play with Solaris 11 by upgrading existing Solaris 10 systems.Now the question may raise that,Is it possible upgrade my older version of Solaris to Solaris 11 ? The answer is NO.This will be shock news to everyone but you have to go with this.Even you can’t upgrade Solaris 10 to Solaris11 directly or indirectly. There is no upgrade option has been provided and no tools available from oracle to do this.You need to perform Solaris 11 fresh installation on Solaris 10 systems to upgrade the OS.
For Solaris 11,you have to use “Automated Installer(AI)” instead of Jump-start.In larger environment if you are going to use both Solaris 10 and Solaris 11,then you have to maintain both Jump-start(To install Solaris 10) and AI (To install Solaris 11) servers.
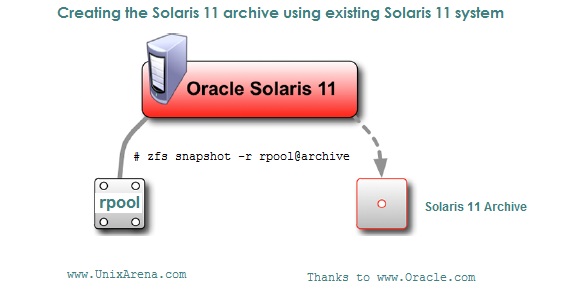
# zfs snapshot -r rpool@archive1
# zfs destroy rpool/swap@archive1
# zfs destroy rpool/dump@archive1
# zfs send -Rv rpool@archive1 | gzip > /nfs_solaris_10/archive_solaris11.zfs.gz
# zpool destroy rpool@archive1
2.Generate the SC profile to configure hostname,Timezone,locale,root password,network information,DNS and NIS. This can be done easily by sysconfig command.(See Profile creation at the end of article.)
3.Now login to Solaris 10 ,and create new rpool to restore Solaris 11 archive.
Note:Solaris 11 archive system’s rpool disk and Solaris 10’s new rpool disk should be in same size and layout to restore archive successfully .

Create rpool using new disk.
# zpool create rpool New_Disk
Note:Solaris 11 X86 will support EFI label disks as boot disk(Ex:c1t1d0).For SPARC ,you have to use SMI label formated disk for rpool aka boot disk(Ex:c1t1d0s0).
Restore the archive data suing below command.
# gzcat /nfs_solaris_10/archive_solaris11.zfs.gz | zfs receive -vF rpool
Now create a swap and dump dataset by using the below commands.
# zfs create -V 8GB rpool/swap
# zfs create -V 6GB rpool/dump
# zfs set primarycache=metadata rpool/swap
Make the rpool bootable using below commands.
# zpool set bootfs=rpool/ROOT/solaris_GZ_11 rpool
# zfs set mountpoint=/tmp/mnt rpool/ROOT/solaris_GZ_11
# zfs mount rpool/ROOT/solaris_GZ_11
# installgrub /tmp/mnt/boot/grub/stage1 /tmp/mnt/boot/grub/stage2 /dev/rdsk/cXtXdXs0       (X86_64)
# installboot -F zfs /tmp/mnt/usr/platform/`uname -i`/lib/fs/zfs/bootblk /dev/rdsk/cXtXdXs0    (SPARC)
# touch /tmp/mnt/reconfigure
Replace the SC configuration file using the new SC profile which we have generated (Step:2)
# rm /tmp/mnt/etc/svc/profile/site/profile*.xml
# cp SC_Profile.xml /tmp/mnt/etc/svc/profile/sc/profile.xml
Now umount the BE and reboot the system with newly configured solaris 11 disk.
# zfs umount rpool/ROOT/solaris_GZ_11
# zfs set mountpoint=/ rpool/ROOT/solaris_GZ_11
Any time you can rollback the upgrade by rebooting with old disk to back to solaris 10.
Note:I haven;t tried this migration.This article is based on oracle white papers and Solaris 11 technical documents.
Thank you for reading this article.
Sarvesh Pawar says
Hi,
When i am going to restore the archive data getting below error.
I have tried using gunzip and gzip -d also.
Kindly suggest.
bash-3.00# gzcat solaris11_archive.zfs.gz | zfs receive -vF rpool
cannot receive: stream has unsupported feature, feature flags = 4
bash-3.00#
Regards,
Sarvesh Pawar
anandkumar says
APPLIES TO:
Solaris Operating System – Version 10 8/11 U10 to 11 11/11 [Release 10.0 to 11.0]
Solaris x64/x86 Operating System – Version 10 8/11 U10 to 11 11/11 [Release 10.0 to 11.0]
Information in this document applies to any platform.
SYMPTOMS
ZFS stream data generated by zfs send on Solaris 10 + 147440-14/147441-14 (or later) or Solaris 11+ SRU3 (or later) , can’t be received using zfs recv although zpool version and zfs version are same. This problem happens only with ZFS version 5. If ZFS version is 4 or older, this does not happen.
[Problem]
zfs send (ZFS version 5) on following system to create ZFS stream data,
– Solaris 10 + 147440-14/147441-14 or later
or
– Solaris 11 + SRU3
zfs recv fails to receive the ZFS stream data on following system.
– Solaris 10 + 147440-13/147441-13 or earlier (including Solaris 10u10 DVD (144500-19/144501-19))
or
– Solaris 11 + SRU2 or earlier
[Example of error output]
# cat backup.img | zfs recv -Fdv rpool
cannot receive: stream has unsupported feature, feature flags = 0
or
cannot receive: stream has unsupported feature, feature flags = 24
CAUSE
This is caused by the fix for following bug. The fix is implemented in 147440-14/147441-14 or later for Solaris 10 and Solaris 11 SRU3.
Bug 15745961 – SUNBT7097870-SOLARIS_11U1 Spill block can be dropped in some situations during incremental receive
This symptom is reported following CR, and this is not a bug.
Bug 15777159 – SUNBT7151420 zfs send recv fails between (S11+SRU) machine to (S11 fcs) machine
SOLUTION
The host that receives the ZFS stream data using zfs recv needs to be updated with 147440-14/147441-14 or later (Solaris10) or SRU3 or later (Solaris 11).
If the ZFS stream is for rpool, Solaris 10 update 10 DVD media and Solaris 11 FCS DVD media can’t be used for booting and restoring rpool.
For Solaris 10, please use Solaris 10 update 11 media. For Solaris 11, please use Solaris 11 update 1 media.
Boot server updated with appropriate patches is required in the case of Solaris 10.
Special instruction to restore root pool from a snapshots stream:
The procedure is showed in the section “How to Re-create a ZFS Root Pool and Restore Root Pool Snapshots” of the Oracle Solaris ZFS Administration Guide, the main steps are the following:
1- Boot from an Solaris installation DVD
2- Re-create the root pool. For example
# zpool create -f -o failmode=continue -R /a -m legacy -o cachefile=/etc/zfs/zpool.cache rpool c1t1d0s0
3- Restore the root pool snapshots. For example
# cat /mnt/backup.img | zfs receive -Fdu rpool
4- Set the bootfs property on the root pool BE.
# zpool set bootfs=rpool/ROOT/zfsBE rpool
5- Install the boot blocks on the boot disk.
SPARC:
# installboot -F zfs /usr/platform/`uname -i`/lib/fs/zfs/bootblk /dev/rdsk/c1t1d0s0
x86:
# installgrub /boot/grub/stage1 /boot/grub/stage2 /dev/rdsk/c1t1d0s0
Do note that the root pool version must be supported by the Solaris release you are going to restore, otherwise the system will panic during boot, Please refer to Doc 1372811.1 for further details.
In case of restoring an older Solaris version, one will need to boot from the specific Solaris 10 release media to re-create the root pool (to make sure the supported zpool version) in Step 2 abve. Once the zpool is created, then proceed to boot the system from a Solaris 10 U11(once available) or Solaris 11 U1 to restore the root pool and avoid this issue with zfs receive, this is Step 3.
The zpool versions supported by the S10 releases are showed in section “Appendix A Oracle Solaris ZFS Version Descriptions” of the Oracle Solaris ZFS Administration Guide
Following document is helpful for patching miniroot for boot server.
If a boot server is available in customer environment, one can patch up the miniroot image on their boot server to 147440-14 or above to facilitate the rpool restore. Do note that the rpool will still need to be created with an older Solaris 10 boot to prevent incompatibility after restore of the original rpool data.
Please refer to the following documents for further information regarding miniroot patching:
Oracle Solaris 10 8/11 Installation Guide: Network-Based Installations
– Patching the Miniroot Image
http://docs.oracle.com/cd/E23823_01/html/E23800/netinstall-patch.html#scrolltoc
For network restore of flasharchive, one would need to have the miniroot on the boot server patched up as well. Additional background in relation to flasharchive can be found in Doc ID 1488899.1 .
Oracle Solaris ZFS Resource Center
To read more documents related to the ZFS Filesystem product please visit “Oracle Solaris ZFS Resource Center (Doc ID 1372694.1)”